Monday, February 28, 2011

February Challenge is Curved Piecing

Today is the big reveal of the second challenge I'm doing with Stephanie from Peas in a Pod. She is also revealing her project today so please go visit her too. In case you forgot, we are working through Jean Wells' book Intuitive Color and Design. This month we did the second assignment - curved piecing.

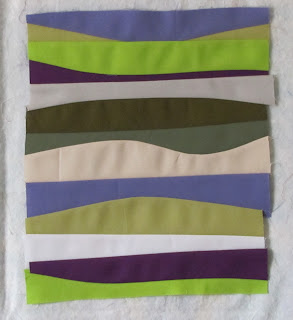
First I started out by piecing some curved strips.


This is okay, but then I got totally distracted by my Radiator project. The link will take you to the post about my process creating it. Here is photo of the finished Radiator Quilt.


Back to my challenge project:

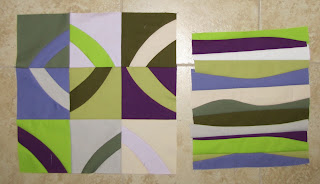
I didn't make any progress on my curved piecing assignment until the recent retreat. I took most of my solids with me on the retreat. The curved strips weren't thrilling me so I decided to try something like drunkards path blocks. I got so excited by the idea that I forgot to take pictures. But never fear, I did it again after I got home and I'll post how I made these blocks tomorrow.

So here are my drunkards path blocks along with the curved piecing strips.


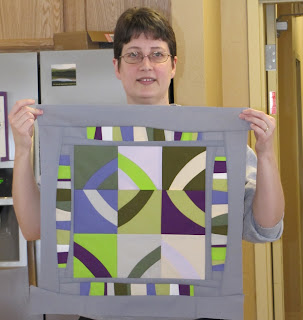
Then I felt like combining these two some how. I ended up with this before leaving the retreat.


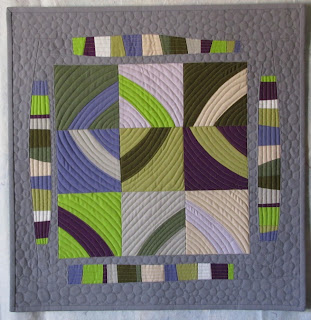
I sliced up the curved piecing strips into four sections and used it in the border. Then I machine pieced the whole thing. Voila!


I love how it turned out! I have titled it Circle Play.

As for Goldie, my son folded up one of his baby quilts and put it into her bag.


I think she likes it.

Friday, February 25, 2011

Wonky Cross Blocks Set

I've got no UFO Report today. Sorry. I thought about working on one of my UFOs, but I'm just not motivated right now to work on "old" projects. I'm having too much fun with new ones.

Yesterday I got my wonky cross blocks that I made at my retreat all pieced together.


Looks pretty good. I have no plan for this quilt. I just wanted to try making wonky cross blocks. I had fun making them but I'm not in a hurry to get it quilted. I want to do a fun back, a la Elizabeth Hartman, but first I need some yardage of the solids (white and aqua) and I'd like a half yard of one of the prints from this line - Origins Basic Gray by Moda.

I packed a zippered bag from a king size sheet set with fabric to take on my retreat. Goldie thought it made a nice bed.


I'm not sure how she stayed up on this precarious perch, but she slept like this for at least an hour!

Yesterday I unpacked the bag and put the fabrics back in their proper places. Goldie still likes the bag!


Maybe I need to make a quilted lining for this bag!

Thursday, February 24, 2011

Retreat Report 3

One of our guild members, Bev Hettinger, has been making T-shirt quilts to be auction off every October for a local breast cancer awareness and fundraiser event. At retreat she finished the quilt for this October's event.


She tries to use t-shirts from the event in years past but also begs, borrows and steals any t-shirt from breast cancer events in the area. Above is Bev and the front of this years quilt. The back is also wonderful.


You can click on the photos to see them larger. Isn't it wonderful?! I hope it raises a lot of money!

Wednesday, February 23, 2011

Retreat Report 2

I won a charm pack from Sandy over at Quilting for the Rest of Us. I used it to make this quilt using only stash fabric.


The pattern is from The Practical Guide to Patchwork by Elizabeth Hartman.

I also used some of the 4" by 6" rectangles I cut to make three of these quilts for charity.


This is a really simple quilt to make and I piece them as Leaders and Enders. It is just 4" by 6" print rectangles and 4" solid squares.

Finally, I just must show you another quilt made by my friend Peg. After she saw my Fun quilt she bought the Word Play book. At the retreat she made Live, Laugh, Love.


I adore this quilt! I'm itching to make another word quilt. I'm just waiting for inspiration.


Tuesday, February 22, 2011

Retreat Report 1

I had a wonderful time at my retreat over the weekend. This was the first four day/three night retreat I have attended. It was fun but I didn't bring quite enough to work on. It was probably a good thing though because cutting scraps was one of my projects I brought. If I had had something else to sew yesterday morning I would not have got as much cutting done as I did.


I forgot to take a before photo of the two large bags of fabrics these were cut from. I also used some of these before taking the photo in one of the three charity tops I pieced over the weekend. I am happy with the amount of progress I made with cutting up these scraps. In case you are wondering, I cut 6" squares, 4.5" squares and 4" by 6" rectangles.

Another project I worked on was some wonky cross blocks. I bought a charm pack of Moda Basic Grey and used them with some solids to create these blocks.


This is just some of the blocks I made. There were 42 charm squares in the pack and I used them all. You'll see more of this project in the future as I finish it up.

At every retreat one of our members provides a mystery block for everyone to make. Fabric requirements are given out before the retreat and then we get a clue or two per day to do. This time we made fish blocks.


We were told to bring "1 fat quarter of wild bright print (think Lynn Weathers) and 1 fat quarter of black print with primary colors plus a solid to match our bright print." Well, obviously I have a reputation of using wild bright prints! I had to make sure that I lived up to my reputation so I chose carefully what fabrics to bring. My fish is the one on the top left of the middle photo. You can see the fabrics better in the bottom photo though (top right). Mine ended up being the rainbow trout. The block pattern is by Doreen Speckman and was originally published in a magazine many years ago. I don't know which magazine though.

My friend Peg made this wonderful piece. The link will take you to Peg's website. She has a long arm quilting business.

Bing by Peg Collins

Isn't this just fabulous?! She pieced the colored part before retreat. At the retreat she made the black background and mounted the finished colored part on top. Peg is one of the members of my art group, the Sew Silly Sisters.

There are many more retreat pictures and stories to share, but those will have to wait for another day.

Sunday, February 13, 2011

Radiator Quilt

I had my annual check-up on Tuesday of last week. I took my sketchbook with me to the appointment and drew this sketch in the waiting room.


The waiting room has a whole wall of windows with a hot water base board radiator running underneath the windows. I just liked the lines, the juxtaposition of horizontal and vertical (opposites of a sort), so I just quickly drew the lines.

Later that same day I was in another waiting room. This time the dentist office waiting while my son got his teeth cleaned. I drew this sketch and didn't even finish it. This sketch is derived from the first in that I took the little rounded rectangles from the radiator cover and scattered them over the page.


I thought about this sketch for the rest of the week, frustrated because I had no free time to explore it further. Saturday dawned and I found myself with a few free hours. The husband did not go skiing and instead took the boy out to breakfast and then to Science Saturday. Ahhh! I didn't even shower, just took my coffee and went straight to my sewing room.

My plan was to work on my challenge with Stephanie. We are doing the curved piecing exercise this month. So I pulled some solids and started.


I got to here and thought to myself I wonder how this would look if I used the idea from my second radiator sketch. So I got out some freezer paper and drew some rounded rectangles on it.


I cut out the rounded rectangles carefully using an Exacto knife and a ruler. Then I adhered it to my pieced fabric.


This is okay, but I don't get the pieced lines going both vertical and horizontal with this. So I put the cut out rounded rectangles on the pieced fabric.


Yes. Now I can get both horizontal and vertical lines in my rounded rectangles. Then I chose a background fabric - Kona medium gray. I adhered the freezer paper to it and using the starch method, cut out the rounded rectangles and starched back the seam allowances.


I cut out the rounded rectangles from the pieced fabric, leaving a 1/4 inch seam allowance all around. I left the freezer paper on top so that I could line them up properly in the windows of the gray fabric. Using my machine and gray thread, I sewed the pieced parts to the gray fabric. Here is how it looked before removing the freezer paper.


And then after removing the freezer paper.


I should say that I removed the freezer paper from the gray fabric before sewing the pieced fabrics into the windows.

I quilted pebbles on the gray.


And now I am embellishing the pieced fabrics with hand stitching. I love how this all started with a very rough sketch in the waiting area of the doctor's office!

Friday, February 11, 2011

UFO Bust Report and Ironing Table

Until this morning, my UFO Bust Report was going to be "nothing accomplished." However, I found one of the charity tops still on my list along with the backing fabric I set aside for it.


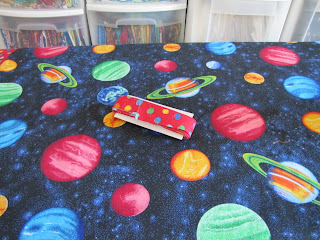
My mom sent me some of the house blocks a few years ago. Maybe she made them or maybe she won them at her guild through a Block of the Month drawing. I don't know. I made a few more houses at retreat two or three years ago, sashed them and completed the top. I think I was trying to just finish the top at retreat and had to use what I had brought which is why there is planet fabric along the sides for a border to make it wider. The rest of the planet fabric is going on the back.


Kind of a crazy combination of fabrics, but hey, it's all from my stash! I'd like to get this basted and quilted this weekend but we'll just have to see. It is still ski season so the husband will be gone again at least one day this weekend. Also the son and I still have Market Day preparations to finish along with Valentines to address for Monday.

Today I thought I would show you the awesome ironing table my husband made for me a few years ago.


The ironing surface is 22" wide by 50" long. It has casters on one end so I can move it to access the fabric bins behind it. The shelves hold my thread bins, button tins and baskets full of embellishments and pre-fused fabrics. There is a narrow shelf right below the ironing surface for ruler storage. I don't know how tall it is, but it is a little taller than most ironing boards will go. I am tall so it is was made to be ergonomically correct for my height.

Wednesday, February 9, 2011

Yummy Recipe

Over the weekend I tried a new recipe. It is a "keeper" so I thought I would share it with you. The recipe comes from the February 2011 issue of Better Homes and Gardens (as does the photo).


I used grape tomatoes instead of the dried tomatoes. I also didn't splurge for fresh herbs so substituted dried Italian herbs. The first night we had it for dinner was right after I made it and it was warm. Yum! It made enough that we could have it for dinner the next night too. I think it was just as good cold, maybe even better. My son thought the minced garlic was a bit spicy the first night, but the garlic mellowed a bit in the refrigerator and he pronounced it yummy the second night. He even asked to take the left over to school for lunch. So this recipe gets 5 stars from me and will definitely go into our dinner rotation.

Disclaimer: My son does not have the usual "kid tastes" in food. He is a very adventurous eater and loves to try new things. So just because he likes it doesn't mean the average kid will. Please don't write to me and ask me how I trained him not to be a picky eater. I didn't and I have no idea why he's not. I'm just thankful not to have to fight the "food battle" with my child.

Tuesday, February 8, 2011

Recent Shopping

I made a couple of purchases recently I thought I'd share with you. First I bought one of the ultimate machine quilting packages from Leah Day at Day Style Designs.


I have the original slider, but this is the Supreme slider. It has a self sticking bottom so that it will stay put without having to tape it down. My original slider works well but having to remove the tape every time I change a bobbin is getting old. And it has gotten a bit bent up over the years from regular use. I also already have a pair of Machingers gloves, but I thought having two would be nice. I have never tried the magic bobbin washers but others say they are great. I've been wanting to try them to see what all the fuss is about. I'll let you know.

My second recent purchase was thread.


After my recent machine quilting nightmare with the YLI variegated thread, I decided to try Signature variegated thread based on recommendations from friends. Again, I'll let you know. I also bought two spools of Aurifil in fun colors. I'm in LOVE with the turquoise. The photo above does not do it justice. Have you ever gotten thread you loved so much you designed a project just so you could use it? I've got to come up with some project to use this turquoise thread on! The green is also wonderful, but it is a replacement spool. I already have some of the green but used most of it. It is such a good color for me that I just bought another spool to have on hand.

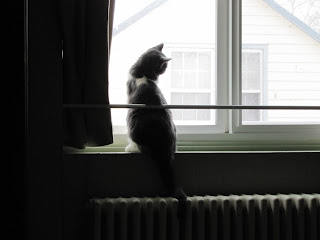
Finally, it is snowing here today. Goldie is sitting in the window trying to catch snow flakes!


Silly girl! One photo can't capture the frequent head turning and little meowy growls she is making.

Monday, February 7, 2011

"Fun" Quilt Finished

I finished my "Fun" quilt yesterday evening.


You can click on the picture to see it larger. My post on Feb. 1st contains all the details about this challenge.


I thoroughly enjoyed making this one! Stephanie and I have already planned our challenge for this month and we will both post our progress on or about March 1st.

Friday, February 4, 2011

UFO Bust Report and More

My UFO Bust Report is easy this week. I finished nothing, I worked on nothing. Well, I didn't work on any UFO projects.

I worked in my sketchbook some. The new theme for February is up - Opposites.

I did a "brainstorm" page.


And then did one for "curvy and straight."


I like this month's theme better than last month. I had lots of ideas for last month, but not many that I felt comfortable attempting to draw and then share.

I have also started on my guild's annual challenge. This year the theme is "birds of a feather" with an emphasis on "feather." There is an added twist this year, the finished quilt must be able to be hung from a branch! In addition, the maximum size is 10" per side. Usually we have a minimum of 18" per side with a maximum of 36" per side. The quilts are due at our April meeting.

I won't be able to show you much because I know that there are guild members who read my blog. But I will show you some teaser photos.


I am basing my project on this sketch I made recently. Some of the fabrics I'm using are below.


Since the finished quilt can be no more than 10" square, I've made good progress on my first attempt at interpreting the theme. We can make up to three entries. I currently have two ideas I really like so I'll be making at least 2 quilts. I may do more and then have a grouping that I can hang together in my house some where.

Finally, I'll leave you with a Goldie picture since I haven't posted one recently.


She is getting so big!

Thursday, February 3, 2011

A Tutorial for Satin Edge Blankies

Some time ago I showed you some satin edge blankies I was making for Project Night Night.

Stephanie asked for a tutorial on sewing the satin edge binding on. So here you go Stephanie!

To make a one you will need a package of satin edge binding, 1 yard of flannel and thread to match or contrast with the binding. Cut the selvedges off the flannel and square up the sides. When you open the package of binding you should notice that it is not folded exactly in half. One side is a tad longer (from the fold) than the other. The longer side goes underneath, that is, on the wrong side of the flannel.

Step 1: Leaving about a 4" to 6" tail of binding hanging off the end of one of the sides of flannel, pin the binding to the flannel about 6" to 8" from the edge of the flannel (so 10" to 14" from the end of the binding). Start sewing the binding to the flannel with a zig zag stitch just past your pin.


You do not need to pin more than this yet, unless you feel that you have more control. This binding is slippy and can be difficult to work with. Just go slowly and adjust things every few inches. Ideally you would like the edge of the flannel to be exactly at the fold of the binding, with no puckers or pleats.

Warning: If you are a perfectionist, this might not be a good project for you. My theory is that these blankets are comfort items for kids and kids do not care if the binding is perfectly flat. It is probably going to be washed frequently and used for tent making and capes, so perfection is a waste of time. Just do the best you can.

Step 2: Continuing zig zagging down your first sided and stop about 8" from the corner. I like to sew backwards for a few stitches to anchor them good. But do not cut your thread yet.


Step 3: Using a water soluble marking pen (or something non-permanent that will show up on your binding), open up the binding and put a dot on the fold where the corner of the flannel hits the binding. I circled it for you in the photo. You can click on any of the images in this post to see them larger.


Step 4: Now cut your thread and move the blanket out of your machine to a flat surface. You are going to make a few more marks on the binding. I use 2" binding which means it is 2" wide when folded, so 4" wide when opened. Measure down (back towards your sewing line) 2" from your dot from Step 3. Along each outer edge of the binding, put a dot 2" from the Step 3 dot. Again I circled the dots on the photo below.


If you use a binding that is not 2" wide when folded you need to measure down from your center dot (the Step 3 dot) whatever the folded width of your binding is. For example if your binding is 1" wide when folded, so 2" wide when unfolded, you need to measure down 1" from your Step 3 dot.

Step 5: Now you need to draw a line from the Step 3 dot (the one on the fold in the middle of the binding) to each of the outer dots drawn in Step 4. You are going to sew on these lines in a minute.


Step 6: Fold the binding, right sides together with the center dot (the Step 3 dot) at the very tip of the fold. And pin to hold the binding together. Do not pin over your sew lines.


Again, this binding is slippy and you've got the flannel attached to it that doesn't always cooperate. Just do the best you can. In the above photo I have turn the binding in preparation for sewing. The center dot (the Step 3 dot) is now on the right with the binding folded over and pinned to itself.

Step 7: Now sew on your drawn lines.


Step 8: Cut the corners off of the binding leaving about a 1/4" seam allowance.


Step 9: Turn the binding back to right side out and slide the corner of the flannel into the corner you just made on the binding. You may find a few pins helpful to hold the flannel in place until you can get it sewn to the binding.


Step 10: Start sewing with a zig zag stitch from where you left off previously, back tacking a few stitches initially. Sew to the corner, pivot and continue sewing the second side. Your corner will look something like this. It probably won't be perfect. Just do the best you can.


Step 11: Continue sewing the second, third and fourth sides. Stopping about 8" from each successive corner and repeating Steps 3 through 10 to make the second and third corners.

Step 12: When you stop sewing 8" from the corner on your fourth side, the corner will be the one with a binding tail hanging off from where you started this project in Step 1. To create this last corner. Mark the binding exactly like you did for the first three corners. You can not fold the binding over on itself this time though. So you will need to also mark the binding from the first edge. Fold the unsewn corner of flannel out of the way and pin the two pieces of binding right sides together, matching up your drawn lines on each.


Step 13: Sew on the drawn lines, cut the excess off leaving a 1/4" seam allowance and slide that last corner of flannel into the last binding corner. Pin in place and finish zig zagging around to where you started.

Step 14: Admire your work.


Step 15: You'll need to wash the blanket to get the marks out then give it to a deserving child.

Note: If you use a piece of flannel larger than 1 yard by width of fabric, you will need more than one package of satin edge binding.

Whew! This is the kind of thing that is easier to show someone in person than to write instructions for. I hope with the pictures that the instructions are clear. If not, please let me know and I'll do my best to explain it better.