Friday, April 28, 2017

Cross Body Bag

Recently I came across what has become my new favorite bag making book. I got the book to peruse as a possible book to teach bag making from in my shop


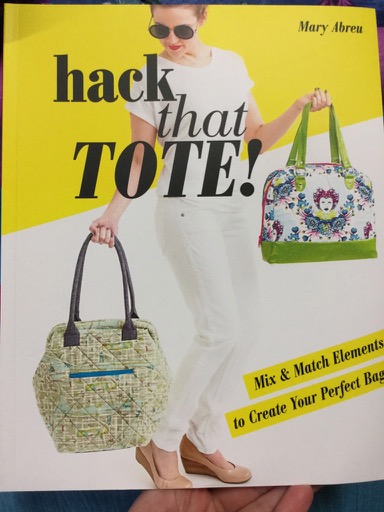
The great thing about this book is that it teaches you about all the basic elements of a bag - interfacings & battings, hardware, pockets, closures (like zippers and magnetic snaps), etc. You start with a basic tote bag pattern. Then working your way through the book you learn how to alter this basic tote bag by adding elements and changing the shape.

I love the book and ordered several copies for the shop. The bag I chose to make as a store sample is the Cross-Body Bag. It has two outside pockets, one zippered (photo directly below) and one open (second photo below).


It has a zipper on the top and no pockets on the inside.


In addition, the shoulder strap is adjustable and calls for cool hardware. It is large enough to carry a tablet but not so large that you can load it down with a bunch of heavy junk.

If you are interested in learning to make bags, this is a great book to own. You can follow the patterns in the book, as is, or use them to learn how to create your own unique "perfect bag."


Wednesday, April 26, 2017

Birds on Parade Bag :: A Finish

I finished my Birds on Parade Bag yesterday!

Here it is with all the embroidery completed but not sewn into bag form yet.


And here it is completely finished.


I used the gray raindrop fabric shown behind the birds as the lining. I added a little detail to the back too.


This was such a fun pattern to make! The bag itself is very basic, but the applique and embroidery make it something special.


Friday, April 21, 2017

Happy Scrappers Group

My Happy Scrappers Group met on Wednesday and they brought show and tell! Both of these are previous projects we have worked on in the group.

This is Connie's completed Scrappy Little Wishes quilt.


It is king size! She made it for her bed.

This is Mary's version of Goose on the Loose.


She plans to do some fancy quilting in the black squares. Her plan is quilt geese in the squares. Real geese, not the quilt block kind.

Here are links to the pattern information for both projects: Scrappy Little Wishes and Goose on the Loose


Thursday, April 13, 2017

Tabby Road Cake Mix Recipe 1

I managed to get my Cake Mix Recipe 1 quilt I showed you in my previous post earlier this week finished. Well ... the top is finished.


I love how it turned out! And it's big! The finished size is 64" by 80" which is a generous twin sized quilt. I could add a border or two, but I won't. It is already large enough for my purposes and I'm not really the border type. I don't mind a border on certain things, but I don't feel that every quilt requires a border.


Tuesday, April 11, 2017

Cake Mix Recipes

Have you heard about Cake Mix Recipes?


These are new from Moda and quite fun to use. Click here to read about them and see a short video about how to they work.

I have been playing with the Cake Mix Recipe 1 and a layer cake of Tula Pink's new fabric line, Tabby Road. The background fabric I'm using is a Grunge, color called Ballet Slipper. It's a pale pink. 

I sewed all the units, pressed them and pulled off the paper (which came off quite easily for me). Then I started playing:


Above are the layouts I tried. I picked one and started sewing but it's not finished yet. I looked down at the units pooling on the floor behind my machine and this is what I saw:


The left is about a third of the way through sewing and the right is when I was finished. I didn't do anything to make them do this. It probably isn't unique or special, but it made me smile.

When I get the top together I'll share it with you so you can see which layout I chose.


Friday, April 7, 2017

Birds on Parade Bag

I'm working on a new store sample. This pattern recently came in.


I have the outer bag portion put together, almost everything is appliqued in place (I still need to add the eyes for the small birds), and I've started on the embellishment embroidery.


I'm also working on my Sue Spargo Fresh Cut 2017 BOM, but I'm not permitted to share any photos of it until summer 2018 when the pattern will be released. All I will say is that it is gorgeous and I'm enjoying working on it. Between me, employees and customers there are 5 of us here doing the BOM. It is really fun to get together and work on it as a group. The last time I did one of Sue's BOMs I was the only one in my area doing it.


Saturday, April 1, 2017

Foot Pedal Bed :: A Tutorial

I started a new event at my shop called "First Saturday Demo Day." When I can, I'll do a tutorial of the demo for you here on the first Saturday of the month. Today is the first of what I hope will be many first Saturday tutorials for you!

Today I'll show you how to make a foot pedal bed.


This is a handy little item to help keep your machine foot pedal from running away from you.

What you will need:

  • One piece of rug gripper, 6.5" by 10". Use two pieces if your rug gripper is flimsy. 
  • (1) 2.5" by WOF (width of fabric) piece of fabric for the binding
  • (1) 4" by 8" piece of fabric to make the pillow
  • some kind of stuffing for your pillow
  • (optional, but recommended) a walking foot for your machine to use when sewing on the binding


You should probably measure your foot pedal before cutting your rug gripper.


My foot pedal measures about 4.5" by 7.5". I added about 2" to the width and 2.5" to the length to arrive at the size 6.5" by 10". If your foot pedal is significantly different in size to mine, make the necessary measurement adjustments.

All seam allowances are 1/4"

Fold the 4" by 8" piece of fabric in half lengthwise and sew the long side seam.


Roll this so that the sewn seam is at the center and press the seam open.


Sew one of the open short sides shut.


Turn this right side out.


This is pretty easy to do, but I wanted to show you my turning tools. This Turn-it-All tool makes turning tubes so easy!! If you don't have one already, you should get one. I use this all the time and it's not very expensive. (Retails for $10.99 at my shop)

Stuff your pillow to the desired firmness. The tube is longer than it needs to be so be sure to measure it against the width of your piece of rug gripper. Mine needs to be about 6.5" long stuffed.


When it is sufficiently stuffed, sew the open end shut and trim off the excess fabric.


Set the pillow aside for the moment. Take the 2.5" by WOF piece of fabric to your ironing surface and press it in half lengthwise, right side out. This is just like you would do for making binding for a quilt.


Sew the binding to what will be the bottom side of your foot pedal bed, this side that will sit against the floor.

Use whatever method of ending the binding you want. I used the "tuck end tail inside beginning tail" method. Photos below:


Turn your partially bound piece of rug gripper over so that the binding is underneath. Baste the pillow to this about 1" down from one of the short ends.


Pull the binding from the bottom side to the top side and clip or pin it in place. Clover Wonder Clips are great for this! Another must-have notion for me.


Topstitch the binding in place all the way around.


Put your new foot pedal bed on the floor underneath your machine and "tuck in your foot pedal" for a day of sewing!