Wednesday, June 29, 2016

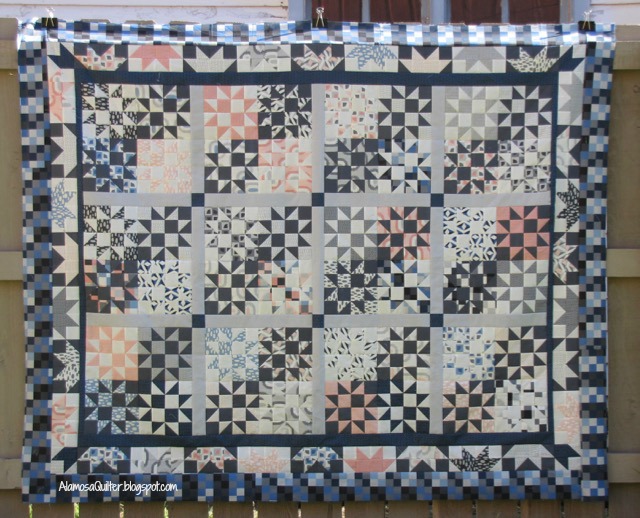
All That Glitters Top Done

I love this one!


I made the lap size version so it will finish at 63.5" by 77.5". The pattern is from The Big Book of Nickel Quilts by Pat Speth and Charlene Thode.

Not sure when I will get to quilt it but I'm thrilled with it thus far.

Click here to read my first post about this project and see a photo of another version of this quilt using very different fabrics. I love how different they look even though they are both the same pattern.


Monday, June 27, 2016

Paper Piecing Class Sample

We've had several requests for a paper piecing class at my shop. Last week I went in search of an interesting, but not too difficult pattern. This is what I found.


I made one block and turned it into a pillow. The purpose of the class is to teach the basic paper piecing technique. I wanted a pattern that was interesting but not too difficult. Something that students could finish in a three hour class. This is perfect!

Students can make one block and turn it into a pillow as I did. Three blocks would make a nice table runner. Or they could make a quilt with more blocks. 


Friday, June 24, 2016

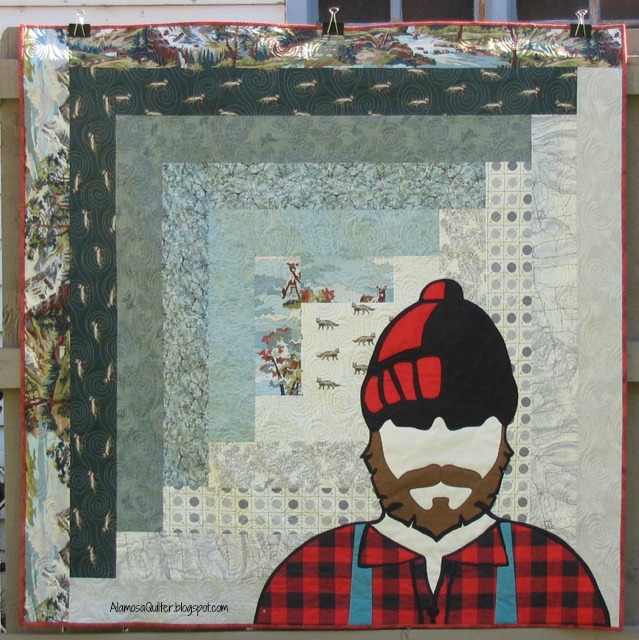
Meet Al

I stayed up late earlier this week to finish the binding on Al.


This quilt is a kit from the Alpine fabric line by Erin Michael for Moda. The lumberjack, I'm calling him Al, comes in the kit. He is a digital print on fabric. You cut him out and applique him to the quilt. It was very easy.

I opted to quilt the background first and then applique him onto the finished (minus binding) quilt. It worked well. I then stitched him down and added some detail stitching.

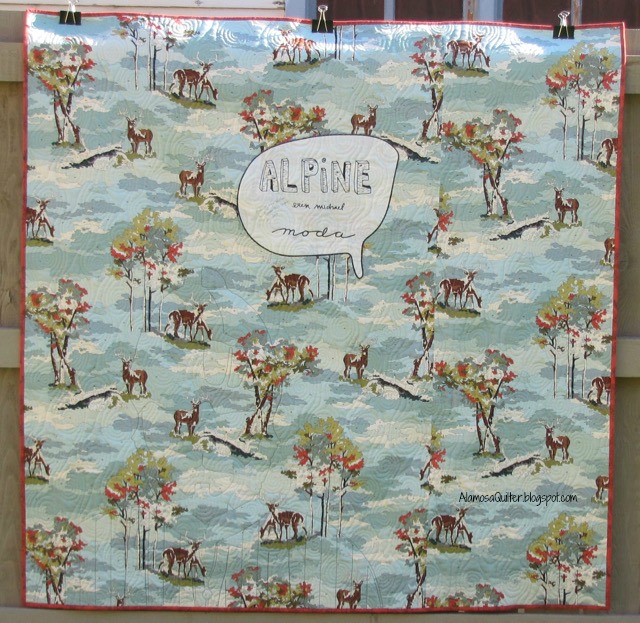
Printed on the fabric with him was a dialog bubble. I wrote the label information on it and stuck it on the back.


This was a pretty fast project. I managed to get the background, which is just a large log cabin block, cut out and pieced at the shop on Friday in between customers. It probably would have only taken me about 2 to 3 hours to cut out and sew with no interruptions.

The finished quilt is about 59" by 59".


Wednesday, June 22, 2016

Progress on Two Projects

The center of my All That Glitters quilt is done and the first border is on.


The second border is pieced and I'm working on that now.

I'm also quilting up a shop sample.


I hope to finish it soon so I can show you the whole quilt.


Monday, June 20, 2016

Daily Grind :: A Finish

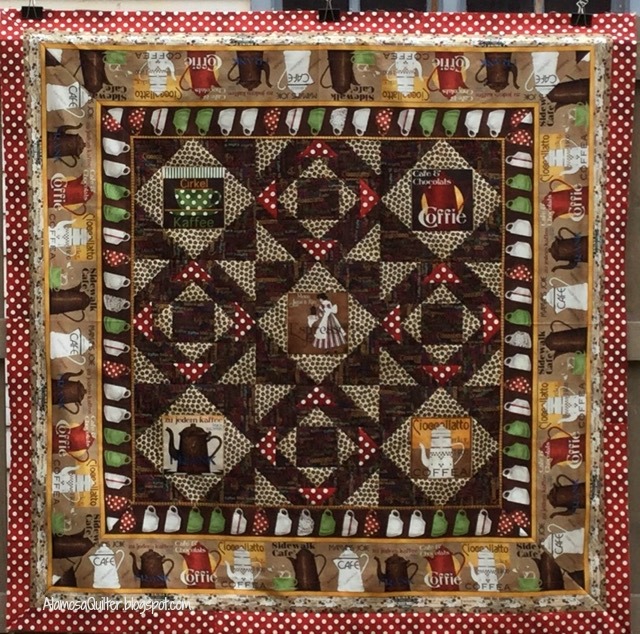
Despite my feline supervisor I was able to finish this shop sample.


Ms. Spooky Boo supervised every aspect of this project. Here she is inspecting the mitered border process.


Then she inspected the quilting process.


Lastly, the binding process.


With so much supervision I'm amazed I was able to get it done! I get lots of supervision when I am the only one home. The rest of the family will be back soon. Then I won't get as much attention.


Friday, June 17, 2016

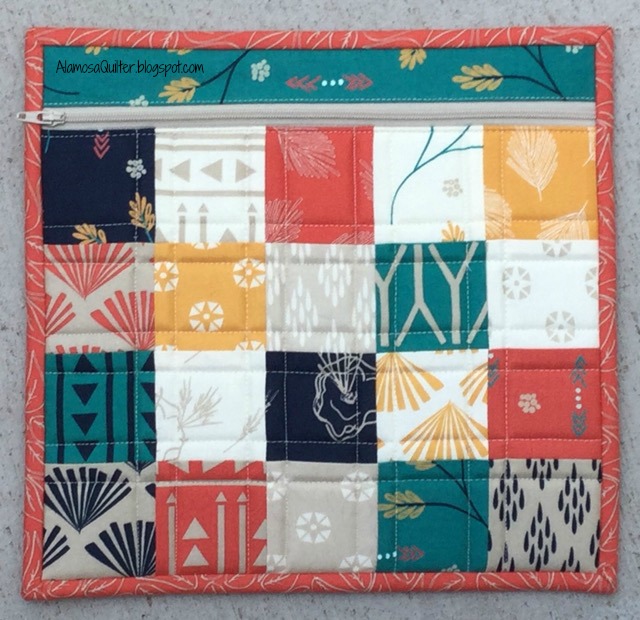
Simple Zipper Bag

I came across a tutorial recently for the Simple Zipper Bag. It looked like fun, fast project so I decided to make one.


It was indeed fast and fun to make.


I made the larger size so it finished at 10" tall by 10.5" wide. 


I used one of the new Moda lines from the shop, Valley. I just love the saturated colors! I may need to cut myself a half yard of every fabric and a yard of a few of them just to hoard in my stash.


Wednesday, June 15, 2016

Goose on the Loose Quilt Along :: Block Five

This month we will be making the block below:


**Please read the entire post before starting your block.**

You will need:

(1) 7.5" square of scrap fabric for the geese
(4) 4" squares of background fabric for the sky surrounding the geese
(16) 2" by 3.5" rectangles of scrap fabric
And a Wing Clipper Ruler

If you don't have a Wing Clipper Ruler scroll down for alternate directions.

Use your Wing Clipper ruler to make (4) 3.5" by 6.5" flying geese units from the 7.5" square and the (4) 4" squares.


Arrange the (16) 2" by 3.5" rectangles of scraps into sets of four.


Sew them together along the long (3.5") sides to create four striped units measuring 3.5" by 6.5".


Sew these to the 6.5" long side of the flying geese units that have the point of the goose triangle.


Lay these units out as in the photo above and sew them together to create the 12.5" by 12.5" unfinished size block.


Here is the back of my block so that you can see how I pressed my seams.


If you don't have a Wing Clipper Ruler you can still make the block! Instead of a 7.5" square of scrap fabric and (4) 4" squares of background fabric, you will need (4) 3.5" by 6.5" rectangle of scrap fabric for your geese and (8) 3.5" squares of background fabric for the sky surrounding the geese. Use the Flip, Flip, Finish technique to make them. Then follow the rest of the directions above to finish your block. 

Ask any questions in the comment section below. If I can, I will respond personally with an answer. If you have your account settings set as "no-reply" then I will respond to your question with another comment and you will need to follow the comments or check back for an answer.


Friday, June 10, 2016

Open Wide Bag

One of the interesting things I participated in at Spring Market was the School House sessions. I didn't fully understand what these were until after the first few sessions. Essentially, these are live quilting related infomercials. Most of them try to give good information as well as sell their product. In fact most of the ones I went to provided very useful information and I took lots of notes.

Some of them also provide gifts just for attending their session and most of them do a drawing for door prizes at the end. Two of the sessions I attended were by the ByAnnie folks. At each of these sessions I received a very nice gift. Below is a photo of one.


I don't have a photo of the other, but  it was very similar. In the bag shown above is everything needed to make the included pattern except the fabric! It has the pattern, the Soft and Stable, some colorful mesh, a zipper and some interfacing. How cool is that!

The reason I don't have a photo of the other packet is because I made the bag before thinking of photographing the packet. Here is the bag.


It is called the Open Wide bag. This is the medium size, 6.5" tall by 10.5" wide by 4.5" deep. The pattern includes directions for three sizes.

Inside it has two mesh pockets.


One end has a strap for tucking the end of the zipper in.


It was a little challenging to complete. Probably not a beginner project. Well ... it wasn't really hard construction, just awkward to maneuver the bag under the needle for certain parts of the construction. I don't know of any way to make it easier and achieve the same result. Wonder clips, a stiletto and sewing slowly worked for me and these were suggested in the pattern. I also cut my binding 2.25" wide throughout based on my experience with a different one of the ByAnnie patterns I made several years ago. 

They have a "Let's Get Organized" program for shops I'm thinking of participating in. It is kind of like a "bag of the month" program as opposed to a "block of the month" program. I want to try out at least one more pattern, the one in the packet shown in the first photo above, before deciding if this is something I want my shop to participate in or not. In either case, I like this pattern well enough that I would order it for my shop even if I don't participate in their program.


Wednesday, June 8, 2016

Daily Grind Top Finished

I am home alone for a bit which means I get some extra sewing time. I have even set up my Featherweight in the living room along with a portable ironing station so I can comfortably sew and watch TV if I want.

My extra sewing time has allowed me to complete this top.


All it lacked were the borders. It's been a while since I have done a mitered border. The directions in the pattern were so "wordy" that I resorted to YouTube to refresh my memory on how to do a mitered border. I watched this video embedded below:


The video seemed to "catch" just before the end. The video stopped but the audio kept looping the same couple of seconds. It didn't affect the quality of the information though. It had already covered everything I needed to know and the method worked great for me. 

I could have done a better job of matching up the pattern on the fabric, but the corners lay nice and flat so I'm just focusing on that. I may even try to get it quilted. We'll see how my week goes.


Monday, June 6, 2016

Placemats and Napkins

I made up some placemats and napkins as shop samples last week. These were super easy as the placemat portion is printed on the fabric. All you do is cut out the placemats, quilt, square up and bind.


It doesn't get much easier! I used a different colorway of the binding print for the napkins.


I backed these with a Fall themed print to make them reversible and good for more than one season. I didn't get a picture of the back though! Not sure why. The napkins coordinate nicely with the backing fabric too.


Thursday, June 2, 2016

Progress on Multiple Projects

I am currently working on several items.

First, the Splendid Sampler. I made three more blocks.


Next I'm working on a store sample, big surprise. This one is called Daily Grind.


I only have the center together at the moment. It needs a few borders to complete the top. I hope to make some more progress on it soon.