Thursday, March 31, 2011

Charity Quilts, Stuffed Animals and a real animal

Every year in March my guild donates the quilts we have made and the stuffed animals we have collected throughout the year to the Victim's Advocates department at our local Sheriff's department. Last Tuesday was "the day" for this year.


This is 49 quilts and 400 stuffed animals. All the quilts are laid out but we only got out a few of the animals for the picture.

The guild actually made more donation quilts over the year than 49. We also give quilts to the hospital for the new babies and the chemo. department, the dialysis center and other groups with a need. For these other groups we give the quilts every couple of months instead of waiting. So I do not know how many donation quilts total we made this past year.

A kitty photo from this week:


Goldie has curly whiskers! I have never seen a cat with curly whiskers. She looks rather contrite in this photo. She was posing for me.

Wednesday, March 30, 2011

Another Guest post

The second part of my beading tutorial is posted over at Stephanie's. Please head over there to read it. I'll be back tomorrow with the regularly scheduled programming, that is, my usual ramblings.

Tuesday, March 29, 2011

Guest Blogging

I'm doing a guest post today for my friend Stephanie over at Peas in a Pod. Please go over to Stephanie's to read my beading tutorial, part one.

Monday, March 28, 2011

Sand Dunes Swimming Pool

Yesterday afternoon we went swimming at the Sand Dunes Pool. It is about a 25 minute drive from Alamosa.

It was windy and chilly but the water was a warm 97 degrees F, as usual. It can be a bit hot for me in the summer, but this time of year it is perfect.

The view from the pool is amazing.


This bush was so orange! I don't know what it is but I love the color.

The Great Sand Dunes National Park is only about 10 miles away, as the crow flies. I circled it for you in the picture below.


I like to go to this pool in the afternoon and eat dinner here. Their menu is fantastic, reasonably priced and definitely not typical pool concession stand food. I had the Capresse Panini with Chicken and my husband had the Cranberry Chicken Salad Sandwich. I have heard of people stopping here to eat but not swim. It's that good! They have several green houses and grow all their own produce for the restaurant. If you are ever in the area, this place is definitely worth a visit. They even have an RV park on the premises.

Sunday, March 27, 2011

Binding

For some reason I am not able to throw away the last little bit of binding leftover from binding a quilt. I just save them in a bag. About a year ago my bag was overflowing and it occurred to me that I could use this to bind charity quilts. My charity quilts are usually scrappy anyway, so why not use scrappy binding?!

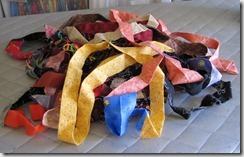
Yesterday I had a charity quilt ready for binding. I have been just making binding each time I need it. I realized that this is one of the reasons charity quilts end up in my UFO pile. So I pulled out a bunch of leftover binding strips.

01 binding

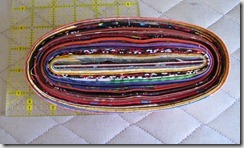
I sewed it all together using bobbins that were almost empty and an almost empty spool of thread. I ended up with this.

03 scrappy binding

Enough scrappy binding for at least two probably three baby size charity quilts. I am considering doing something similar for pieced backings for charity quilts. I have a bag of large scraps that I have set aside for charity backings. I’m planning to take a day and just make up a bunch of backs from this bag of fabrics. Hopefully, this will decrease the chances that my UFO pile will grow from charity quilts.

Friday, March 25, 2011

UFO Bust Report with a finish

I finished the Space Quilt! It is now hanging in the playroom for the enjoyment of all.


Thursday, March 24, 2011

Calm

Calm
Calm down
Be calm
Stay calm
Winds are calm
Remain calm

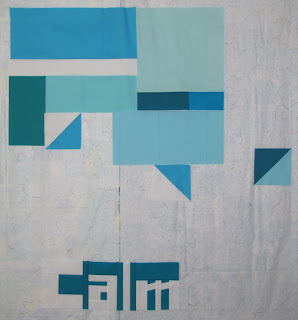
I decided to make another word quilt. It is hard to chose a word though. Whatever word you choose will define your quilt. Definitions vary depending on the reader, so you must choose carefully. I wanted to make an aqua quilt, essentially monochromatic.

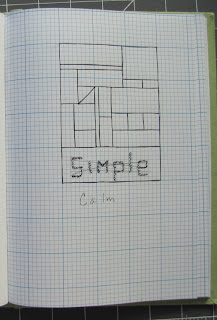
I started with a sketch.


Initially I chose the word "simple." Notice that the title of the post is not "simple." After making the word I realized that "simple" has some definitions that do not adequately describe the quilt I was making. The piecing for this quilt was definitely not simple. There were several partial seams, which aren't hard, but aren't simple either. After pulling out my fabrics, I decided that "calm" was more the feeling I was going for with my aqua quilt. So I made a "c", put the "s", "i", and "p" aside. Flipped over the "e" so that it became an "a" and now I have "calm."


In addition, "simple" was too long. It would have forced me to make the piece larger than I intended. I didn't realize this until I had pieced the letters and put them on the design wall. "Calm" fits better. I chose not to do any wonky piecing. "Wonky" is not "calm" in my world. Neat, orderly, organized = calm.

Now I am cogitating on what quilting motif best complements "calm." I have a few ideas but no time to act on them yet.


This may be my art group project for the Downtown Show this summer. I have another idea too though. My entry will most likely be which ever one gets finished in time. Such is life.

Wednesday, March 23, 2011

Yesterday's Project

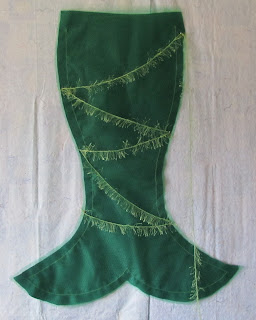
My son's class is putting on a production of "The Little Mermaid" in May. I am a weekly classroom volunteer so lately I have been doing some set design and other tasks related to the play. This morning I made a mermaid tail.


The fabric base is cut from a green sheet and then there are four layers of a green plastic tulle-type stuff sewn to the fabric. I am auditioning embellishments too.


This is some lime green eyelash yarn pinned over the top. I like it! I haven't figured out all the details yet but this looks like a good start.

Tuesday, March 22, 2011

Charity Quilt Pattern Idea

Here is a really simple charity quilt pattern. I made mine from my stack of 6" squares I have been cutting recently. Any size square will work though.

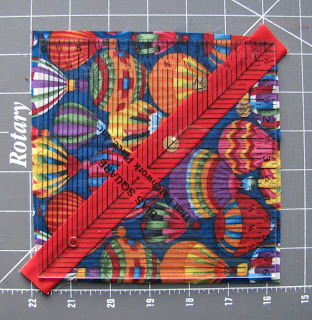
Start with forty-eight 6" squares and forty-eight 1.5" by 9" solid (or reads as solid) rectangles. Cut the squares in half once diagonally.


I used this as a Leader and Ender project. Above are my pieces stacked and waiting to be sewn. Sew the solid rectangle to one triangular half of your square along the diagonal you cut. Then sew the other triangular half to the other side of the rectangle. So basically you are inserting the solid rectangle into the diagonal of the square.

After you get them all sewn, you need to square them back up to 6" by 6".


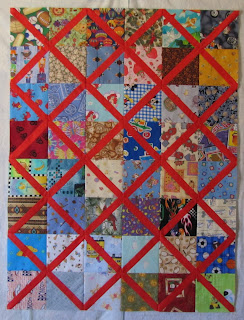
Then play with your blocks. I chose to make an X pattern.


You could also just do a zig zag pattern with the solid rectangle. I think I'll try that next. I have another set of the red rectangles ready to go. I just need to pick out 48 more 6" squares from my stack.

You can do this with any size square. I wouldn't go much smaller than 5" squares though because then your insertion rectangle will have to be pretty skinny. If you go larger than 7" squares you may want to increase the width of your rectangles a bit. For the length of your insertion rectangles, just measure the diagonal of your square and add at least an inch. For 6" squares like I used, 1.5" by 9" rectangles are perfect. To square up your blocks just cut the largest square you can from your sewn blocks. If you follow my instructions you will be able to cut a 6" square from your sewn blocks with very little waste.

Monday, March 21, 2011

March Guild Class

My guild meeting was Saturday. Check out what we made.


This is a pressing and cutting mat.


Inside there is a 12" by 18" cutting mat and the same size ironing surface. Awesome! We had such a fun time making them but got a little high from the glue fumes. I'm going to really enjoy using this!

Friday, March 18, 2011

UFO Bust Report

In a fit of cleaning yesterday, I found my UFO plastic bin! Well, it wasn't really lost. I knew exactly where it was. But it was underneath a whole bunch of other junk and I just didn't have the inclination to move all the stuff off until yesterday. I have now put it in an easily accessible place so hopefully I'll be able to get it emptied out in a few month.

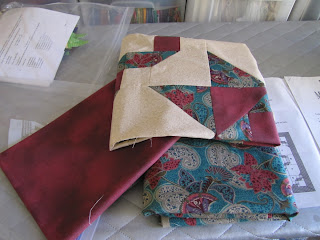
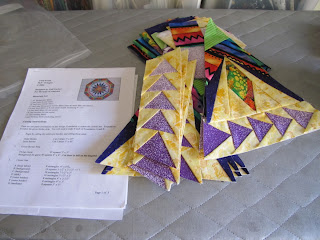
I pulled out three projects that will be worked on next. The first is one from my mom. Her guild did a mystery quilt in 2007. She made the center held on to it for a year, then sent it to me.


I've got to add the outer border (the print fabric), then quilt it and bind it. The burgundy will be the binding and the rest of the border fabric is for the back. The directions say it should finish at 48" square. I'm not sure what I will do with it when I finish it. Maybe I'll give it back to my mom.

The second project is from a Gail Garber class my guild did several years ago.


The class was on making paper pieced stars. This little project finishes as an octagon. I think I may try to add some borders so it will be square or rectangular. I've got the eight triangles paper pieced along with the eight geese units that go on the outside edge of the triangles. I've even got the geese part attached to two of the triangles. I think the thing that is holding me up on this is knowing that I've got to remove the paper. It is going to make such a mess. *sigh* I'm going to just do it though!

The last project is the one I am going to tackle first. It is the Space quilt for my son. It is sad that this is a UFO. It's just a panel! All it needs is some quilting, binding and a sleeve. I'm planning to hang it in the playroom to replace a more babyish quilt that is hanging in there now.


I spray basted it yesterday. The plan is to quilt it today.

Button Giveaway

Bejeweled Quilts By Barb is having an awesome giveaway. Check out these cute buttons.


She has ten of these cards of buttons to giveaway. Yes, ten winners will be selected! This is a small excerpt from Barb's post:

This company was started in 1984 by one woman using the beauty of Africa as her inspiration. She started specializing in handmade buttons, craft kits, jewelery. Eventually it involved into hiring people from their local community. I believe they say 45 women, empowered by creating these buttons and other crafts. Lifting their families.
These awesome buttons are handmade, all the way from the making of the buttons themselves to painting and decorating them. I have checked out their website and they make oodles of really cute buttons. You can also check on their website to see if anyone in your area carries their buttons. I checked out Colorado. Nobody close to me sells them, but I'm going to the Quilt and Stitch Expo in Pueblo, CO soon. The last few years there has been a button booth and I think the shop is one of the ones listed for Colorado! I'm going to check them out at the Expo.

So head over to Barb's blog and sign up for the giveaway.

Thursday, March 17, 2011

Happy St. Patrick's Day

My little guy never did catch a leprechaun. Oh well! I got him a shamrock plant today though as a little gift. He's been wanting a plant (and a fish and a bird and a ....). You get the idea. Shamrocks are pretty easy to grow so maybe he'll be able to keep this plant alive for a while. He has named it Patricia.

Yesterday I was feeling the need to sew, but I didn't feel like working on any of my in progress projects. I know, this is how UFOs are born, but come back tomorrow for my UFO Bust report and you'll see that I am making progress in that department. Anyway, I pulled out my solids scraps and found some that were about 4" square so I paired them up and made half square triangles.


This little piece has turned into my challenge project for the month. The monthly challenge I am doing with Stephanie from Peas in a Pod. The assignment this month is "narrow inset piecing." I know you don't see any narrow inset piecing in the photo above, but I'm not going to show you that yet! This is just a sneak peak. We reveal our challenge projects around the end of the month.

While making these half square triangles yesterday I also finished my other two blocks for the Just One Star project. See yesterdays post for details about the project. There is still plenty of time to participate. Here are the blocks I am sending in.


And will you just look at this crazy cat!


What is that she is killing? It is my bunny slipper pin cushion. (The link will take you to my blog post where I showed how I made it.) I have had to rescue it three times today!

Wednesday, March 16, 2011

Just One Star times 4

Moda is coordinating making quilts for the Quilts of Valor program. These quilts will be given to Marines injured in the line of duty in Iraq and Afghanistan. The are asking folks to make a star block and send it to them. All the details can be found on the Moda blog post for Just One Star. The deadline for star blocks is May 1, 2011. They don't want just any star block. Click on the link for the block pattern. The block pattern link is to a two page .pdf pattern file. The first page shows a picture of what the finished quilts will look like and the second page is the instructions. They need 1800 blocks to make 100 quilts.

This morning I cut out four blocks, two red and two blue. I have already finished the blue ones.


I'll make the red ones later today.

Tuesday, March 15, 2011

Zentangle Tuesday

I have not done much sewing lately - work life and family life have been too time consuming. I did take a few minutes for myself and draw a couple zentangles. This is really helping to aid my creativity and give me short creative outlet.


Another busy day ahead. Might be able to sew this afternoon, but might need to take a nap instead. This time shift has really messed up my internal clock!

Friday, March 11, 2011

UFO Bust Report

I finished putting the label and binding on the Clifford Quilt.


It is called the Clifford Quilt because the blue print is Clifford the Big Red Dog and letters. All of the fabric used for this project was given to me and the batting is provided by my guild to be used for charity quilts. So it cost me nothing except the thread and my time. Ahhhh! Another one off the list.

Wednesday, March 9, 2011

Quilt Show Wednesday

Usually my favorite quilt I have made is what ever I am working on at the time. However, I made this one in 2007 and I still really like it.


My version of VanGogh's Starry, Starry Night. It was made for my guild's challenge in 2007. The theme was your favorite song title. It measures 28" wide by 24" high. I'm not sure Don McLean's Starry, Starry Night is my favorite song, but I do really like and I like the painting. It was a real challenge for me at the time. There are things I would do differently if I was making this today, but this was the best I could do at the time and better than I thought I could do at the time. It was the first art quilt I made that actually turned out even close to what I envisioned in my head!

Tuesday, March 8, 2011

Zentangle

I first heard/read about zentangles about a year ago. They sell kits for $49 plus shipping but at the time that was too steep a price for me. In the past couple of months I have been encountering zentangles more frequently and recently decided to just buy the kit. It came last week.

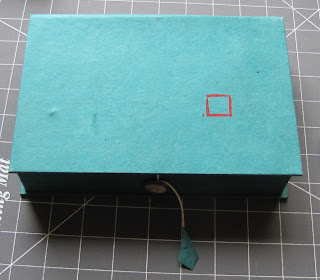
The kit is very nice. I'm such a sucker for good packaging! It comes in a beautiful box.


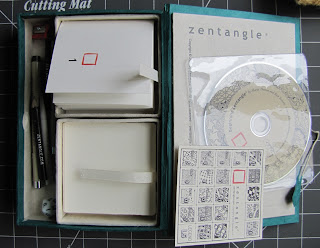
The box is designed to sit flat like this or you can stand it on end and put it on a bookcase. Inside the kit is a DVD, an instruction booklet, a legend card (shows examples of different fill designs that are numbered), a die (roll the die and draw the fill design that corresponds to the number rolled), two pencils with a sharpener, a blender stick, two Micron pigma pens, and a generous amount of tiles made from very nice paper for drawing your zentangles on.


The DVD is just 28 minutes of watching someone draw three different zentangles while music plays. No words are necessary. Just watching someone do a few is all the instruction you need. The instruction booklet and legend card give many examples of fill designs. However, any fill design you can imagine will work. This is why I decided to go ahead and get the kit. Any free motion quilting design is a fill design! I am learning that drawing helps me with my quilting and zentangles are fun to draw.

Do you need to buy the kit to draw zentangles? No. In fact I have done some on regular paper and on water color paper. I wanted the booklet, the nice paper tiles and pens and was curious about the DVD. I like using good quality materials and the paper tiles in the kit along with the pens are very nice. You can buy these separately though.

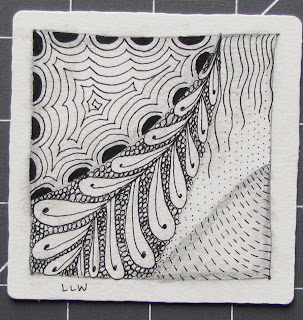
Here is my very first zentangle creation.


At first I thought the 3" by 3" tile would be too small, but after doing some larger ones I think this smaller size is the perfect size for getting the hang of drawing this way. I can envision doing these patterns on cloth with stitch, beads, buttons and other embellishments. In fact, I know there is a new book just out on this very same subject.


Zentangle for Fabric and Quilts on YouTube

You can watch the video here or go to YouTube and search for the title. You may be able to view a larger version directly on YouTube.

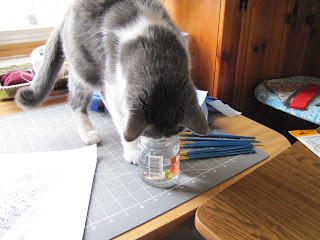
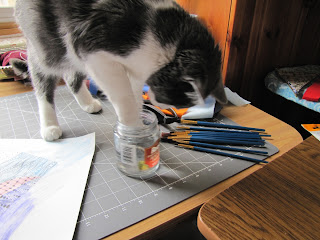
Goldie likes zentangles too.


She also likes water.


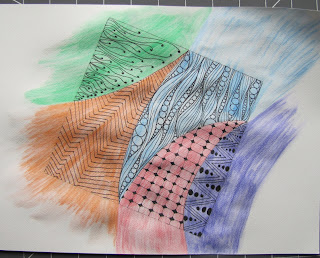
I finally had to put her out of my room and shut the door so I could finish. I did a 6" by 6" zentangle on watercolor paper and colored it with my Inktense watercolor pencils. This is my first try at the "Spilling Over" theme for March in the Sketchbook Challenge.


My idea is that the color is spilling over. I like the way the orange "spills over" and the blue isn't bad, but the others are not at all what I envisioned. I'll have to try again. I'm having a hard time with the theme this month. It just isn't speaking to me.

Monday, March 7, 2011

Bunny Slipper Transformed

Last week I showed you my son's old bunny slippers. I made a first attempt at turning one into a pin cushion.

First I looked at the bottom of the slipper.


I measured the width and length then drew an approximate copy to use as a pattern.


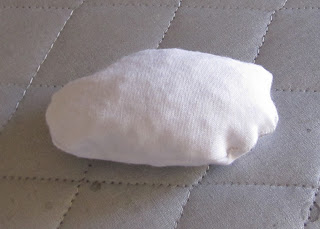
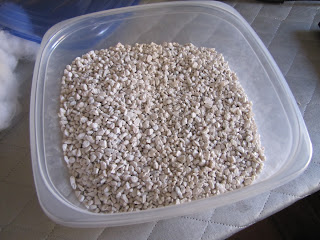
I drew my pattern on freezer paper, ironed it to a doubled piece of white fabric and cut out two pieces leaving a generous 1/4" seam allowance. Then I sewed the two pieces together leaving a hole for turning and filled it with aquarium rocks.


I think this 5 lb. bag of aquarium rocks cost between $3 and $4 at Walmart. I did open the bag and lay them out on a towel because they were a bit wet when I got them home. I'm not sure if the water was in the rock bag or from something else I bought that day, but I let them dry a good 24 hours before using them.

After filling the pouch with rocks I hand sewed the opening shut.


This went into the slipper first to give the pin cushion some weight. Next I added some stuffing to fill out the slipper a bit.


Then I made a little pouch for some play sand.


My sand is pink because it is Crayola colored sand. I asked my husband to buy me some play sand last year for some other pin cushions I was making. He came home with a 20 lb. bag of pink play sand! He said this was all Walmart had that day. Play sand is my favorite pin cushion filler because it fits well into any shape, it is cheap and it has some weight to it. I would prefer it to be "sand" color, but this pink stuff has worked out fine.

This pouch will be the part pins are stuck into. To make the pouch I cut two circles and a rectangle from my white fabric. My plan was to make a short cylinder, circles on either end with the rectangle in the middle. First I sewed the short ends of the rectangle together to make a tube. Then I sewed one circle onto one end of the tube. After struggling through this I decided that just sewing the other end shut after filling it with sand would be fine. My sand pouch looks like this.


With the slippers there was a lone baby sock.


I would prefer to use white or gray or blue or orange, one of the colors from the slipper, but this is what I have. I stuffed the sand pouch into the sock and then put it into the slipper.


Add some pins and I'm done!


I have not altered the actual slipper at all so all this can come out. I may try to locate a better color sock at some point, but for now I am using it as is.

Sunday, March 6, 2011

Amended Tote Bag Pattern Review

Have you seen my amended post about the Stand and Stow tote bag pattern?


I made another one using the correct fusible product this time and the pattern worked beautifully. Please go here to read my amended review of the pattern. I tried to edit my original post, ended up overwriting it. Then I tried to publish it but Blogger was acting weird so I don't know if anyone actually saw it. I want to make sure that those of you who read my horror story of the putting together the first bag get an honest review of the pattern. Unbeknownst to me, I was using the wrong fusible product which is why I had such trouble. With the correct fusible product the pattern is excellent. So please go read my amended pattern review.

Friday, March 4, 2011

UFO Bust Report and Leprechauns

Finally this week I have UFO progress to report. I worked on two of my projects and finished one. On Monday I basted the House Charity quilt and the Clifford Charity quilt. On Tuesday I quilted both of them. I just used what I call "git 'er done" quilting on both of these. I think most folks would call it meandering.


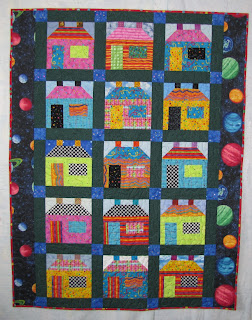
The house quilt is finished!


The Clifford quilt still needs to have the binding sewn to the back and I'll finish that this soon.

I used my new Supreme Slider to quilt these. I love it! It is more flexible and less flimsy than the Original Slider. It also stays in place with no tape! I'm not sure exactly how it stays put so well, but it just clings to the machine and table, kind of  like one of those vinyl window clings. I also used the Bobbin Genies for the first time. They must do something because I had to adjust the machine tension from my usual free-motion quilting settings. And I quilted both of these with one of the spools of Signature variegated thread I bought recently. I had no problems at all with this thread but it is very linty. I'll spare you the sight of my filthy bobbin housing after quilting two baby size quilts with this thread, but I had no problems with breakage or skipped stitches. So thumbs up for all of these products.
With St. Patrick's Day coming up, my son is trying to catch a leprechaun. Here is the outside of his trap.


There is a gold rope that leads to a hole on the left of the box. You will probably need to click on the photo to enlarge it be able to see the rope. The bricks are suppose to help the leprechauns get in, but prevent them from escaping once inside. Here is what the inside of the trap looks like.


Inside there is plate of food for the trapped leprechauns. Apparently leprechauns like candy cane. There is a small bottle of water for them to drink (above left of the plate). The scrap of fabric is a towel/blanket. Below the towel/blanket is a cup of water with a K-nex ladder and a bar of soap - so the leprechauns can take a bath.

He leaves some fake gold coins in the trap as bait. So far he hasn't caught one, but last night one of them lost his hat.


The leprechauns usually leave a small amount of candy in exchange for the "gold" coins.