Tuesday, December 31, 2013

New Light

My trusty desk flip top Ott Light needs a new bulb. I've been having a terrible time finding the correct replacement bulb because my light is so old. So I have upgraded.

Meet Stella.


She arrived last night. I got her from Amazon. Here is the link. It's not an inexpensive light, but wow is it nice!

This might be my only post for this week. We are doing inventory at the store this week and it is taking FOREVER. Instead of sewing, I'm counting.


Friday, December 27, 2013

Pin Cushion Innards

The first project for others is completed.


These are sandbags for inside pin cushions. Six each for two different friends, two for me. I would have made more for myself, but I ran out of sand.


Wednesday, December 25, 2013

Merry Christmas Grace!

I put the final stitches in the binding this morning. This is now finished and ready to be mailed off to its new home.


My niece pieced the center then sent it to me along with the border fabric. I picked out backing and binding, attached the borders, then quilted it simply with an all-over meander and bound it.

I used a nice marble-look purple on the back.


I hope you will enjoy using it Grace!

I have a couple more projects for others to finish up. My plan is to get these done before the end of the year so that my January sewing time can be all about me. It's my birthday month and this is what I am giving myself, a whole of month of sewing just for me.

I have a couple of projects that having been sitting in pretty piles for months and at least a dozen tops that need to be quilted. I am not going to set any specific goals for myself (i.e. put pressure on myself to finish certain things), I'm just going to do only sewing for myself for the whole month. That means no store samples, no charity quilts, no gifts for others, just projects for me.

Merry Christmas!


Monday, December 23, 2013

Back in the Sewing Room Again

I took an unplanned sewing/blog break last week. The guess right now is that I had an allergic reaction to something I ate Monday evening. As a result I spent most of the week in bed and didn't get anything on my list done.

I got this quilt basted on Monday afternoon, before getting sick. It was suppose to be finished last week and back to its owner.


This quilt belongs to my niece. She pieced the middle then sent it to me to finish for her. The new goal is to have it back to her before the end of this year. So far, so good!


Friday, December 13, 2013

A Friday Finish


This quilt is on its way to its new home. It is simply quilted with an all-over meander and measures approximately 58" by 74".


Thursday, December 12, 2013

Hand Dyed Goodness

I decided some time ago that while I really like hand dyed fabric, I don't enjoy the dyeing process. So I will happily pay someone else to do the dyeing for me. Luckily, I have a friend who enjoys dyeing fabric. Recently we have done some trading. I gave her a sewing chair I was no longer using and she gave me some of her hand dyed fabric.

When we got all the snow a few weeks ago, she snow dyed.


Aren't these fabulous! I have no idea what I will do them, but I had to have them. Heck, I could just frame these and call it good!

I also got these three hand dyed pieces she did at her recent Ricky Tims retreat.


Again, I have no plan for these but they will enhance my stash nicely.


Tuesday, December 10, 2013

Wool Pin Cushion

Thank you for all of your sympathy for yesterday's mishap! I'm happy to report that the quilting is now finished and the binding is made. Today's project will be attaching the binding and the label so I can get it in the mail by the end of the week. I hope to be able to show it as a finish in a few days.

Over the weekend I started a small wool, hand project to do while watching my Auburn Tigers win on Saturday afternoon. I finished it up yesterday evening.


This will be a gift for a quilting friend.


Friday, December 6, 2013

Theatre O and a Charity Quilt

My son is participating in the drama club at his middle school, Theatre O. Last night was opening night of their production of Beauty and the Beast Jr. My son is the Candle Man, a Villager, a wolf, and in several of the musical numbers in the chorus. Here he is after last nights performance dressed in his Villager costume.


All the kids did great! It's quite a large production with 33 actors and 22 stage crew.

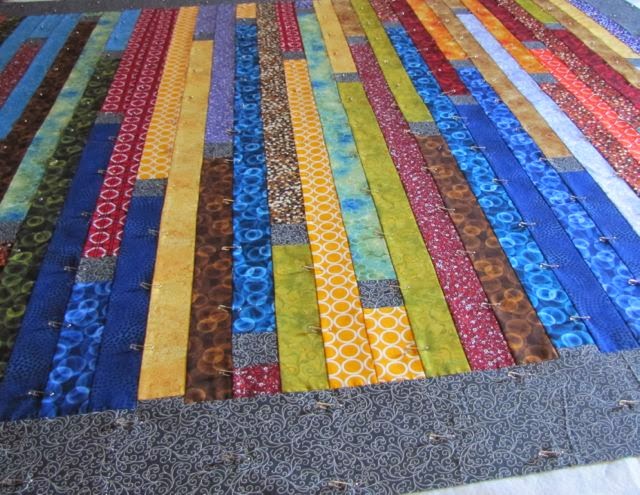
In quilting news I whipped up a Jelly Roll 1600 quilt yesterday in between work, chores and other daily tasks. I didn't get a full view photo yesterday and snapped the photo below quickly before heading off to work.


It is basted and ready to quilt this weekend.

Gene, this is what I will send for your Angel Project.


Tuesday, December 3, 2013

Village Scene

In my art group we have been working on our next group project. We are doing a village scene. I am woefully behind on my section due to work and lack of an idea that excited me. I've planned and picked fabric for several different pieces but never even cut anything for it because it just didn't feel right.

I started over, again, with this two weeks ago.


I know, it doesn't look like much. This was just the start of my new idea. While auditioning fabrics I realized that my batiks stash was low, which may have been part of my problem. I remedied that last Friday.

Here is what is looks like today.


The tree is off to the side because I haven't decided if I will use it or not. I need to put something in the bottom third. I was planning to just put flowers but then I cut out this tree trunk. So maybe I'll put flowers and a tree. I'm still playing at this point. I also need to add a recognizable quilt block somewhere. I've got a couple of ideas for this, just haven't gotten that far yet.

After I get everything fused on I will stitch it all down and add more stitching in places to enhance and fill out the design. I will also add other embellishments, although exactly what is yet to be determined.

There are six of us in my art group, The Sew Silly Sisters. We are each doing a 12" by 30" finished size panel for this piece that will end up being 72" by 30". Everyone is stitching and embellishing their own piece. When they are done, we will sew them together then layer it with batting and backing. Someone will do a little bit of quilting to hold everything together, but the idea is to only do minimal quilting at this point.


Monday, December 2, 2013

Flying South

My last class sample is finished!


The quilt is fairly big, 72" by 72" and we still have quite a bit of snow on the ground. Makes it difficult to get a full view photo of this quilt, but I think you can get the idea.

This one should look somewhat familiar because I have made another version of this pattern and called it Scrap Jar Insanity. The pattern for the center is from the book Cut the Scraps. In the book she calls it Fly Away. The pattern for the border is called Migrating Geese and is a technique developed by Deb Tucker of Studio 180 Design.


Friday, November 29, 2013

Star Value Top Finished

The November project for my scrap group was the Star Value Quilt. My top is finished!


The pattern can be found here and includes instructions for 5 block sizes. I made the 24" blocks and did twelve blocks. My finished top is 72" by 96".

No one else in the group was able to finish a block during the class. We are meeting in December, but there is no new project so hopefully some of them will be able to get one of the previous projects finished.

I am already planning another one of these quilts. It will be a Quilt of Valor. A guild friend gifted me some red and blue squares that will be perfect for the stars. I already have plenty of light background fabrics and gray/black. I purchased a few 1/8 yard cuts of cheddar fabric to use for the diamonds. I'm planning for this quilt to be my main retreat project for my guild's February retreat.

Notice the snow in the photo above. And we got more snow after it was taken. Spooky is not fond of the snow. She has started behaving better so she can hang out with me in my sewing room.


Wednesday, November 27, 2013

A Few More Ornaments

The crochet thread I ordered came in so I have made a few more ornaments.


I'm using size 3 cotton crochet thread with a 2.75mm crochet hook. The center wool circles and yo-yos are about 1.75" in diameter. Again, this is the tutorial I am using for inspiration. I have experimented with the crochet stitches around the edge as well as the centers.


Tuesday, November 26, 2013

Scrapper's Delight and an Iron Review

I'm trying to finish my class samples for the next quarter of classes at my LQS. Next quarter I'm doing one of the quilts from the book Sunday Morning Quilts.

It uses strips (or strings).


I can pack quite a bit of fabric into this bin but when I open it they kind of explode out. I worked on this at work over the last couple of weeks in between my other duties. I finished six blocks.


I want to make at least three more blocks, maybe six more. I'll work on those when I teach the class so I can demo the technique. Not many people around here seem to be familiar with this type of improv-style piecing. I've already had one person express interest in the class!

Recently we had to replace one of the classroom irons at my LQS. The owner bought a cordless model.


This one is by Panasonic. It has a cover that locks on for travel. The iron sits in the dock to charge. It is dual sided so you can't stand it up on one end. You just put it back in the dock instead.

Pros: (1) It is dual sided and there is no cord (only the base plugs in) so it works well for both left-handed and right-handed quilters. We routinely have both at the store. (2) It is a good weight, not too heavy and not too light. (3) It has a good size reservoir for water but we haven't tried it yet. We keep a spray bottle full of water at each ironing station and only fill the irons if steam is required for a particular project. (4) If you are taking this iron to retreat or a class, you don't have to wait for it to cool down before packing it up. The cover locks on securely and the cord retracts into the base.

Cons: (1) It is dual sided and folks are always trying to stand it up on one end which does not work. (It is comical to watch though.) I've also seen some folks just leave it sitting on the ironing surface while they adjust their fabric instead of putting it back in the dock which over time is going to ruin the ironing surface. (2) It does not seem to get quite as hot as I like. Not everyone has had this complaint though. I may just be picky. (3) It seems to take longer to heat up than I am accustomed to.

I'm not sure how long it stays hot once you remove it from the dock and are using it. So far we've just used it for pressing seams which only takes a few seconds. If you were trying to press a large piece of fabric or a garment, I wonder if it would stay hot enough until you were ready to put it back in the dock to adjust your project/garment.

Overall, I think this is a great iron. For the store it is perfect because we often have both left-handed and right-handed students in the same class. The majority of the time we are just pressing seams with it and have had no issues with it staying hot long enough. It is pricey, retailing for $130 but worth it if both righties and lefties will need to share the iron or if you need a good iron to take to class or retreat.


Monday, November 25, 2013

Swap Goodies

A few months ago when Stephanie, of Peas in a Pod, visited we made arrangements to do a private swap. I made her a cover for one of her sewing machines.


Her machine is much bigger than my Bernie. I had to put my camera bag underneath the cover so that it would stand up nice for a photo.

She made me a new pillow for my sewing room chair.


Click on the image to make it larger so you can see all the details. The star is English Paper Pieced and then appliqued on the background. Notice all the lovely hand stitching she did echoing the star. And the pompom fringe is so fun. On the back she put in a hidden zipper so I can take out the pillow form and wash it, if necessary.

Good swap partners always include extra goodies and Stephanie is a good swap partner!


The small circle on the right is a little tin which contains a tape measure. I sent her a fun tape measure too. The little "quilt happy" book on the left is a book of sticky lint remover sheets. I've never seen a book of lint remover sheets before. Every quilter needs a lint remover and these sheets work well! The spiral bound book is a journal. On the cover it says, "I am fairly certain that given a Cape and a nice tiara, I could save the world." How fun is that?! I love journals and use them. I am the secretary for my art group and this journal is going to be used to keep us organized.

Thank you so much Stephanie! I am so lucky to be able to call you my friend! Go visit Stephanie's blog to see the cover I made for her on the machine it is intended for as well as the extra goodies I sent her.


Monday, November 18, 2013

Monday Finish

I finished up the binding at my guild meeting on Saturday.


It was a bit breezy yesterday when I took these photographs. I could not get the quilt to stay still!

Here is a detail shot of the front.


I used two packages of Honeycombs for this quilt but only used 73 for the front. The other seven went on the back.


And here is a closeup of the back. The quilting shows up really well on the back.


The quilt is titled Hexa-Chevragon and the idea came from this tutorial. I altered the pattern to use pre-cut hexagons and trimmed my blocks a bit differently. The finished size is about 41" by 56". The quilting is all free-motion done by me on my HQ Sweet 16. I used Signature cotton 40 wt. thread in an Ivory color which oddly is almost the exact same color as the Kona Ash solid grey.


Friday, November 15, 2013

Friday Finish

This was a recent scrap group project.


Finished, washed and ready to be turned in to our charity quilt chairperson at guild tomorrow. It turned out 48" by 54". It is simply quilted with an all-over meander using white thread.

And check out my new header! I learned how to make a photo collage yesterday afternoon using PicMonkey. It took some trial and error to get the size right so that it would fill most of the top of the page. Not bad for someone who really doesn't know what they are doing but is willing to try something new and see how it goes. It only took me about 30 minutes to get it to the "good enough" stage.


Tuesday, November 12, 2013

Half Dozen Done

I've made six ornaments so far. I ended up redoing the yo-yo one with the correct size hook (top left in photo below). I like it much better now.


Things I have learned:

1. When using a button in the center, if there are only two holes it is best to place the hanger so that the holes line up vertically. Otherwise, the button tends to pull away at the top.

2. Doing four chains and skipping two double crochet gives a more petal-like look (bottom left with the cream wool center and red button in photo above).

3. I have lots of fun buttons in my stash, but I'm having a hard time using them. LOL! I don't seem to want to use it unless I have a duplicate I can keep for my "collection."

I've ordered a couple more colors of crochet thread for these. I'm going to wait until it comes in before making more. Tutorial information can be found here.


Monday, November 11, 2013

Quilting My Hexa-Chevragon Quilt

I'm not even done, but I really love this one.


I started by stitching in the ditch around the columns of hexagons. Then went back and forth in the chevrons.

Aside: I have succumbed and gotten a Pinterest account. I'm "Alamosa Quilter" there too if you are interested in seeing the few things I've pinned so far.

Through Pinterest I found a new-to-me blog, The Inbox Jaunt and this tutorial. So I tried it.


LOVE!

Then I added ovals around the leaves.


While the light was still good I snapped a few more photos.

The back - in progress:


The front - in progress:


I hope to get this finished soon. I'm already thinking about what I will use for binding. I have a couple of good options in my stash.