Showing posts with label finish. Show all posts

Monday, February 3, 2025

Basic Zipper Bag PDF Pattern :: Free for a Limited Time

 I finished up my personal sewing project for the month!

Hexie Bag Side One Finished

Hexie Bag Side Two Finished

This is what I chose for the lining.

Hexie Bag Inside Finished

I filmed the process of actually sewing the bag and currently am offering the pattern I wrote for this bag for FREE. Click the link below and use the code FreePatternValentine2025 to get a copy for free through Thursday February 13, 2025 at 6pm Mountain Time USA.

Basic Zipper Bag PDF Pattern

To view the video you can watch it embedded right here or click the link below the video to go to it directly on my shop YouTube Channel. If you are so inclined, please consider subscribing to my YouTube Channel. I have lots more instructional videos planned. I hope that it will become a good resource for folks.


Basic Zipper Bag YouTube Video

I give a couple measurements in the video but not enough to actually make the bag so you will need a copy of the pattern to be able to follow along and actually make one yourself. Note that the pattern is only for the actual bag. There are no instructions for the hexagon designs or the hand quilting/embroidery work. 

If you happen to be reading this after the coupon code has expired, the pattern will still be available for $4.99. It's a PDF download so you'll get the link to download the pattern within a few minutes of placing the order.


Monday, October 14, 2024

Crimson Tweed is Done, Done, DONE!

 As most Sue Spargo projects are, this one took quite a while. I've been working on this for about four years. The hand quilting alone took a little over two years, but I really only got to work on it on Thursdays during the hand sewing group at my shop.

I included lots of close up shots of the finished quilt below. 

Crimson Tweed Finished

Crimson Tweed Detail 1

Crimson Tweed Detail 2

Crimson Tweed Detail 3

Crimson Tweed Detail 4

Crimson Tweed Detail 5

Crimson Tweed Detail 6

Crimson Tweed Detail 7

Crimson Tweed Detail 8

The pattern is called Crimson Tweed by Sue Spargo. The pattern book is discontinued and I have already sold my personal copy of the pattern to a customer who wanted it. An internet search might turn up a couple copies of the book from an individual who is selling their personal copy or from a shop who might have a copy or two still in their inventory, but I don't have any copies of the pattern book any more.

If you get your hands on a copy be forewarned that this pattern is from 2010. At that time Sue Spargo was not doing as much embroidery on her designs as she uses now. Most of the embroidery I did on this is my own design. There were about 10 of us at my shop who did this project together. We all took ideas from each other and shared lace, buttons, beads and other embellishments within the group.


Wednesday, September 6, 2023

Second Batik Rug Finished

 For this rug I used 9 yards of fabric. It finished at 26" by 36" but as expected the size shifted after washing and drying. It's now 24" by 37".

second batik rug finished

I have enough strips cut to make another rug using these exact same fabrics. For that one I can't decide how I want to order the six different fabrics. Should I use all of each fabric so the stripes are wider or should I pick a fabric order and use one strip of each so that the fabric changes every 6 inches or so? I'll think about it for a bit, then make a decision and get busy on the third one.

You can read my previous post about the making of this rug by click here.

And all of the batik fabrics I have in stock in my shop are currently in my clearance section for $9 per yard. If you'd like to make a batik rug similar to mine you can pick up some gorgeous batik fabrics for a great price, while supplies last. You can make whatever you like with them though, not just a rug. Click here to go to the clearance section of my online shop. And in case you are wondering, yes I will still be carrying batik fabrics in my shop but I'm going to start over with all new batiks once I've sold out of what I currently have.


Wednesday, August 16, 2023

In the Garden Shop Sample

 I received a really lovely fabric collection recently called In the Garden. The collection includes two convenience fabrics - one is a panel and the other is yardage. They are both featured in the shop sample.

In the Garden block panel, front of the sample

Above is the front of the quilt. It features the printed block panel. These blocks are about 20" by 20" and look like I did a lot of work to make them, but I didn't. It's printed just like that! Other uses for this fabric is to use one of two of the blocks as the outside of a tote bag, use one block for a pillow, use one block as the center of a medallion style quilt, or fussy cut out a block and applique it to the back of denim jacket or a sweatshirt.

In the Garden petal fabric, back of shop sample

For the back I used the petal print. Other uses for this fabric would be to use it to make orange peel blocks. You can simply iron fusible web to the back side, cut out the petals, fuse them to a background and stitch around them. Or you could cut them out and hand applique them down.

I like to label all my quilts but I didn't want the label to be noticeable.

label on the back side is hidden

Can you see the label in the photo above? If not, look below to see it.

label showing on the backside of the quilt

These fabrics have such a nice feel to them! The quilt finishes at about 41" by 41". Right now I have the entire fabric collection in stock, complete with the block panel and the petal fabric.

If you want to make one too this is what you'll need:

One In the Garden Block Panel, 1 1/4 yards of In the Garden Petal Convenience Fabric (a quantity of 3 if ordering from my website), and 1/2 yard of binding fabric (a quantity of 1 if ordering from my website) - any of the fabrics in the collection would be good for binding but I used the In the Garden Dahlia Dream Verdant one. In addition to the fabric you'll also need some batting. I used a crib size package of Quilter's Dream Fusible 80/20. 

I opted to quilt it quickly with an allover meander, but you could also quilt this really fancy and hide the fact that it's a printed panel even more. However, everyone I have showed this sample to in person have thought that I pieced it. I have to point out to them that it's a printed panel - so anybody can make one of these!


Tuesday, June 6, 2023

Boxed Up :: A Finish

 This one took me a while to quilt. I used rulers for the whole thing. It took so long because I didn't get a chance to work on it for over a week. Too busy with other things at the shop!

hanging view of Boxed Up quilt

Here is another photo of it without shadows.

laying down view of Boxed Up quilt

The pattern is called Boxed Up. Its a Cluck, Cluck Sew pattern - which means it is a good one. This is the crib/baby size and finishes at 48" by 58". The fabric collection I used for this is called Swatch.

Here is a close up view so you can see the quilting better.

detail shot to show the quilting

I used my Westalee 2" circle template and a straight ruler on my Bernina Q20.


Wednesday, January 25, 2023

New Pillow :: A Finish

 I turned a mistake into a new pillow.

New flannel star pillow

It measures 16" by 16" with an envelope back.

This star was originally made as the center for my Flannel Plaid Star Quilt. However, I seriously miscalculated and this star was way too small for the center of the quilt. I just threw into a bin and made a correct sized center star for the quilt. When I was cleaning my office recently I found this block and decided to turn it into a new pillow for my house. All that was required was a little simple quilting and making the envelope back from some scrap flannel.

We really needed a new pillow too!


Tuesday, January 3, 2023

Charity Finish and Tried a New Ruler

 I finished this quilt recently.

charity quilt finish

I used some scraps of older Kim Diehl fabrics and the Cats Cradle ruler from Creative Grids.

Cats cradle ruler
I tried several different layouts of the blocks and blank squares. I went with this one because I had enough fabric. Other layouts would have required me to dip deeper into my stash or buy more fabric. The only thing I had to use from my stash for this one was the inner border fabric and binding. The binding was actually leftovers from my binding bin. They are several different black fabrics but it is hard to tell that from the photo. You can really only tell they are different fabrics up close.

The quilt finishes at 46" by 54". My Cats Cradle units finish at 4". I quilted this one myself using my Q20.


Thursday, December 15, 2022

Charity Finish

 I did a big clean out of my office at my shop last week. I threw out a bunch of junk and found a few treasures.

I found a one yard piece of convenience fabric (cheater cloth). I also found a scrap of batting that was the perfect size, left over backing fabric from a shop sample that was the perfect size and leftover binding fabric from my binding leftovers stash at home. So this project cost me nothing!

convenience fabric charity quilt

Not sure if I will just donate this to my local guild for them to do whatever they want with it or if I donate it elsewhere.


Thursday, December 8, 2022

Eclipse Quilt :: A Finish

 My Eclipse shop sample is all done. 

Eclipse Quilt

I used all Australian Aboriginal Fabrics for this. I love these 5 yard patterns! They are all so well written and easy to follow. 

The details

Finished size: 58" by 70"

Pattern: Eclipse

Fabrics used: Kangaroo Path Blue, Plum Seeds Orange, Bush Spinifex Green, Bambilla, Untitled Neutral


Wednesday, September 14, 2022

Woodland Winter Quilt Kit :: A Finish

 Finally got the cat to let me get this one quilted and bound.

Woodland Winter Quilt Kit Sample quilt

This one is called Woodland Winter Quilt Kit. It finishes at 75" by 75" and is a beginner friendly kit. The only piecing involved is the four nine patches and eight large half-square triangles. The rest of the piecing is just sewing the units together in a five by five grid.

The four large printed blocks are from a panel, which is of course, included in the kits. Unfortunately, I don't have any more panels, besides the ones in the kits. And honestly, I don't have much of the fabrics included in the kits either. It's been a very popular collection, Woodland Winter.


Monday, September 5, 2022

Chubby Tubby Finish

 I got my new set of shop sample Chubby Tubbies done!

new set of Chubby Tubbies using Random Thoughts fabrics

These were made using some of the fabrics from the new Random Thoughts collection by Marcia Derse for Windham Fabrics. I also just received a resupply of the patterns, Chubby Tubbies.

You need 5 fat quarters, 4 zippers and some batting to make these. I used Soft 'n Stable batting which is why these stand up so nicely on their own. A half yard package of Soft 'n Stable is plenty for all four bags. You can use whatever batting you want, but the Soft 'n Stable is what makes these stand up nicely. However, if you use Soft 'n Stable and quilt your bag exterior like I did, cut you exterior fabrics and the Soft 'n Stable 1" bigger in both directions then square them down to the appropriate size after quilting. 

There is one other product I really love to use when putting zippers in bags. It's called Wonder Tape. Below is a video I made demonstrating how to use this hemming tape for zippers. 


This product will wash out if you wash your item but it won't hurt anything at all if you don't wash it out. I have used it for years to install bag zippers and rarely wash the finished bag.

For me, this product was a "game changer" for installing zippers in bags. My zippers look much better in the finished bag since I started using it.


Monday, August 1, 2022

Cattle Drive :: A Finish

 Despite the help from my "quilt tester," Ms. Boo, I was able to get the binding finished on this shop sample. She just loves this quilt for some reason and insisted on sleeping on it in my lap while I finished the binding. I'll have to get the lint roller to this before I hang it up at the shop!

Cattle Drive Shop Sample Quilt Front

Cattle Drive Shop Sample Quilt Back

It finishes at 54" by 65" - a great lap/throw size. The pattern is Quilters Palette by Villa Rosa Designs. Yep, it's one of their postcard patterns. You could use a panel in the center but if it is "standard" size (24" wide) then you would need to add some borders on the long sides to it to make it large enough for the center section.

If you go back and look at my previous post on this quilt, and you look closely, you'll notice that I did fix the center section. I just couldn't bring myself to make the backing and get it quilted the way it was. I finally realized that the reason for my procrastination was that I didn't like the center section with the alteration we had to do because the center fabric was cut wrong initially. You might also notice that the finished size is different too. In my previous post I used the finished measurements from the pattern. In this post I used the actual finished size from the quilt. I need to let them know that the finished size printed on the pattern is wrong.

I will be kitting this up and listing the kits in my online shop next week. The fabrics are already listed. I used the Sundance collection for this quilt. If you want me to let you know when the kits are available you can leave me comment with your email address or a way to contact you and I will let you know. Or you can email my shop directly at AlamosaQuiltCompany@gmail.com.


Friday, April 1, 2022

Pin Cushions :: Done and Done!

 Both of my Sue Spargo pin cushions are now actual, useable pin cushions!

Pin cushions front

Top: Canna Blossom Pin Cushion Kit or Canna Blossom Pattern

Bottom: Circle Play Pin Cushion Kit or Circle Play Pattern

Both of these were kits. They came with all of the required fabrics, even the fabric for the crushed walnut shell inner "pillows" and a piece of wool for the back. I opted to put the wool pieces for the backs into my stash and use a cotton fabric instead for the backs.

Pin cushion backs

Of course, I have these kits and patterns in my shop, Alamosa Quilt Company. I don't have a lot of them, but I do have some. I am ordering more though since I just finished the shop samples! 


Friday, March 25, 2022

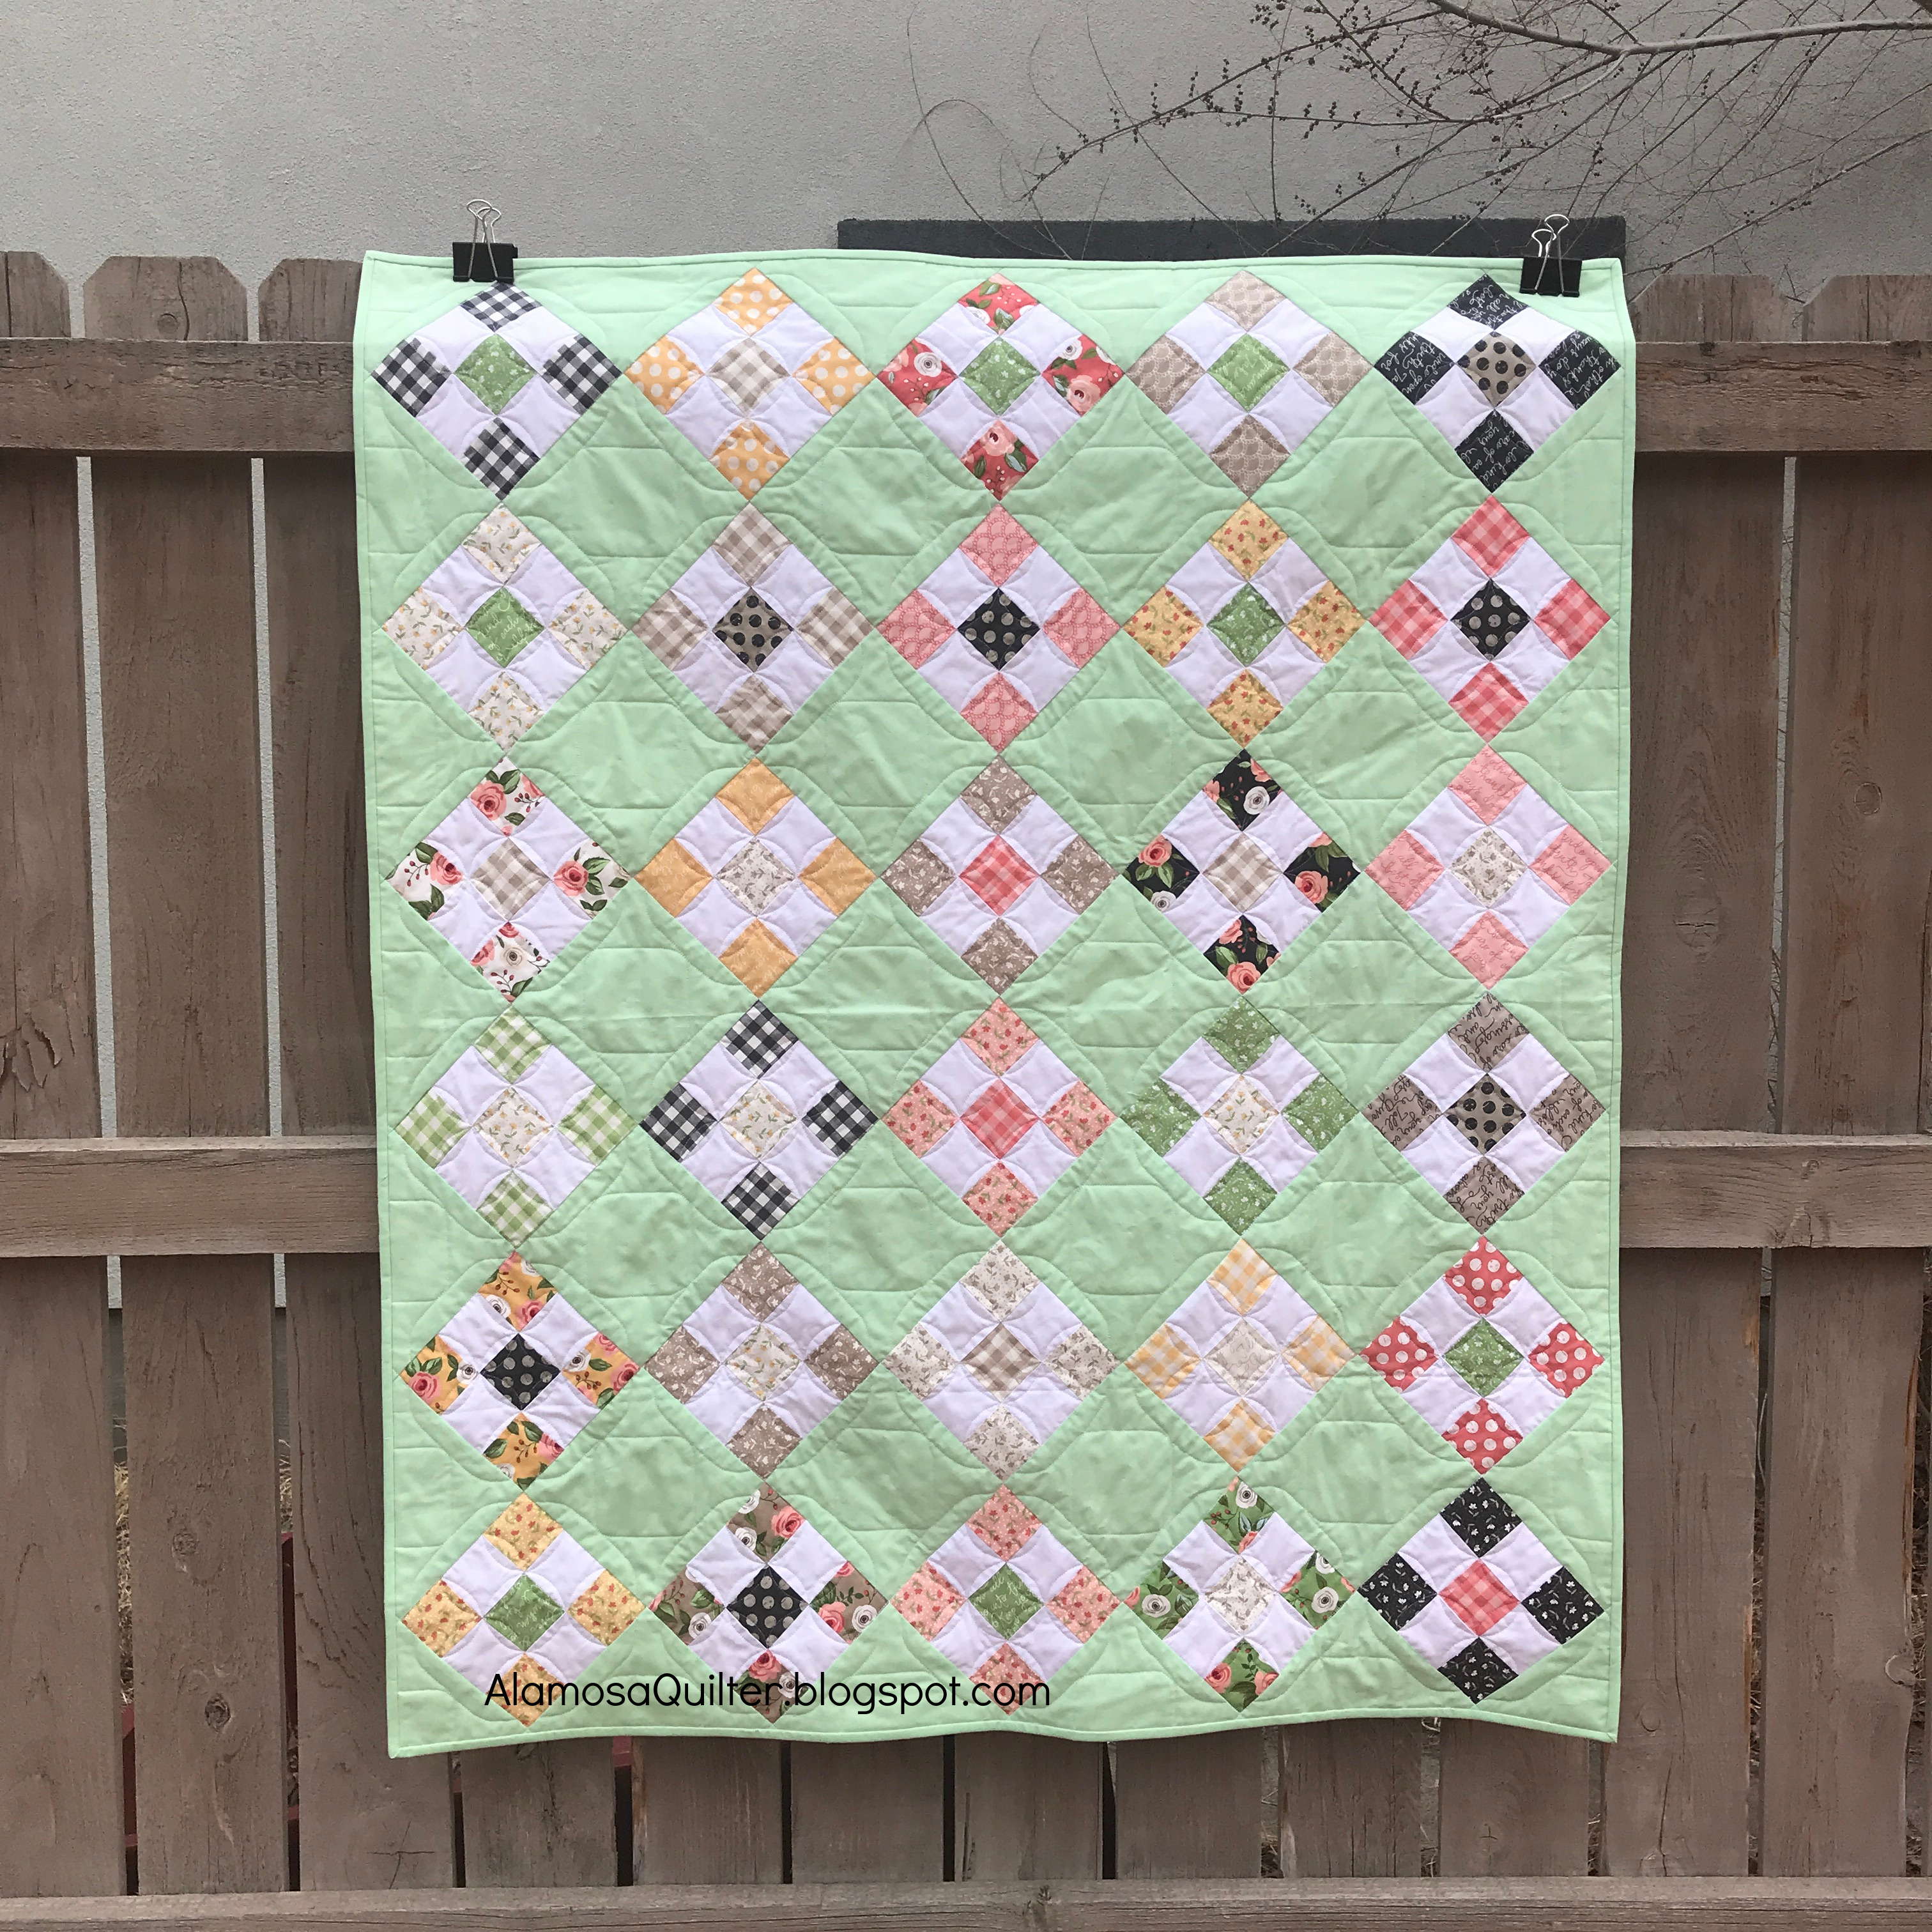
Nine Patch Quilt :: A Finish

 My mom pieced the top of this quilt and sent it to me to finish and donate to charity.

nine patch charity quilt 1

For the back I used this adorable elephant fabric.

nine patch charity quilt backing

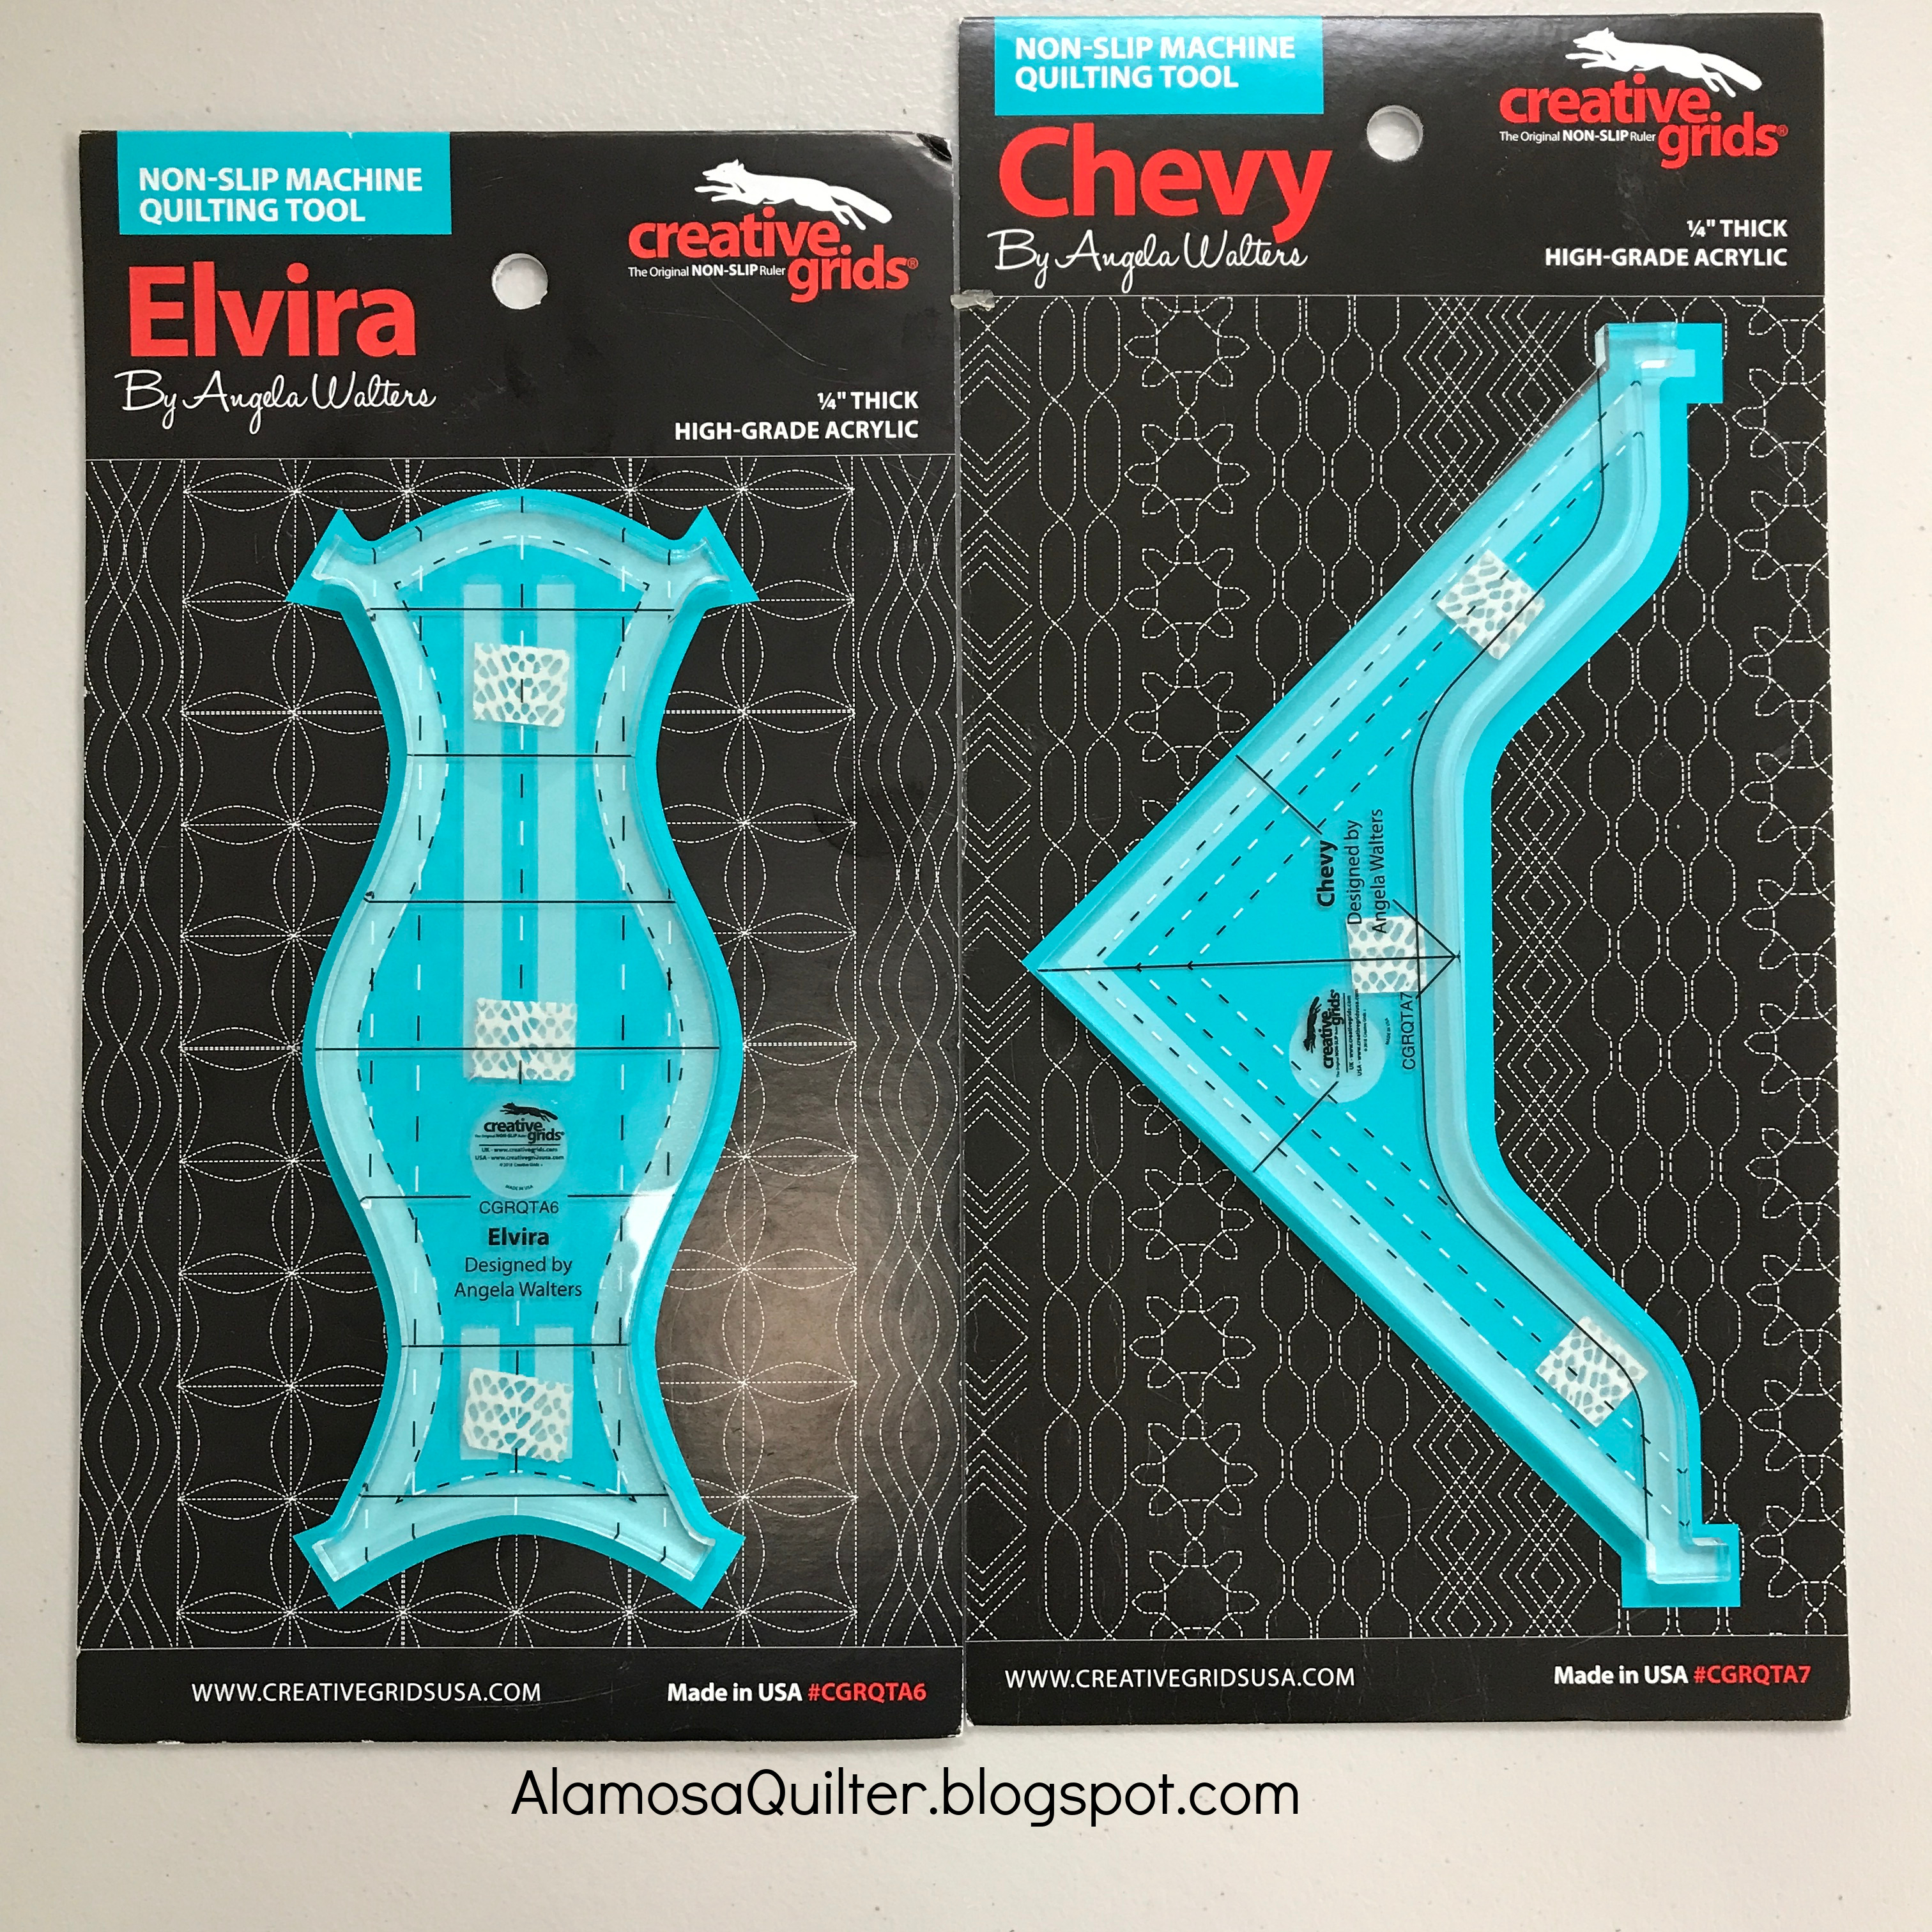
To quilt it I used a few different rulers.

nine patch charity quilt rulers used

In addition to the two above, I also used a straight ruler for stitching in the ditch. I stitched in the ditch around all of the blocks first. Then I used Elvira to quilt the nine patch blocks.

nine patch charity quilt Elvira quilting

The nine patches were made from 2 1/2" strips and Elvira is designed to quilt this pattern on 2" finished size pieces.

I used Chevy to quilt on the plain green squares.

nine patch charity quilt Chevy quilting

I went from one side of the quilt to the other then came back to get the other side of each square. Then I turned the quilt and repeated the process so that every plain square got quilted the same from all four points. It created an interesting pattern on the plain squares.

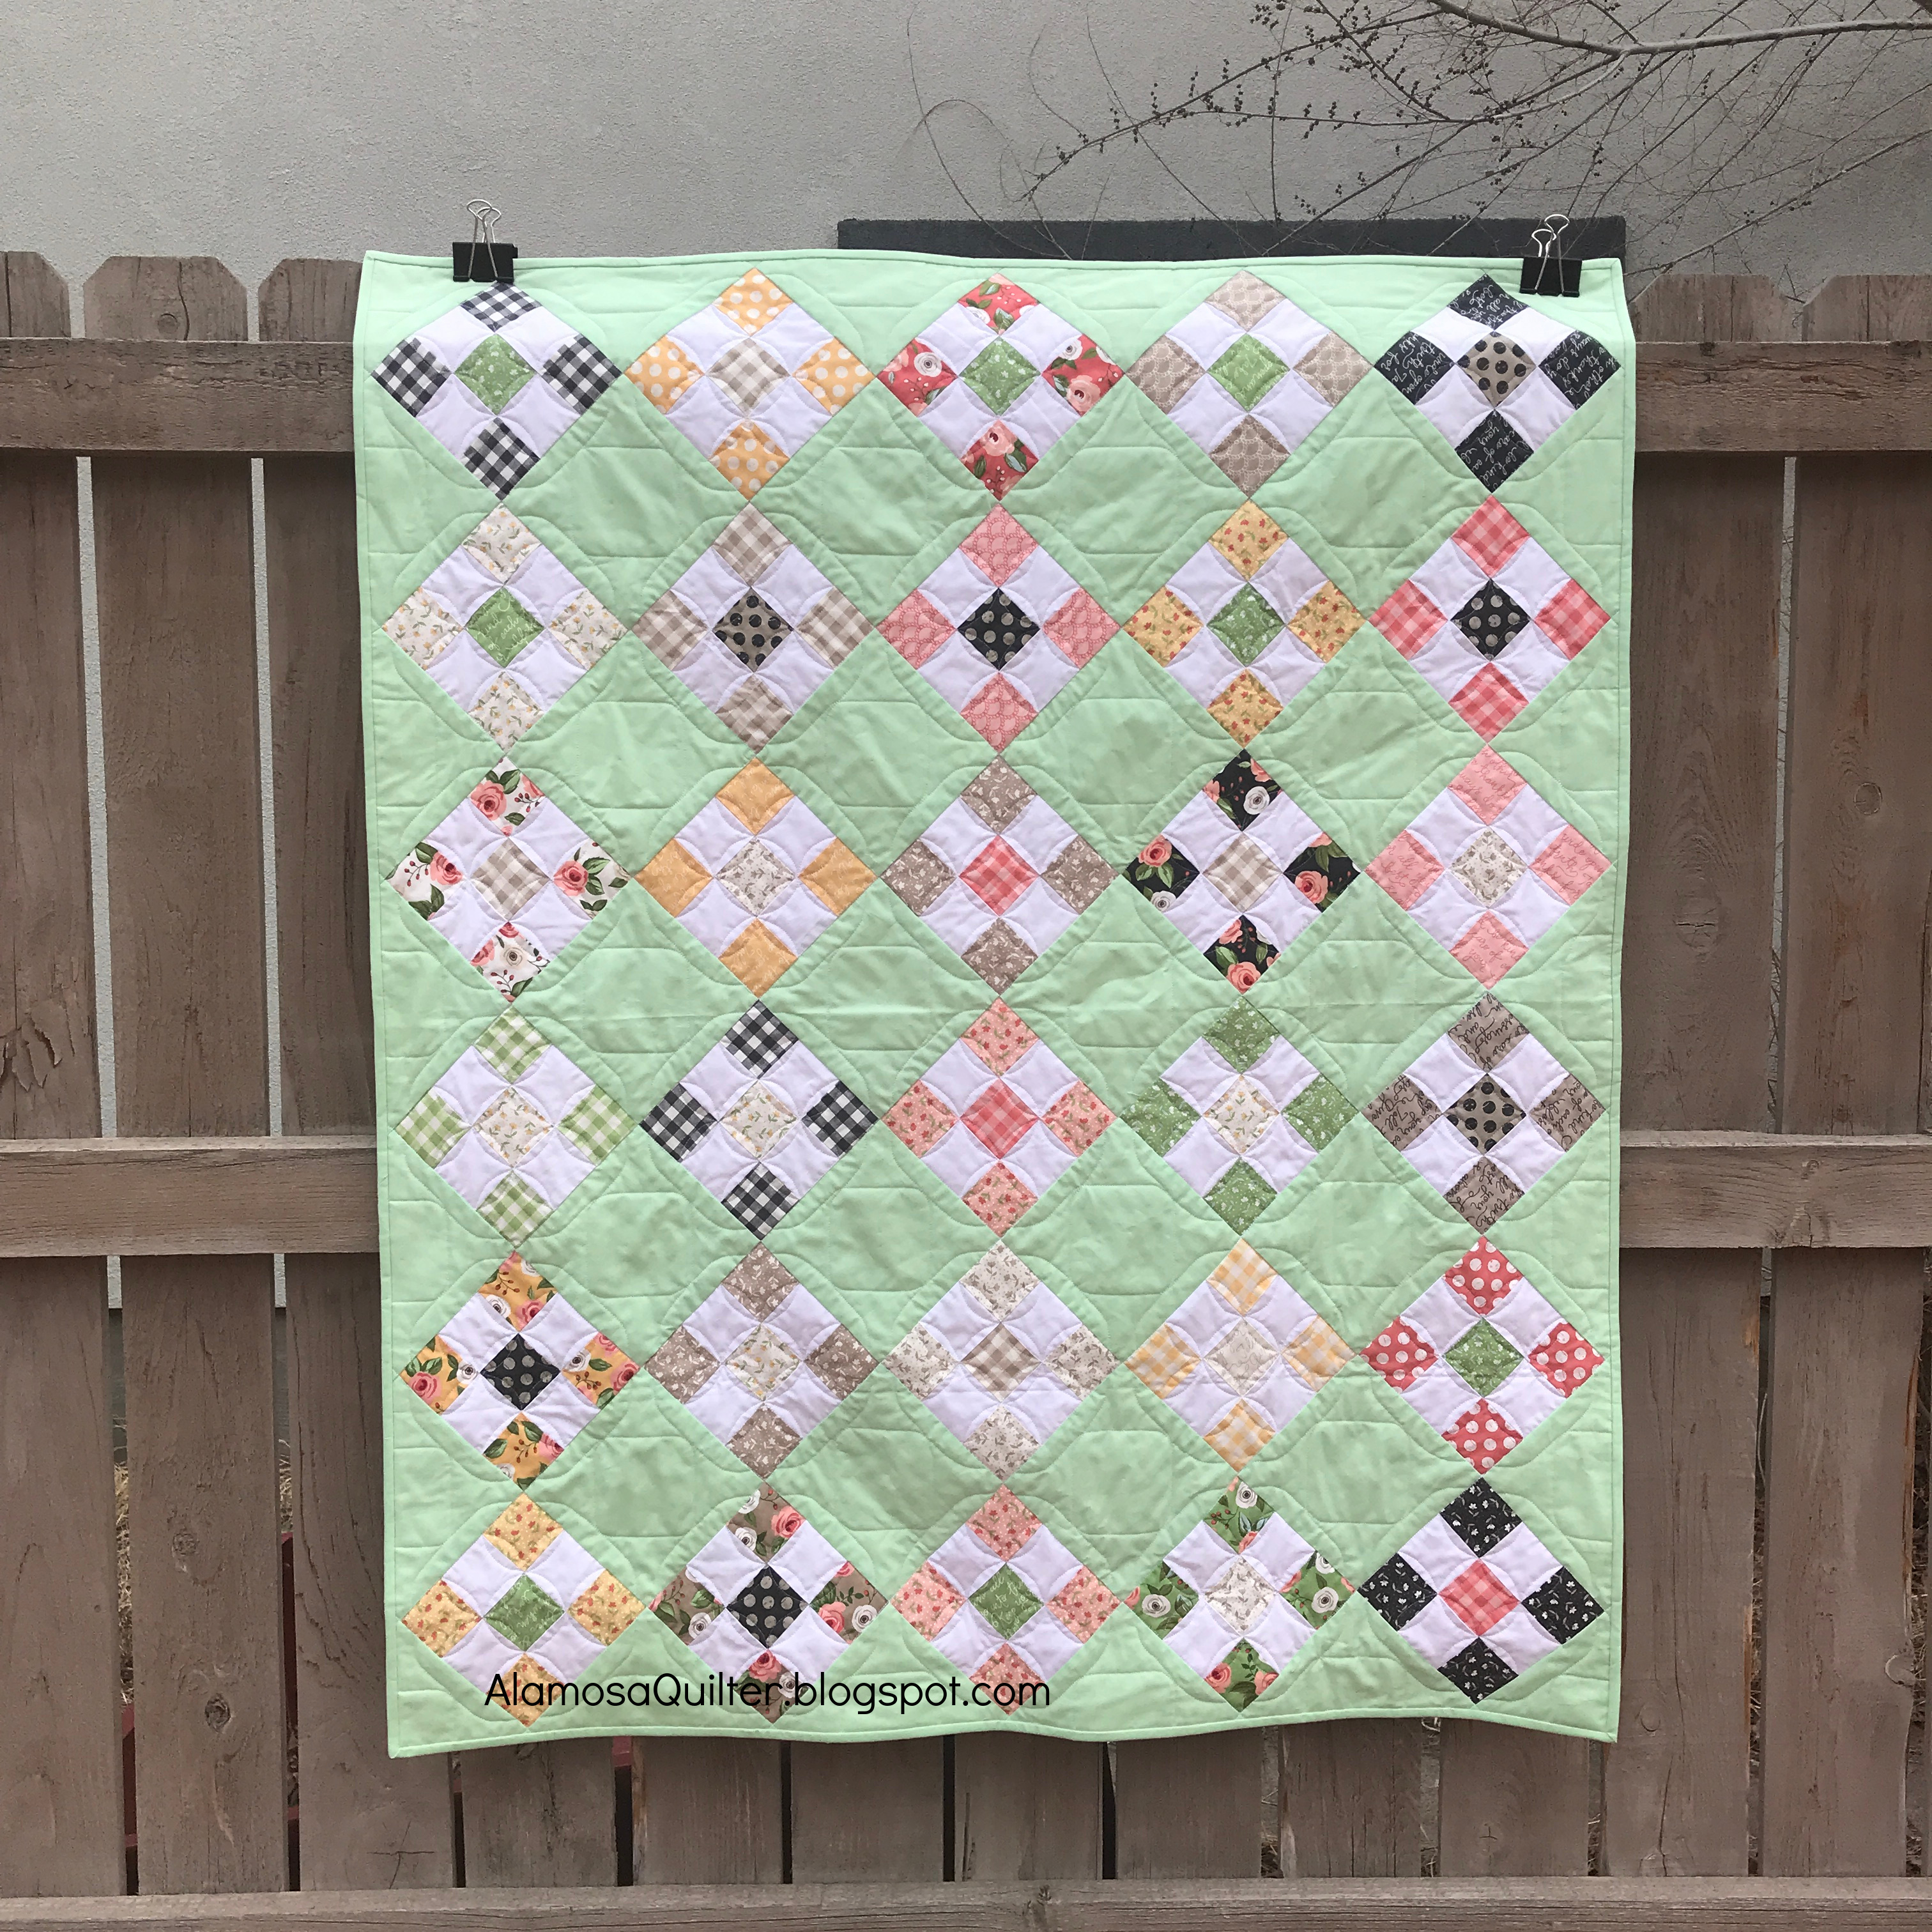
It finishes at about 40" by 50". Here is the finished quilt again.

nine patch charity quilt