Monday, March 30, 2015

Oncology Quilts

I collected three more quilts for oncology at my last guild meeting.

The first one was made by Judy.


The second one was made by Juanita. I believe she said it was a braided table runner pattern. She made two and bordered them together.


The third and last one was made by Debbie.


I just had to include a close-up of the quilting on this one. It was quilted by another member, Peg.


In each photo I included the bag that goes with the quilt. We have had lots of positive feedback on the quilts and bags.


Thursday, March 26, 2015

Spring Break Update

I'm still working on my guild challenge. I'm starting to worry that I won't be able to get everything done on it that I planned and get it quilted before the deadline of April 18th. I'm working on it every spare minute that I have.

I'm posting this picture mainly for my family. We ate at a relatively new restaurant for dinner last night. The boy ordered The Wrangler burger.


It was HUGE! And he said it was really good. The other things we ordered were also very good. If you are local, the restaurant is The Grille, the new restaurant at the golf course. The food is good and reasonably priced. The atmosphere is casual and the view is nice. It isn't loud like quite a few other places in town so it's a nice place to eat and talk without having to yell. I know this space has housed quite a few restaurants lately that didn't last long but I think this one has staying power. It won't last if we don't eat there though. So next time you are planning to eat out, consider giving it a try. Also, I noticed that beginning Easter Sunday they will be open for brunch.


Friday, March 20, 2015

'Tis the Season :: Guild Challenge TimeI

I will probably be a little quieter here than normal for a couple of weeks. It is guild challenge time again. Most of my sewing time for the next few weeks will be spent on this project.


Above is the only sneak peek I will be showing you of this project. Many guild friends read my blog. I'd like for them to be at least somewhat surprised by my entry. Although those that know me well will probably be able to easily pick out mine.

We are doing a Scavenger Hunt challenge this year. For full details, click this link to go my guild website. It is definitely a "challenge" for me!

I'll leave you with one other photo, not quilting related. I took it this morning.

Mist rising from the fence
This morning when the sun hit our fence it caused a spooky mist to rise from the fence. There is really nothing "spooky" about it. It rained yesterday evening and the fence was still wet this morning. When the sun hit the damp fence the moisture began evaporating. This doesn't happen often because we don't get much precipitation around here. But when it does happen it looks really neat. And it doesn't last long. I've tried to photograph it before but was unsuccessful because it stopped before I could find my camera and get outside. I was quick this morning.


Tuesday, March 17, 2015

Circles

My guild is doing a sampler quilt this year. It's kind of a quilt along. Each month a skill is demonstrated and then the block for our sampler quilt uses this skill.

This month the skill is sewing curves. I was asked to demonstrate sewing a traditional drunkard's path curve. I recently purchased the Accuquilt die for my Go! to cut 3.5" finished drunkard's path blocks. I pulled it out along with some scraps and started cutting. Then I sewed up a few to practice before I have to demo this next weekend.


The original plan was to just sew a few for practice and that would be that. However, once I got going I decided to really make something with these. I ended up cutting down the circles to 5.5" (unfinished) from the 7.5" (unfinished) they were. A few plain 5.5" squares plus the pieced circles turned into the block you see above. It is going to be finished as a pillow cover one of these days.

For now, I'm ready to do my demo on Saturday for my guild. I even cut up some extra block units for guild members to use for practice.


Monday, March 16, 2015

Another Sew Together Bag

I needed to make another one of these to use as a class sample.


I'll be teaching this as a class in April at Kathy's Fabric Trunk.


This is such a nice bag! I really enjoy making it. The finished product always looks so nice.


Friday, March 13, 2015

Rose of Sharon Bag :: A Finish

My little bag is finished. It measures about 7" wide by 7" tall by 2.5" deep.

I pebble quilted in the background around the appliques on each side. Here is the first side quilted and trimmed.


And for some reason I took pictures of the back side too.


I put a piece of muslin on the back only because it helped me to move it more smoothly while quilting. The muslin does not show in the finished bag. For the lining I used the same cotton fabric that is on the first side of the bag behind the flower.

Here is the second side quilted and trimmed.


And the back


And finally the finished bag.

Side One

Side Two
This was such a fun little project! I hope it makes a nice class. Now I just need to write up the pattern.

Previous posts on this project:

Post One, Post Two, Post Three


Thursday, March 12, 2015

A Fun Exercise

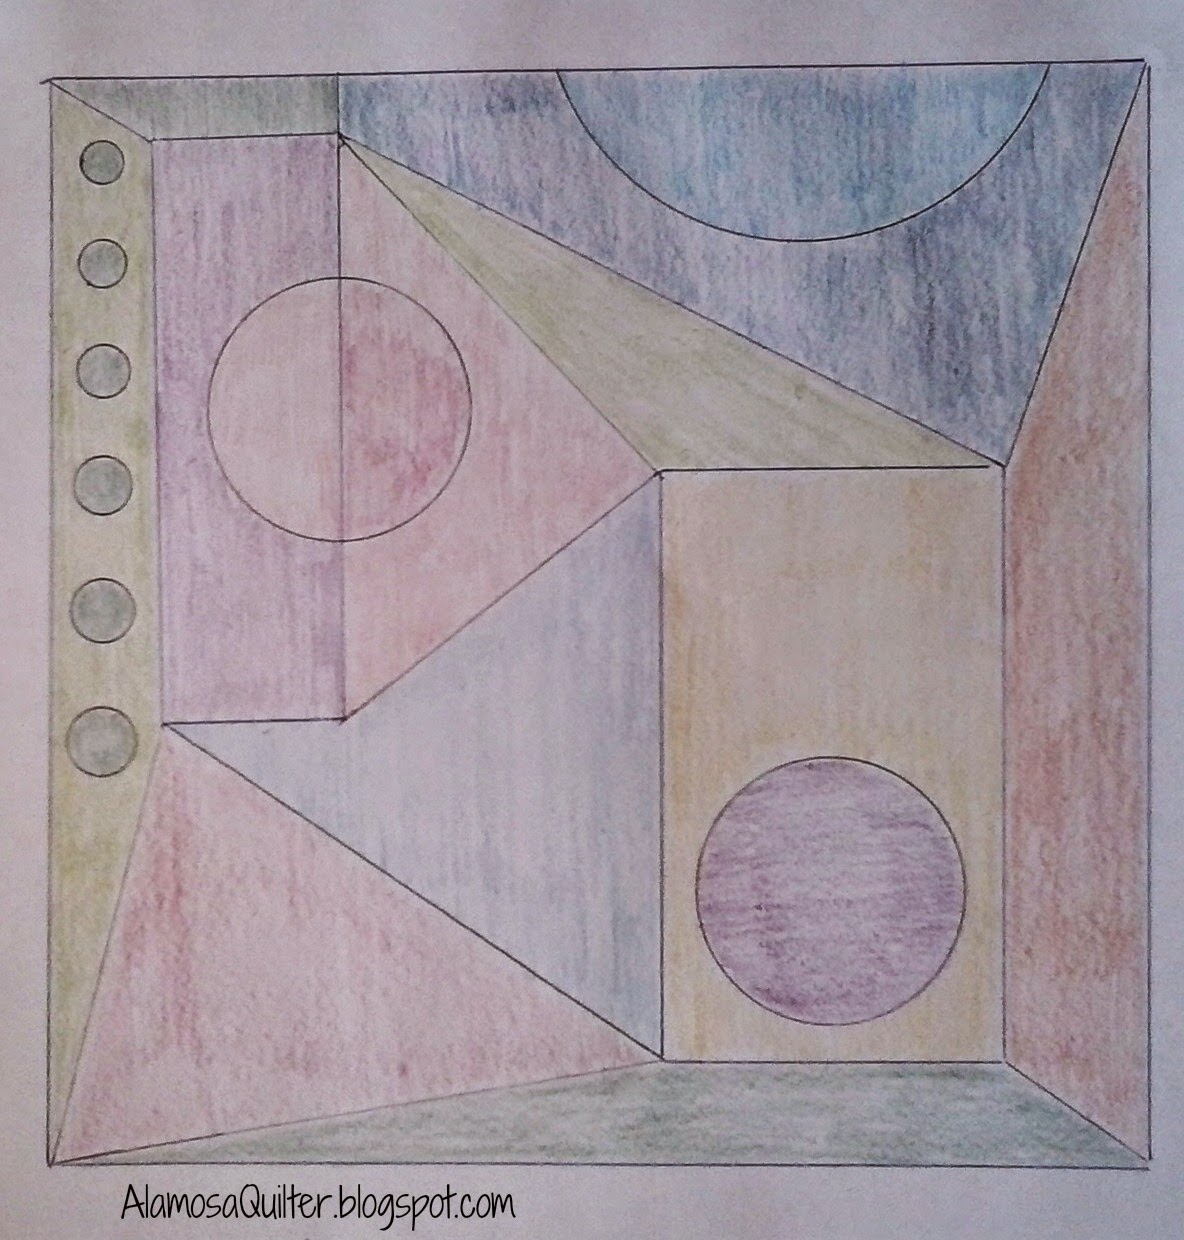
My art group did a really fun exercise at our meeting this week. We all started with a drawing of the same block.


We each added lines and circles to our copy of the block then colored them. They all turned out completely different.

Here is mine.


Peg's block


Janet's block


Barb's block


And Linda's block


We have a sixth member of our group but she is out of town and didn't get to participate this time.

These photos aren't the best quality because I took them with my phone and I'm still learning how to use the camera on my phone, but you get the idea. Aren't they all so different! It was really interesting. For homework we each came home with another blank copy of the block. We are suppose to make more copies for ourselves and do a few more with different colors and lines. Next month we will decide what, if anything, we plan to do with these.


Wednesday, March 11, 2015

Rose of Sharon Bag, Second Side

Like yesterday, click here for that post, I will show you process photos for each step of the second side of this bag.

Here is what it looked like before anything was sewn down.


Then the first layer is appliqued.


Then the next layers are added.


And finally the embroidery is added.


The next step is to quilt both sides then sew up the bag. I will post again when it is finished.


Tuesday, March 10, 2015

Rose of Sharon Bag, First Side

I will be showing you my progress on this little bag all week. This kind of work takes a lot of time, but I enjoy it. You can read my first post about this page by clicking here.

Here is what the first side looked like before sewing anything down.


Then with the applique done and a little hand stitching for texture on the cotton square. There is also a little bit of outline embroidery done at this point because I got carried away with my stitching and forgot to take a picture first.


And here it is with all the embroidery completed.


Tomorrow I hope to be able to show you process photos and the completed piece for the second side of this bag.


Thursday, March 5, 2015

Rose of Sharon Hand Embroidered Bag

I have had a request to teach some hand embroidery. It all started with this bag. I can't teach that exact bag without requiring folks to buy the book that the bird pattern comes from. So I'm developing my own applique pattern using my Accuquilt Rose of Sharon die. Students can draw and cut their own flowers, leaves and circles or use the die at home or at the store. Or we may decide to make kits.

Here is what it looks like so far.


I don't know which is the front and which is the back. I'm not sure it matters. Nothing is sewn down yet and I don't have a firm plan for the embroidery yet. We'll just have to see what happens. Should be fun!


Wednesday, March 4, 2015

QAYG Class

Monday I was back at Kathy's Fabric Trunk to teach another session of QAYG (quilt as you go). I had three students this time, but only managed to get pictures of two of their projects.

First is Leona's


And this is Rita's


A good time was had by all!


Tuesday, March 3, 2015

Covered Notebooks

After seeing Debbie's gorgeous notebooks last week, I decided to make some more myself. I even have composition notebooks already to go inside. I started with these two that have been cut out for over a year! The fabrics are the same but I quilted them differently.


Then I found a large enough piece of this cup fabric in my scrap basket. So I turned it into a cover.


And by this time I was on a roll. I decided to finally cut into some of my Charlie Harper fabrics. For this last one I used two fabrics for the outside.

The Front

The Back
For all of these I put a label on the inside front sleeve.


I used my own pattern for these but have been adjusting it to make it faster. The original tutorial I did for these is here, but I plan to update it soon. Originally I was leaving an opening and hand sewing it closed. I have figured out how to avoid having to hand sew at all and have streamlined the steps involved.