Showing posts with label pin cushion. Show all posts

Tuesday, June 3, 2025

Free Pattern for June

 I am slowly going through my older tutorials and turning them into downloadable PDF patterns. I am listing them for "sale" on my website although so far the price for them is $0.00 - FREE.

I picked my Wonder Clip Pin Cushion Tutorial for this month. If you want to go to the tutorial then click the link in the previous sentence. The tutorial is not written in a form that is downloadable. 

If you would like a download PDF of the pattern then click this link, Wonder Clip Pin Cushion PDF Pattern. 

Two versions of the Wonder clip pin cushion

If you would like a copy of the pattern please click the link and get it for yourself. If you have friends who would like a copy too, please ask them to go get a copy of the pattern themselves from my website rather than downloading it and sharing it. The pattern is free after all. What I get out of offering it for free is traffic on my website. If you just get one copy of the pattern and then email it to all your friends then I lose all of that traffic on my website I should have gotten. 

You can also get your friends a copy of the pattern by checking out as your friend and giving their email address at checkout so that they will receive the download link email.


Tuesday, May 16, 2023

Rabbit Hole Covers

 The name of this post is a joke. A group of us here has been making these and we joke that "we've gone down a rabbit hole." Hence the name, rabbit hole covers. Actually these will eventually be turned into pin cushions once I can stop hand sewing them and find time to turn them into pin cushions.

This first set are woven patterns. You do some stitching then you weave through the stitching to create the design.

Woven patterns

This one is a rice pattern.

rice pattern

This one is just a spiral ending with an X in the middle.

spiral pattern

We started making these then decided we needed some pattern ideas so I got us this book.

Sashiko 365 front cover

We are using gingham prints as our base fabrics. I have 8 of these in stock right now with more coming next month. The gingham fabrics are from a collection called Sorbet. There are only three prints in the collection - pin dots, tossed circles and gingham, each in 12 colors. The pin dots print also works really well for sashiko stitching with no marking, but I haven't started playing with it yet.

The book is called Sashiko 365 and is a fabulous book of sashiko designs.


Friday, September 2, 2022

More Stitched Scraps Pincushions

 I have been playing around with more scraps to make stitched pincushions. Previously I was using only one color of thread so I was using only that color fabrics. This time I decided to switch the threads to match the fabrics and use whatever fabrics I wanted.

stitched scraps pincushion

For all the fabrics except the bottom right I just stitched them down with a running stitch. But for the one in the bottom right corner I stitched along the print on the fabric. I really like the way that piece turned out and I have that fabric in several colors. I decided to make one with just one fabric using a different colorway of that print.


single fabric stitched pincushion

In case you missed my previous post about these click the following link to read more about this technique and see more examples: Stitched pincushions

All of these are finishing at about 4.5" by 4.5". I put crushed walnut shells inside these little pin cushions.


Wednesday, June 1, 2022

Stitched Pin Cushions

 I have been playing around more with my "Kanwandiko" stitching. I am leaning toward the name "stitched meditations" now or "mindful stitching" instead of a weird, made-up word. I have finally perfected my technique to one that is more my own rather than following someone else's ideas. Here are the few I have made so far.

Blue stitched meditations pin cushion

Red stitched meditations pin cushion

The two above are now finished pin cushions.

Completed blue and red pin cushions

These two below are just stitched but have not yet been turned into completed pin cushions.

Purple stitched meditation pin cushion

Solid fabrics stitched meditation pin cushion

The one above I made using only solids. I thought I would like it more than I do. Maybe if I had just used a single color of fabrics in various shades I would like it better. I'll try that at some point. Or maybe I it's the white thread I don't like. I could have used a different color thread for each fabric. Maybe I'll try that too at some point.


Friday, April 1, 2022

Pin Cushions :: Done and Done!

 Both of my Sue Spargo pin cushions are now actual, useable pin cushions!

Pin cushions front

Top: Canna Blossom Pin Cushion Kit or Canna Blossom Pattern

Bottom: Circle Play Pin Cushion Kit or Circle Play Pattern

Both of these were kits. They came with all of the required fabrics, even the fabric for the crushed walnut shell inner "pillows" and a piece of wool for the back. I opted to put the wool pieces for the backs into my stash and use a cotton fabric instead for the backs.

Pin cushion backs

Of course, I have these kits and patterns in my shop, Alamosa Quilt Company. I don't have a lot of them, but I do have some. I am ordering more though since I just finished the shop samples! 


Tuesday, March 29, 2022

Canna Blossom Pin Cushion

 I'm making progress on my Canna Blossom pin cushion. I have finished the hand embroidery.

Canna Blossom pin cushion

I just need to turn it into a pin cushion. My Circle Play pin cushion is also waiting to become an actual pin cushion. Hopefully I will get some time to get both of these finished up soon.

If you want to see what it looked like before the embroidery click the following link: Canna Blossom before embroidery.


Friday, January 14, 2022

A Couple Cute Gifts I Received

 My sewing friends are always so creative when it comes to gift giving! I got two adorable little items: a teeny-tiny pin cushion and an adorable needle book.

sewing gifts 1

The pin cushion is so stinkin' cute! The pin in it is a small applique pin. And it looks huge because the pin cushion is so small.

sewing gifts 2

She went to Harbor Freight and looked around to see what she could find that she could repurpose. This is a bolt screw cover less than 1" in diameter.

Someone else made me the needle book. Here is a close-up of the inside.

sewing gifts 3

I have another fun sewing themed gift I received but I haven't photographed it yet so I will have to share that with you another day.


Tuesday, January 30, 2018

Wonder Clip Pin Cushion :: A Tutorial

My mom made one of these for me and took one as a door prize to my guild meeting. The lady that won it at the guild meeting asked for the pattern, but Mom didn't use a pattern. This weekend I made one and took pictures so I could write a little tutorial.


The one on the left is the one I made. The one on the right is the one my mom made. For the purposes of this tutorial I made mine a little smaller. You can easily adjust the pattern to add more (or less) clip strips. The finished size of mine is 4.5" by 6".

I used scraps to make mine and it took less than a fat quarter worth of fabric. You'll also need some sand or crushed walnut shells for the filling.

Here is what you need to cut:

(4) 2" by 4.5" rectangle for the clip strips
(3) 1.25" by 5" rectangles for the spacers between the clip strips
(2) 2.5" by 5" rectangles for the end pieces
(2) 4.5" by 5" rectangles for the back

To make the inner bag that you will fill with sand or crushed walnut shells you need (2) 4.75" by 6.25" rectangles of scrap fabric.

Step 1: Fold the 2" by 4.5" rectangles in half lengthwise, wrong sides together. Sew both short ends. Clip the seam allowance a bit to reduce the bulk at the corner. Turn right side out and press.


Step 2: Layout your base pieces and put the clip strips on top of the appropriate pieces, aligning raw edges. Your base pieces are the (3) 1.25" by 5" rectangles and the (2) 2.5" by 5" rectangles. Notice that the clip strips are shorter than the base pieces. Just center them on the base piece as best you can.


Step 3: Sew the clip strips to their base pieces using and 1/8" seam allowance to hold them in place before sewing the pieces all together.


Step 4: Sew the pieces together using a 1/4" seam allowance. You will need to make sure you keep the unbasted edge of the clip strips out of the way.


Step 5: Press all your seams in one direction.


Step 6: Press one of the 5" sides of your back pieces over 1/4" twice, then topstitch the hem down. The piece on the left below is only pressed while the right hand piece is pressed and sewn. Notice that my fabric is directional. I made sure that the two edges I was working with in this step align the pattern on the fabric properly.


Step 7: Pin the two back pieces to the completed top piece, right sides together. The back pieces should overlap 1" to 1.5" along the hemmed edges.
Step 8: Sew all the way around the outer edge with a 1/4" seam allowance. I usually backstitch over the overlap section since this area will get some extra stress on it when it's time to put the inner bag inside.

Step 9: Turn it right side out through the opening in the back.


Step 10: To make the inner bag, place your (2) 4.75" by 6.25" pieces right sides together and sew all the way around the outer edge with a 1/4" seam leaving about a 2" opening in one of the shorter sides. You may want to shorten your seam allowance for this step since you will be filling this little bag with sand or crushed walnut shells. Clip the corners and turn it right side out then fill. I used crushed walnut shells for mine.


Step 11: Hand sew the opening closed. This does not have to be invisible since no one will ever see it once inside the cushion, but it does need to be securely sewn.


Step 12: Insert the inner bag into the cushion through the opening in the back. It may take some finessing to get the filler bag inside if you have filled it really full like I did. Just take your time.

That's it! Enjoy your Wonder Clip Pin Cushion!


Monday, March 21, 2016

French Knot Insanity Pin Cushion :: A Finish

It took me a while but I finally finished my french knot heart pin cushion. Click here to see my start of this little project.


I used a variegated Eleganza size 8 thread for the french knots. The texture is really nice in person. The pin cushion is about 4" square finished size and it is filled with crushed walnut shells.

Thought for the week: There are no ugly colors, only good ones used badly.

Do you agree? I think you could also substitute the word "fabric" for "colors." 


Friday, February 26, 2016

Embroidered Pin Cushion

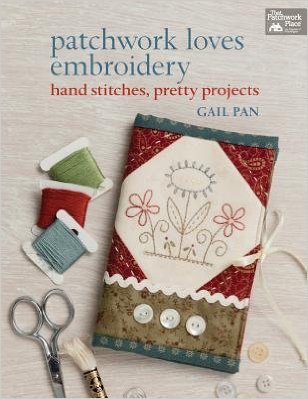
I recently purchased a couple of colors of Aurifloss for my shop, just to try it out. I needed a test project and chose one of the pin cushions from the book Patchwork Loves Embroidery.


Here is my pin cushion.


It is about 4" by 6" when finished. How did I like the Aurifloss? I loved it and ordered several more colors for the shop. Eventually I will get all of the colors but, like most people, I can't afford to get everything I want immediately.


Monday, December 21, 2015

Guild Christmas Party and AQC Update

Saturday was my guild's December meeting. We did a gift exchange. I took one of the needle books I made. I received this cute pin cushion.


The base measures about 3" and it stands about 4" tall. It's darn cute!

I also received this foot control bed.


Here it is "in action."


Thanks so much Mary Ann. I love it!

Alamosa Quilt Company Update: 

The construction phase is over. Next is painting and cleaning. I hope to get everything painted in the next few days then stay away for a few days to let everything dry really well. I'll take pictures once everything is painted.

On Friday afternoon I received most of my huge Moda order.


UPS delivered 36 boxes on Friday to go with the 10 or so that were delivered earlier in the week. Above is pretty much all fabric. Counting the boxes I received previously containing thread and notions (not shown in the photo above), there are 61 boxes of merchandise waiting to be opened, inventoried and put out on shelves. Probably won't start on that until January.


Wednesday, November 25, 2015

Needle Books and a Pin Cushion :: Finishes

I finished the dozen needle books I was asked to make as well as the pin cushion I was working on.


Here are the needle books standing on end.


I wish I could have lined them up straighter, but it was hard enough to get them to stand up like this at all!

The needle books will be off to their home next week. The pin cushion is for me.

Tomorrow is Thanksgiving here in the U.S. 

Happy Thanksgiving!