Showing posts with label challenge. Show all posts

Tuesday, July 11, 2023

San Luis Valley Quilt Guild Challenges

 It's challenge time again for the San Luis Valley Quilt Guild. Every year the guild presents a challenge to it's members in January.

Below are the rules for this year.

San Luis Valley Quilt Guild Challenge Rules 2023

Challenge quilt entries are due at the April meeting. In July I get to hang the challenge quilts at the shop for you to enjoy and vote for your favorites. So if you get a chance, stop by the shop this month to view them in person and vote. These will be hanging at the shop for the next few weeks. After that they will be in Del Norte at the Rio Grande Museum for a couple weeks while the SLV Quilt Guild Quilt Show is hanging at the museum. The dates of the show in Del Norte at the Rio Grande Museum are August 1 - 14, 2023.

2023 SLV Quilt Guild challenge entries


Please note that these are original works of art. There are no patterns available for you to purchase or order for any of these little quilts. If any of them are for sale, you will need to go to the quilt show at the museum in Del Norte to inquire about purchasing. None of them are for sale right now at the shop.

If you would like to vote but can't stop by the shop you can email me your votes. You can vote for up to 3 favorites. Here are the voting categories:
  • Best Representation of this year's theme
  • Viewer's Choice
  • Most Creative


Wednesday, July 13, 2022

San Luis Valley Quilt Guild Challenges

 This has been an annual thing at my shop. Every July I hang the challenge quilts from the San Luis Valley Quilt Guild members who chose to participate. It gives them some exposure and advertises their annual quilt show which happens the first two weeks in August.

The photo below explains the theme for this year: 

2022 SLV Quilt Guild Challenge Rules

And here are the 12 entries:

2022 SLV Quilt Guild Challenge Quilts

The bottom portion of the first photo explains the 4 voting categories. If you'd like to vote just leave a comment and use the 4 categories from the first photo. I will fill out a paper ballot for you and put it in the basket with the other votes. In your comment, just leave the name of the category and the appropriate number quilt you are voting for that category. You don't have to put a number for every category if you don't want to.


Tuesday, May 3, 2022

March Madness Challenge Winners

 My shop sponsored a little challenge recently. I called it March Madness because it's cute, catchy and you had to be a little bit mad to give it a try. You can click the following link to read the challenge rules: March Madness Challenge

We had eleven folks brave enough to give it a try AND bring their item back in for voting.

March Madness Challenge Display

There were some really creative items made using those little 1" finished size units! Visitors to the shop were able to vote for their favorites all month in April and I tallied the votes on Saturday, April 30th. Here are the winners:

March Madness Challenge Winners

That fish was hands down almost everyone's favorite but all of the entries received several votes each. There were only two votes separating 2nd place and 3rd place. It was fun and I'm already thinking about what kind of challenge I can give next.

Scroll back up and look at the first photo. I'm really impressed by my employee, Leah, who came up with such a cute and unique way to display such a wide variety of items. That was a challenge in itself!


Friday, March 4, 2022

March Madness Challenge

 I will be hosting a challenge in my shop this month. I'm calling it March Madness.

Here is how it works: 

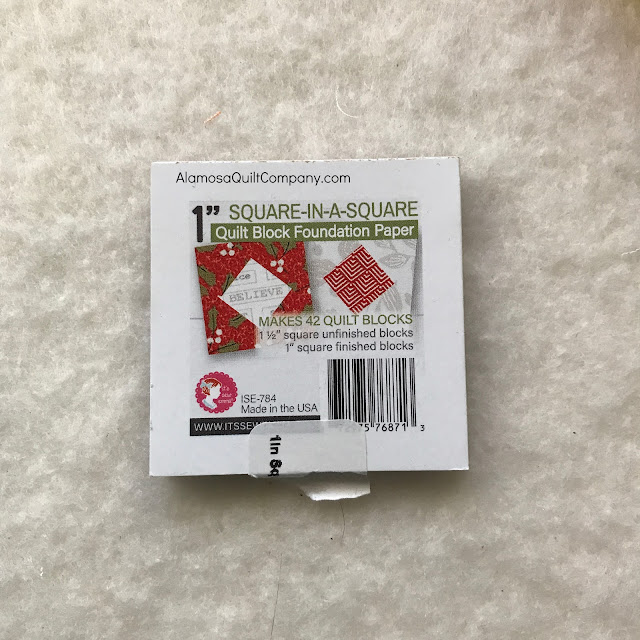
(1) You must purchase one (or more) of our 1" square in a square papers packs.

1" square in a square papers

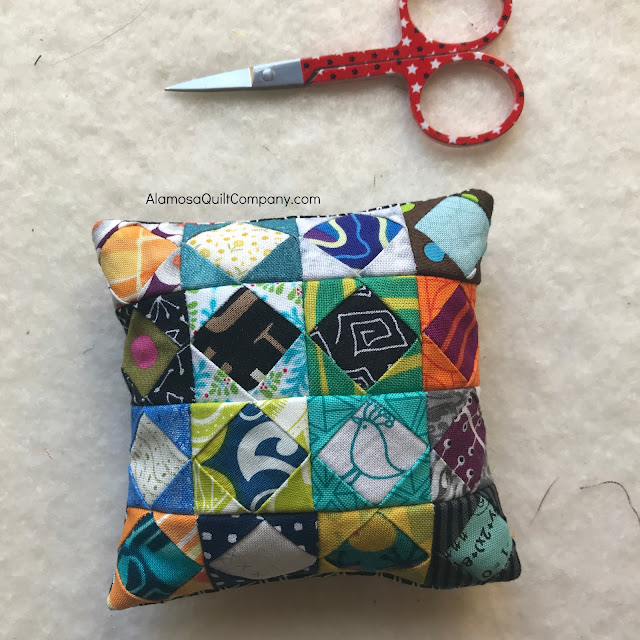
(2) Use at least 12 of these little blocks to make something - anything! I made a pin cushion using 16 blocks and it finishes at 4" by 4".

pin cushion

(3) Bring it into the shop by March 31, 2022

In April I will find a nice spot in the shop to display all the items that have been made so that folks can vote for their favorites. There will be prizes in the form of gift certificates to the shop: 1st prize will be a $25 gift certificate, 2nd prize will be a $15 gift certificate and 3rd prize will be a $10 gift certificate.

Should be fun to see what people come up with!


Saturday, March 28, 2020

Surgical Gown Project

This is a fairly long post. I am trying to be as clear as possible with photos of each step. The first one took me about 30 minutes to make, but now I am making one in about 20 minutes. You will be cutting out four at a time with these instructions.

What you will need:


Three 54" by 108" plastic table cloths from the dollar store will make FOUR gowns if you cut them out in the way I will describe. Other things you need are a dinner plate, scissors and/or a rotary cutter, a ruler, a cutting mat (if using a rotary cutter), a Sharpie or other marker for marking (use a marker, not a pen or pencil as they will tear the table cloth), an alcohol prep pad (optional, but you will thank me later) and not pictured are WonderClips (photo below). DO NOT USE PINS! These table cloths are plastic. Pin holes will not heal like when you pin fabric. If you don't have any clips, a little dab of glue used in strategic places can help. This plastic stuff is slippy. Whatever needle you have in your machine right now will work just fine.


Above is a photo of WonderClips. You only need a few. I think the most I used at one time was 6. Cute kitty dish is from our local gift shop Treasure Alley. Cute kitty dish is optional, but handy to contain the clips.

Cutting:

Open two of the table cloth packages. These will make your FOUR gown bodies. Fold one of them in half to make a 54" by 54" square. Using scissors, cut on the fold to make two 54" by 54" squares. Leave them together. Fold them in half again to make a 27" by 54" rectangle and them fold in half again to make a 13.5" by 54" rectangle.


Using your ruler and rotary cutter, cut three 1" by 54" long strips from one of the short sides. Do not worry if these are not exactly 1" wide. Set these aside as they are the waste and neck ties for your gowns.

Unfold the gown bodies back out. They should be 27" by 51" (because you cut 3" off for the ties). I found it easiest to use the cut edge as the top of the gown since you cut the edge evenly in the last step.

The center fold in the photo above is along the right hand side of the gown body - the side with the mark 3" from the corner. The side with the mark 4" from the corner is the edge I cut the ties from. It will be the top of the gown.

Measure three inches down from the top edge along the center fold and make a mark. Measure four inches from the center fold along the top edge of the gown and make a mark. Get your plate. Put the plate over the marks, so that it just covers the marks.


You can either use your marker to draw a scoop neck along the edge of the plate and cut it out with scissors, or use your rotary cutter against the edge of the plate like I did. Just be careful that your fingers are out of the way!


Along the center fold, measure 17" down from the center of the neck scoop and make a small mark.


This mark is your placement mark for the waist ties. Make sure that you mark both of the gown bodies.

Open up your gown bodies and separate them. I did the next step separately for each gown body. Fold the gown body so that the two outer edges meet in the middle.


Measure 11" down along each outside folded edge and make a mark 11" from the top edge.


The marker is sitting at the 11" mark in the photo above. Using your scissors slit the table cloth from the top edge down to the mark. This should be an 11" long slit. Do this on both sides. These are the arm holes.


Repeat this process for the second table cloth.

Now open up the third table cloth. Again, cut it in half to make two 54" by 54" squares. Then cut these in half again to make four 27" by 54" rectangles. Each of these rectangles will make one set of sleeves (that is, each 27" by 54" rectangle will make two sleeves).

Separate the 27" by 54" rectangles. Take one of them and fold it in half lengthwise to make a 13.5" by 54" rectangle.


Then fold this in half the other way to make a 13.5" by 27" rectangle. In the photo below the long folded edge is the one with the marker laying next to it. The short folded edge is closest (at the bottom) of the photo. The long folded edge is the important one.


Get your marker and ruler so you can measure and mark to cut out the sleeves.

Long folded edge is at the bottom in the photo above
On one side, draw a line 11" up from the fold. Along the folded edge, measure over 20.5" from the drawn 11" long line and draw a 4.5" long line up from the fold. Then use your ruler to connect the tops of these two lines with a third line. Without moving anything, use your ruler and rotary cutter to cut on all three lines. If you don't have a rotary cutter and mat, pin all the layer together anywhere off the sleeve to hold everything together when you pick it up. Cut on all three lines. You just cut out two sleeves. 

Now is where you may want to use that alcohol prep pad. I would wait until you are completely done with the marking. So if you are planning to make a few more gowns, wait until you have marked the last one before doing this.


Run that alcohol pad along the edges of your ruler where you marked. See that black stuff on my alcohol pad? That is the excess marker coming off the ruler. You don't want that to get onto your fabric if you are using one of your good rulers for this project! Clean it off now so you don't forget and ruin the fabric you cut later!

Now take everything to your sewing machine. You will be using a 1/4" seam allowance, but don't stress about being super accurate. You don't want it to be less than 1/4" because this stuff will rip easily, but if your seam allowance is a little wider in places it won't make a bit of difference.

Increase your stitch length. The normal stitch length is too small. It will cause the plastic to rip easily along the seam. Below is a photo of the default stitch length setting on my machine, which is 2.5 (as are most machines these days).


Increase that to about 4.


You will need one gown body, two sleeves and three 1" by 54" long ties per gown. Cut one of the ties in half. So you will have two 1" by 54" long ties for the belt and two 1" by 27" long ties for the neck closure.

Start by taking a sleeve and the gown body. Match the folded edge of the sleeve to the end of the arm slit. Clip the two pieces together. Then match up the ends of the sleeve with the top of the gown and add a couple more clips to hold things in place.


In the photo above, the scissors are pointing the end of the arm hole slit and the folded edge of the long side of the sleeve is clipped here. Sew the seam. 

Match up the two ends of this seam and clip along the shoulder and length of the sleeve.


Notice that there is a little bit of the top edge that extends beyond the shoulder seam into the neck area. The scissors in the photo above point to the edge of the neck scoop. You want to start sewing a little before the end of the neck scoop. DO NOT BACKSTITCH! Backstitching will only cause the seam to rip.


In the photo above you can see that I started sewing the seam at the clip and the scissors are pointing at the same place as the previous photo, where the neck scoop starts along the top edge of the gown. Since you can't backstitch at the start/end of the seam, this is the best thing we found to prevent the shoulder seam from ripping out when the gown is put on.

Repeat this process with the other sleeve.

Now add the two neck ties.


These go at the back of the gown at the top. In the photo above you can see the neck scoop underneath the ties. Overlap the ties with the gown body about 1" to 1.5" inches and sew them on. I stitched them on with a "U" pattern.

Carefully turn the gown right side out.

Find your mark that should be about 17" down from the neck right along the center fold of the gown.


Go ahead and slide the gown under your needle so that the mark is under your needle. Then overlap the two waste ties about 4" to 6". 


Center the overlap over the mark and stitch it in place with about 4" to 6" of stitching.


Neatly fold up your gown. Repeat for the other three gowns you have already cut out.


Here I am modeling the prototype. I have my hands behind my back because originally we didn't make the waste ties long enough. 

A big thank you is owed to one of my employees, Peg Collins, who helped me to deconstruct the gown I was given by the hospital and figure out how to turn a Dollar Tree plastic tablecloth into a disposable surgical gown! Thank you Peg!

Local folks, take your gowns to the SLV Health Foundation office located at 106 Blanca Ave. in Alamosa. The building is located on Main Street in front of the hospital between Blanca and Pike Avenues. Look for the glass door that says SLV Health Foundation. The door faces Arby's. There will be a box or tub or something for you to put them in just inside the door. If not, there should be someone there who will take them from you. Here is their contact information:


Kelly S. Gurule

Director, SLV Health Foundation and Volunteer Services
106 Blanca Ave.
Alamosa, CO  81101
719-587-5707

If you have a question chances are someone else might have the same question. If you leave your question as a comment below I can answer you with another comment so everyone can see all of the questions with answers. If you have a question, check the comments below first before you contact me. I might have already answered it!

If you prefer to contact me privately, since the shop has been force to close for a bit, the quickest way would be to contact the shop through Facebook, search for Alamosa Quilt Company, and message me or email the shop directly, AlamosaQuiltCompany at gmail dot com. You could also call the shop at (719) 937-2555 and leave a voicemail message. I am checking the shop messages daily during the week.


Monday, March 20, 2017

Charity Sewing :: A Finish

The first of three charity quilts from my shop is finished.


The backing fabric was purchased and donated by a very generous customer who was unable to make a block for the challenge but wanted to participate.


The second quilt is still in progress. We recently received new fabric at the shop and samples had to be made. As soon as I finish the last sample I'll get back to these quilts.

To see a photo of this quilt before quilting and to read about the details of the challenge, click here for my previous post about this project.


Tuesday, March 7, 2017

Charity Sewing

I had a block challenge at my shop recently. Folks purchased a small fabric pack that contained 8 different 5" squares. They then had to make a 12.5" unfinished block using at least 6 of the 8 fabrics and could add one fabric from their stash. We received 23 blocks from customers! I'm turning those blocks into quilts for the oncology department of our local hospital.

The first quilt top is completed.


One of my employees is also a long arm quilter and has volunteered to quilt these for me. She will work her magic on this. I'll sew on the binding so we can donate it.

The second quilt is in progress.

Originally I was going to make just two quilts from the blocks but have decided to stretch them into three quilts. I'll need to make a few simple blocks for the third quilt but I have a simple plan for those. 


Friday, October 7, 2016

Coloring Fabric Challenge Results

Last week I did an in-progress post on my coloring fabric challenge. Click here to read that post.

I'm happy to report that everyone has completed their projects and they are all so different!

Here is mine. I did a simple name banner wall hanging.


Peg put her name on a shirt.


Vicki embellished an apron.


I used Inktense pencils to color mine. Peg used watercolors. Vicki used crayons. 

Instead of doing an entire name, you could also just use the first initial on something. I thought an initial on a notebook cover would look cute.


Wednesday, September 28, 2016

Coloring Fabrc

I recently received a couple of the "coloring" fabrics I ordered for my shop. One is letters in triangles.


I cut up two of them and gave each of my employees and myself the letters of our names and challenged them to "make something with it." Over the weekend I worked on mine.


I have my name colored but I may add more. I quilted up the background to test out a new-to-me design which I am considering using on my Fancy Forest quilt. I decided that I really like it and will indeed quilt my Fancy Forest quilt using this design. More that another day.

Anyway, I plan to fuse the letters to the background and topstitch them on with black thread. I have a black ribbon that I will add along the tops and I may add a little hand stitching around the letters.