Showing posts with label charity sewing. Show all posts

Tuesday, July 23, 2024

Potato Chip Blocks Variation 2 is Closer to Done

 I'm getting closer to finishing up my potato chip quilt.


Quilted Potato Chip variation 2 quilt

I got it quilted this weekend. Next step is binding. I have some scrappy binding and I plan to use it for this scrappy quilt.

Check out the backing fabric I used. I found this in my stash.

Backing fabric
closeup of backing fabric


Wednesday, June 12, 2024

Potato Chip Block (variation 2) Sew Along Progress

 How are doing with your Potato Chip variation 2 blocks? I have four blocks completed and the other eight are in progress.

four completed blocks

Eight partial blocks

If you missed the instructions for these fun blocks, click the following link for them: Potato Chip Block Variation 2 Instructions


Monday, December 20, 2021

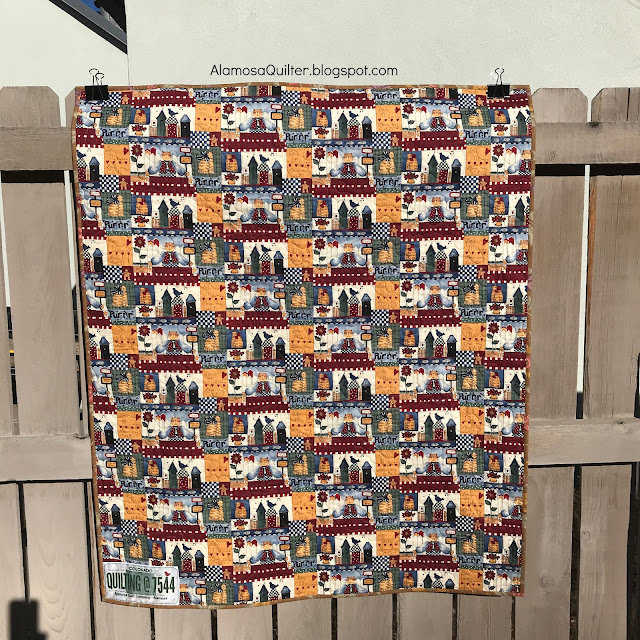
Another Finish

 This is third quilt I quilted with my new Q20 sit-down machine. It is a digital sample (that is, the quilt is printed on the fabric, not pieced) that I got in my shop back in 2016 for some fabric I had in the shop at that time.

digital sample 1

I quilted it in what would be the ditch if it was pieced using a straight ruler. Then I added a bunch of free motion quilting to fill in.

detail of quilting

Normally I wouldn't add this much quilting to a charity quilt but I was really having fun playing with my new machine. Here is a photo of the back.

back of digital quilt

This one finishes at about 40" by 40" and will be another charity quilt that I will donate to my guild. I have a couple more digital samples that I will quilt up and donate to charity as time permits.


Thursday, December 16, 2021

2021 2nd Saturday Sampler Version 3 :: A Finish

 This is the second quilt I quilted with my new Q20 sit-down machine. I used a ruler to quilt wavy lines across it.

2021 BOM version 3

quilting close-up

Yes, I probably could have done this design without a ruler, but I wanted to experiment with using a ruler on my new machine. Worked great! And the best part is that I can use my regular Bernina ruler foot (#72 foot) on my Q20.

For the back I found this fun print in my stash that complemented my color scheme on the front.

back of quilt

This quilt will be donated to my local hospital for the oncology department. It finished at about 40" by 50".

This is the third version of this quilt I have made. It was made as part of the 2nd Saturday Sampler Club I have at my shop. It's a block of the month program I run through the shop. Soon I will have the first version of the 2022 2nd Saturday Sampler Club project done and ready for quilting. This year I will be opening sign-ups to anyone. The patterns will be emailed to you so you don't have to be local to participate. The cost will be just $25 and there is no kit or fabric purchase required. I will be recommending that you purchase a single fabric for the background and a 1/2 yard of a dark fabric for another part of the quilt, but these are just recommendations not requirements. All the details, along with a sign-up link, will be in the post in which I reveal the top. Hopefully that will be happening before the end of this year. The 2022 program will not begin until March 12, 2022 so there will be plenty of time to sign up.


Tuesday, December 14, 2021

Charity Quilt Finish

 I have no idea when I pieced this top but it was well before I opened my shop in 2016.
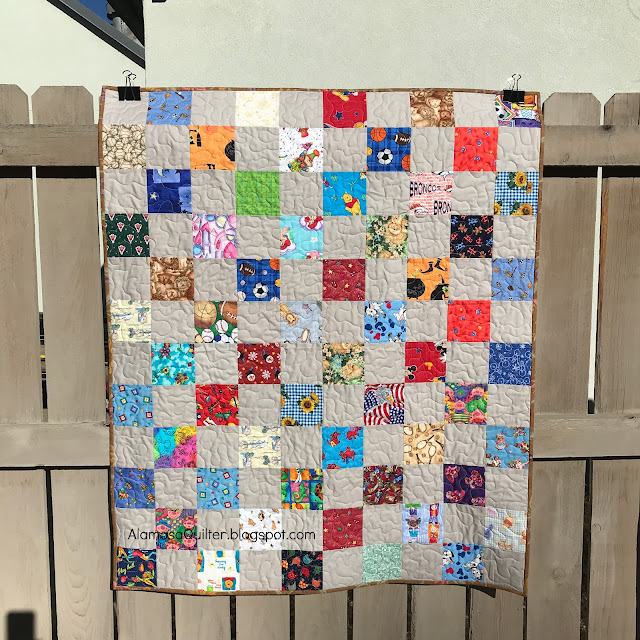
squares charity quilt

This is the first quilt I quilted with my new Q20 sit-down machine. I fell head over heels in love with that machine on this project! 

squares charity quilt back

For the backing I found this very old print in my stash. I must have really loved it when I bought it because I have 5 or so yards of it! 

This quilt will be given to my local guild to donate to a local charity. It finished at about 40" by 50".


Thursday, December 9, 2021

Q20 Play

 I have been bonding with my new Q20 machine.

Q20 machine

I have quilted two charity quilts already with her but don't have pictures of those yet for you. Next time! The first one I just did a quick all-over meander to get used to the machine. The second one I quilted with a ruler that I have had for a while. I'll give details on that when I show you the finished quilt.

Right now I am working on a third charity quilt with her. I'm getting fancy with this one. It is an old digital sample that I got for the shop the first year I opened in 2016.

3rd project 1

I am doing this one with a combination of free-motion quilting and ruler quilting. I'm mainly using the ruler to do straight lines since this one is a cheater quilt (that is, the design is printed on the fabric instead of being pieced).

3rd quilt 2

There are flying geese printed along the border but they only go part way along each side. So I did some flying geese that are just stitched.

3rd quilt 3

I have already stitched around each ring in what would be the ditch if it were pieced. Now I am going back and filling in the on-point squares. I haven't decided how I will quilt the rest just yet but something will come to me.

Free fuse and fusible batting

I have been using a couple newish products for these quilts. One is Fusible 80/20 batting from Quilter's Dream. I sure do love this batting! And when they offered me a free sample to try it out a couple years ago I originally said no because I don't like fusible batting! I'm so glad the lady taking my order talked me into taking it! It is fusible on one side and I always fuse the backing fabric to the batting. Then I use the Free Fuse powder to baste the top to the batting.

Basting is not the most fun part of quilting but it is necessary and it really needs to be done well in order for the quilting to turn out nice. However, it is much easier with these two products!


Tuesday, May 26, 2020

Surgical Caps for Kids {Photo Heavy}

What you will need:

Fabric and the pattern, download it here, you will need to scroll down a bit. Below the header image is a link to download the pattern for the surgical cap. 5/8 yard of fabric will make four caps but you can also use scraps. The pieces don't have to all be from the same fabric.

Be sure your printer settings are correct: no scaling, print at 100%, uncheck the "fit to page" box if it is checked. If you have problems printing the pattern and want me to mail you a printed copy send a self-addressed stamped envelope to:
Alamosa Quilt Company
710 Del Sol Drive
Alamosa, CO 81101
Simply slip a note inside that says "please send me a surgical cap pattern" and I will pop one in the mail to you right away. If you are local, you can just stop in and ask for a printed copy of the pattern.

After you have your pattern, I suggest you keep the original somewhere safe. Then print or trace a copy of the pattern onto freezer paper. You can use the freezer paper pattern multiple times. When it stops sticking to your fabric just make a new one.

Cutting: cut a 9" by WOF (width of fabric) strip. It comes off the bolt folded in half. I folded it in half again so that you have a 9" by about a 10" piece. Iron or pin your pattern piece to this.


Then cut out around the pattern piece. This will give you four cap tops.

From the remaining fabric, cut (2) 3.5" by WOF strips, subcut these into (4) 3.5" by 19.5" rectangles. These will be the hat bands. Finally, cut (4) 1.5" by WOF strips for the ties. You could also use 1/2" or 3/8" double fold bias tape. I prefer to make my own for most things so this isn't something I have in my stash, AND there is no need for this to actually be cut on the bias. Notice that I didn't tell you to cut these on the bias, just a regular width of fabric straight cut is fine. Trim the selvedges off the ends of the tie pieces before continuing.

To make a cap you will need one of each piece, that is, one cap top (cut from pattern piece), one cap band (3.5" by 19.5") and one cap tie (1.5" by WOF).


On the cap top, press under the straight edge 1/4" twice. On the cap band, press under the two short sides 1/4" twice.


Since you are at the ironing board already, take the tie, press it in half lengthwise. 


Then open it up and press both raw edges to the center seam. At each short end, press it in about 1/4" to conceal the raw edge inside once it is sewn.


And then press it back in half again on the original fold you made.


Go to your sewing machine and topstitch the edges you pressed under on the cap top and cap band.


Fold the tie in half and the cap band in half. Mark the centers. Do the same for the cap top, but the center mark you make needs to be on the side opposite the one you topstitched, the edge that has the rounded corners.


I like to give them a press rather than use a pin. In the photo below, the tip of the scissors are pointing at the pressed center of the band and the tie is clipped to the bottom edge of the cap band. The tie is longer than the cap band. Just match up the centers and clip/pin them together so that the ties are the same length on either side, or at least pretty close to the same length. This doesn't have to be perfect!


Before you sew, make sure that you have the tie on the BOTTOM edge of the cap band. In the photo below I wanted the sleeping kitty to be right side up so the tie is going on the edge below the kitty. It won't make a bit of difference in the functionality of the cap if the kitty is upside down, but if your fabric is directional and if this kind of thing bothers you, take the time to make sure your motifs are right side up.


Topstitch the tie closed and to the cap band. I just start sewing at one end of the tie right across to the other end.


Now match up the centers of the cap band and the cap top, pin or clip. 


Then match up the two ends of the cap band to the back of the cap top (the edge that you topstitched). Add a few more clips or pins in between.


Using a 1/4" seam allowance, sew the cap band to the cap top. Don't worry if there are a few puckers or if your seam allowance gets a little wider than 1/4". Again, this doesn't have to be perfect!


I took a close up picture of a portion of my seam to show you that even this one isn't perfect, but the cap will function just fine! My scissors are pointing to the less than perfect match up.


As a final touch, zig zag over the raw edges of this seam. This will help tame the fraying. As an alternative, if you have a serger, you could use it to serge the final seam instead of sewing and then zigzagging.


Turn the cap right side out and you are done!


If you are local, bring your completed caps to the shop. As needed I will take them over to our hospital for their stash of these caps. The kids get to choose which cap they want before surgery. Also, if you want to make size adjustments to the pattern to make some smaller versions, feel free. This one fits smaller adult heads as well as most children. The ties help to make it more adjustable.

Thank you to the several children and their parents who came into the shop while I was working on the pattern and allowed me to try it on them!


Saturday, March 28, 2020

Surgical Gown Project

This is a fairly long post. I am trying to be as clear as possible with photos of each step. The first one took me about 30 minutes to make, but now I am making one in about 20 minutes. You will be cutting out four at a time with these instructions.

What you will need:


Three 54" by 108" plastic table cloths from the dollar store will make FOUR gowns if you cut them out in the way I will describe. Other things you need are a dinner plate, scissors and/or a rotary cutter, a ruler, a cutting mat (if using a rotary cutter), a Sharpie or other marker for marking (use a marker, not a pen or pencil as they will tear the table cloth), an alcohol prep pad (optional, but you will thank me later) and not pictured are WonderClips (photo below). DO NOT USE PINS! These table cloths are plastic. Pin holes will not heal like when you pin fabric. If you don't have any clips, a little dab of glue used in strategic places can help. This plastic stuff is slippy. Whatever needle you have in your machine right now will work just fine.


Above is a photo of WonderClips. You only need a few. I think the most I used at one time was 6. Cute kitty dish is from our local gift shop Treasure Alley. Cute kitty dish is optional, but handy to contain the clips.

Cutting:

Open two of the table cloth packages. These will make your FOUR gown bodies. Fold one of them in half to make a 54" by 54" square. Using scissors, cut on the fold to make two 54" by 54" squares. Leave them together. Fold them in half again to make a 27" by 54" rectangle and them fold in half again to make a 13.5" by 54" rectangle.


Using your ruler and rotary cutter, cut three 1" by 54" long strips from one of the short sides. Do not worry if these are not exactly 1" wide. Set these aside as they are the waste and neck ties for your gowns.

Unfold the gown bodies back out. They should be 27" by 51" (because you cut 3" off for the ties). I found it easiest to use the cut edge as the top of the gown since you cut the edge evenly in the last step.

The center fold in the photo above is along the right hand side of the gown body - the side with the mark 3" from the corner. The side with the mark 4" from the corner is the edge I cut the ties from. It will be the top of the gown.

Measure three inches down from the top edge along the center fold and make a mark. Measure four inches from the center fold along the top edge of the gown and make a mark. Get your plate. Put the plate over the marks, so that it just covers the marks.


You can either use your marker to draw a scoop neck along the edge of the plate and cut it out with scissors, or use your rotary cutter against the edge of the plate like I did. Just be careful that your fingers are out of the way!


Along the center fold, measure 17" down from the center of the neck scoop and make a small mark.


This mark is your placement mark for the waist ties. Make sure that you mark both of the gown bodies.

Open up your gown bodies and separate them. I did the next step separately for each gown body. Fold the gown body so that the two outer edges meet in the middle.


Measure 11" down along each outside folded edge and make a mark 11" from the top edge.


The marker is sitting at the 11" mark in the photo above. Using your scissors slit the table cloth from the top edge down to the mark. This should be an 11" long slit. Do this on both sides. These are the arm holes.


Repeat this process for the second table cloth.

Now open up the third table cloth. Again, cut it in half to make two 54" by 54" squares. Then cut these in half again to make four 27" by 54" rectangles. Each of these rectangles will make one set of sleeves (that is, each 27" by 54" rectangle will make two sleeves).

Separate the 27" by 54" rectangles. Take one of them and fold it in half lengthwise to make a 13.5" by 54" rectangle.


Then fold this in half the other way to make a 13.5" by 27" rectangle. In the photo below the long folded edge is the one with the marker laying next to it. The short folded edge is closest (at the bottom) of the photo. The long folded edge is the important one.


Get your marker and ruler so you can measure and mark to cut out the sleeves.

Long folded edge is at the bottom in the photo above
On one side, draw a line 11" up from the fold. Along the folded edge, measure over 20.5" from the drawn 11" long line and draw a 4.5" long line up from the fold. Then use your ruler to connect the tops of these two lines with a third line. Without moving anything, use your ruler and rotary cutter to cut on all three lines. If you don't have a rotary cutter and mat, pin all the layer together anywhere off the sleeve to hold everything together when you pick it up. Cut on all three lines. You just cut out two sleeves. 

Now is where you may want to use that alcohol prep pad. I would wait until you are completely done with the marking. So if you are planning to make a few more gowns, wait until you have marked the last one before doing this.


Run that alcohol pad along the edges of your ruler where you marked. See that black stuff on my alcohol pad? That is the excess marker coming off the ruler. You don't want that to get onto your fabric if you are using one of your good rulers for this project! Clean it off now so you don't forget and ruin the fabric you cut later!

Now take everything to your sewing machine. You will be using a 1/4" seam allowance, but don't stress about being super accurate. You don't want it to be less than 1/4" because this stuff will rip easily, but if your seam allowance is a little wider in places it won't make a bit of difference.

Increase your stitch length. The normal stitch length is too small. It will cause the plastic to rip easily along the seam. Below is a photo of the default stitch length setting on my machine, which is 2.5 (as are most machines these days).


Increase that to about 4.


You will need one gown body, two sleeves and three 1" by 54" long ties per gown. Cut one of the ties in half. So you will have two 1" by 54" long ties for the belt and two 1" by 27" long ties for the neck closure.

Start by taking a sleeve and the gown body. Match the folded edge of the sleeve to the end of the arm slit. Clip the two pieces together. Then match up the ends of the sleeve with the top of the gown and add a couple more clips to hold things in place.


In the photo above, the scissors are pointing the end of the arm hole slit and the folded edge of the long side of the sleeve is clipped here. Sew the seam. 

Match up the two ends of this seam and clip along the shoulder and length of the sleeve.


Notice that there is a little bit of the top edge that extends beyond the shoulder seam into the neck area. The scissors in the photo above point to the edge of the neck scoop. You want to start sewing a little before the end of the neck scoop. DO NOT BACKSTITCH! Backstitching will only cause the seam to rip.


In the photo above you can see that I started sewing the seam at the clip and the scissors are pointing at the same place as the previous photo, where the neck scoop starts along the top edge of the gown. Since you can't backstitch at the start/end of the seam, this is the best thing we found to prevent the shoulder seam from ripping out when the gown is put on.

Repeat this process with the other sleeve.

Now add the two neck ties.


These go at the back of the gown at the top. In the photo above you can see the neck scoop underneath the ties. Overlap the ties with the gown body about 1" to 1.5" inches and sew them on. I stitched them on with a "U" pattern.

Carefully turn the gown right side out.

Find your mark that should be about 17" down from the neck right along the center fold of the gown.


Go ahead and slide the gown under your needle so that the mark is under your needle. Then overlap the two waste ties about 4" to 6". 


Center the overlap over the mark and stitch it in place with about 4" to 6" of stitching.


Neatly fold up your gown. Repeat for the other three gowns you have already cut out.


Here I am modeling the prototype. I have my hands behind my back because originally we didn't make the waste ties long enough. 

A big thank you is owed to one of my employees, Peg Collins, who helped me to deconstruct the gown I was given by the hospital and figure out how to turn a Dollar Tree plastic tablecloth into a disposable surgical gown! Thank you Peg!

Local folks, take your gowns to the SLV Health Foundation office located at 106 Blanca Ave. in Alamosa. The building is located on Main Street in front of the hospital between Blanca and Pike Avenues. Look for the glass door that says SLV Health Foundation. The door faces Arby's. There will be a box or tub or something for you to put them in just inside the door. If not, there should be someone there who will take them from you. Here is their contact information:


Kelly S. Gurule

Director, SLV Health Foundation and Volunteer Services
106 Blanca Ave.
Alamosa, CO  81101
719-587-5707

If you have a question chances are someone else might have the same question. If you leave your question as a comment below I can answer you with another comment so everyone can see all of the questions with answers. If you have a question, check the comments below first before you contact me. I might have already answered it!

If you prefer to contact me privately, since the shop has been force to close for a bit, the quickest way would be to contact the shop through Facebook, search for Alamosa Quilt Company, and message me or email the shop directly, AlamosaQuiltCompany at gmail dot com. You could also call the shop at (719) 937-2555 and leave a voicemail message. I am checking the shop messages daily during the week.