Lots going on here but not that much sewing. The little sewing time I've had over the last two weekends was spent making these four Whatcha Got? bags for my employees.
We decided not to exchange gifts at Christmas since our One Year Anniversary was coming up in February. It was last week so we had a little party Wednesday evening and exchanged our gifts.
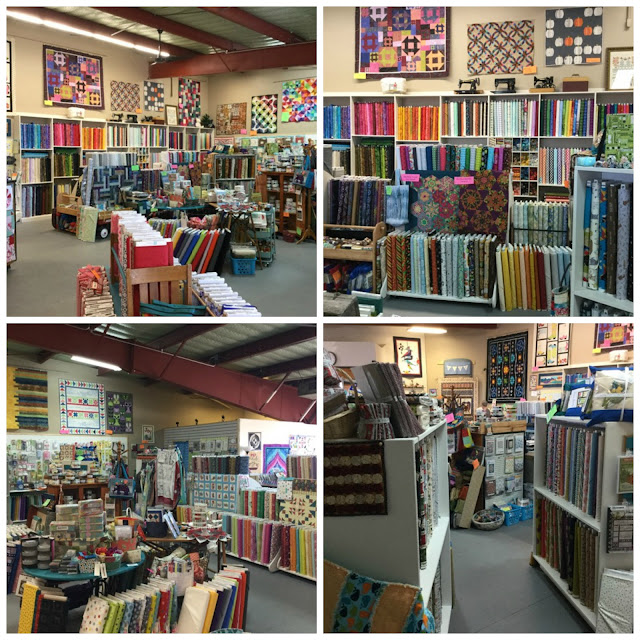
I made these photo collages of my shop for the newsletter so I thought I'd share them with you too.
These photos were taken in February 2016.
And these were taken this month, February 2017.
We've come a long way in one year and this is why I'm not able to sew and blog as often as I would like.
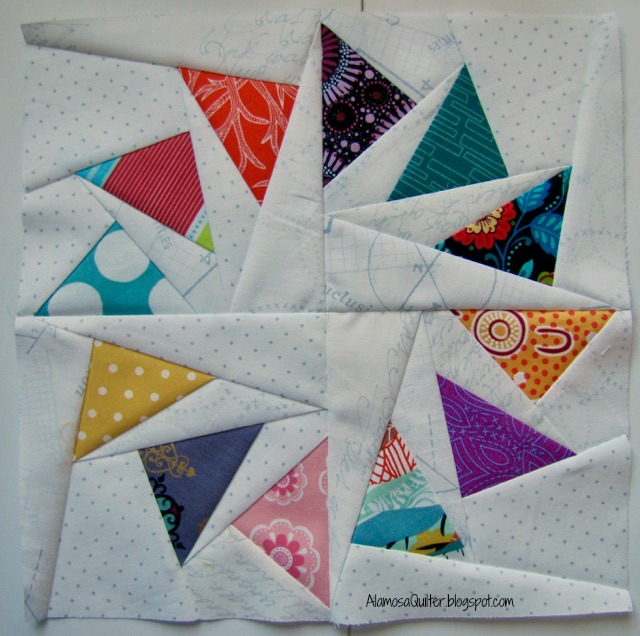
Are you ready for the final block? It's another paper pieced block.
Here is what you will need:
(4) copies of the pattern - download that here from Piece by Number and print them out making sure your printer is set to print full size - no scaling or "fit to page".
(12) 3" by 4" rectangles of scrap fabric for the geese [label these "#1,4,7"]
(4) 3" by 4" rectangles of background fabric [label these "#2"]
(4) 2" by 5.5" rectangles of background fabric [label these "#3"]
(4) 4" by 4.5" rectangles of background fabric [label these "#5"]
(4) 2" by 6" rectangles of background fabric [label these "#6"]
(4) 2" by 7" rectangles of background fabric [label these "#8"]
(4) 3" by 7" rectangles of background fabric [label these "#9"]
The numbers I'm telling you to label your pieces with are the ones used on the pattern. You should have 7 labeled stacks - one for the geese and six for the background pieces.
An Add-a-Quarter ruler is optional but very helpful.
You can paper piece the block using any method. There are at least two that I am aware of: (1) sew through the paper (which is what I did) and (2) use freezer paper and don't sew through the paper. I did a tutorial on the second method a few years ago. Click here to go to my tutorial.
As I said, I used the first method for this project. I printed out the patterns onto Carol Doak's foundation paper, cut out the patterns and sewed directly to the paper with a shortened stitch length. I used a 2.0 stitch length on my BERNINA 380. When it comes time to tear off the paper, gently run a pin along the seams lines to score the paper and it pulls off fairly easily.
Note: Knowledge of paper piecing is assumed. If you need assistance with the "sew through the paper" method I recommend you refer to Carol Doak's tutorial. Click here to go to her tutorial.
The pattern is for a quarter of the block. You will need to make four of them.
And then sew them together.
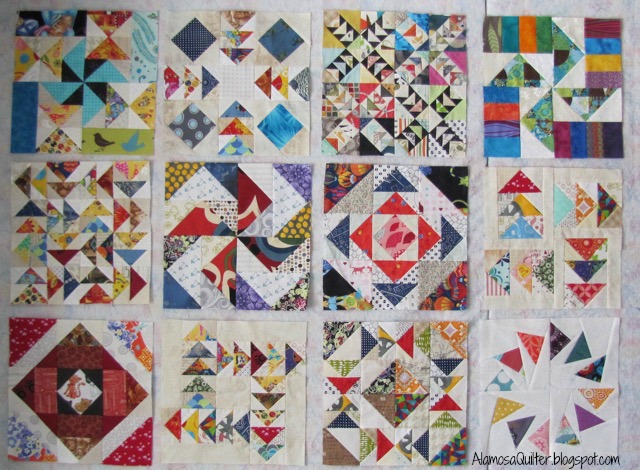
Here are all of my blocks.
I'm trying to decide how to sew them together. I know that I want to sash them in some way. Originally I had planned to add a flying geese border but now I am rethinking that. Because I am planning to donate this one to charity I'm not sure I want to spend the time to make a pieced border. More importantly, a pieced border would make this one too large for the charity I have in mind.
Check back in on March 15th. I'll make a decision soon and have it finished by then. Well ... I'll have the top finished by then. Not sure when I'll get it completely finished.
I'm sure I'm not the only one who has done this. You pick out a beautiful selection of fabrics for a quilt. They look great together on the cutting table. Then you start sewing them together and realize that there isn't enough contrast between them for the pattern you are making.
Sometimes you put it all away for "later." Sometimes you fix it. And sometimes, you just keep going knowing that you won't like it but for some reason you just have to finish it.
So here it is.
The pinwheels just disappear into the other fabrics. *sigh* It is a nice size for a charity quilt. When finished it will be 40" by 58". I'll quilt it simply at some point and give it away. Someone will like it even though the pinwheels don't show like they are suppose to.
I love quick and functional projects! This one definitely fits in that category. Like the Whatcha Got bags I posted about previously, this pattern has been around for a while but I am just now getting around to making them.
I put the large spools of Aurifil thread inside for scale.
You need two 10" squares of fabric for these which makes it a perfect project for leftover layer cake squares you may have laying around. I used two fat quarters and you can make two button boats from 2 fat quarters and have a nice chunk of fabric left over for your scrap basket.
The pattern for these bags has been around for a while, but this is the first time I've made one (or two).
I recently ordered them for my shop and needed to make a shop sample as well as at least one for me!
Both of these are the smaller size in the pattern, 8" by 10" finished. I put a large spool of Aurifil thread inside each for scale. The construction is a little different for me, but they both turned out great. I will definitely make more. I used a Desert Bloom mini charm pack and four fat quarters for these two and I have enough mini charms left for another bag of this size.
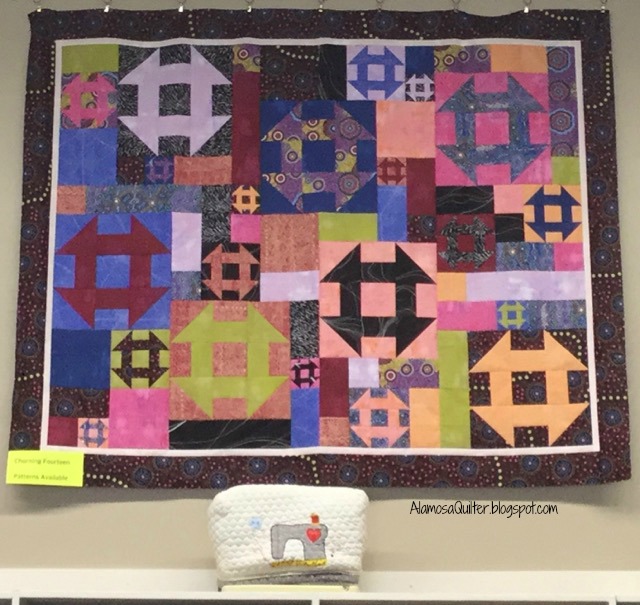
My Churning Fourteen top is completed and hanging at the shop.
For the record, I really love this pattern. I love the different sizes of churn dash blocks. I love the scattered, non-grid layout. I love that it uses fat quarters for the center. I also love the fabrics I used.
Because I'm just not capable of following a pattern completely, I opted to cut my outer border wider than the pattern suggested. I cut my outer border to finish at the same size of the smallest churn dash blocks, which is 3.5". I think it would also look good with an even wider outer border.
My version with finish at about 58" by 72".
Pattern information is in this post.


