Tuesday, February 28, 2023

My Potato Chip Block Quilt Top - Again

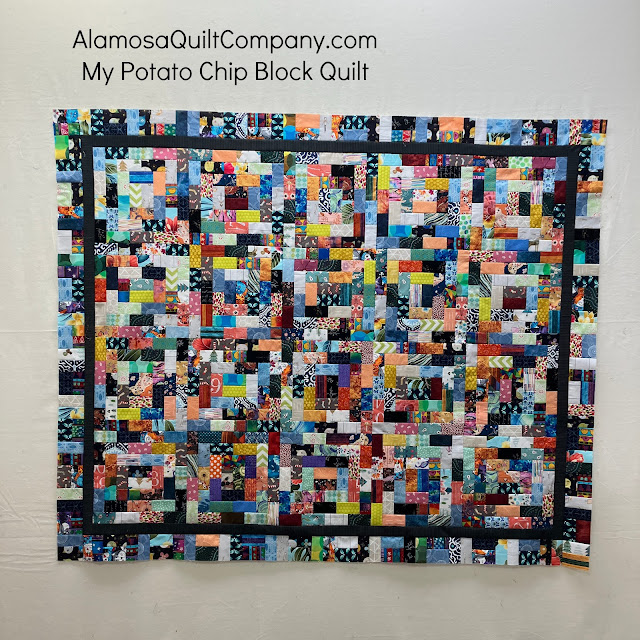
 I had some unexpected sewing time at the end of last week so I decided to add the inner border and a pieced outer border to my Potato Chip Block quilt.

My potato Chip block quilt top

I used up all but about a dozen of the pieces I cut for this project! The inner border was cut 2" wide, just like all the pieces. It took me a little bit of trial and error to get the outer border pieces sewn so that the pattern continues around the corners AND no fabric was sewn to itself. That last part got harder as I had fewer pieces left over to work with, but I did it!

I am going to quilt this one myself and try out a new brand of batting in the process. If I like the batting I will tell you all about it. If I don't I will follow the "if you can't say anything nice, don't say anything at all" rule.

Instructions for the Potato Chip block can be found by clicking the link.


Tuesday, February 21, 2023

My Potato Chip Block Quilt Top

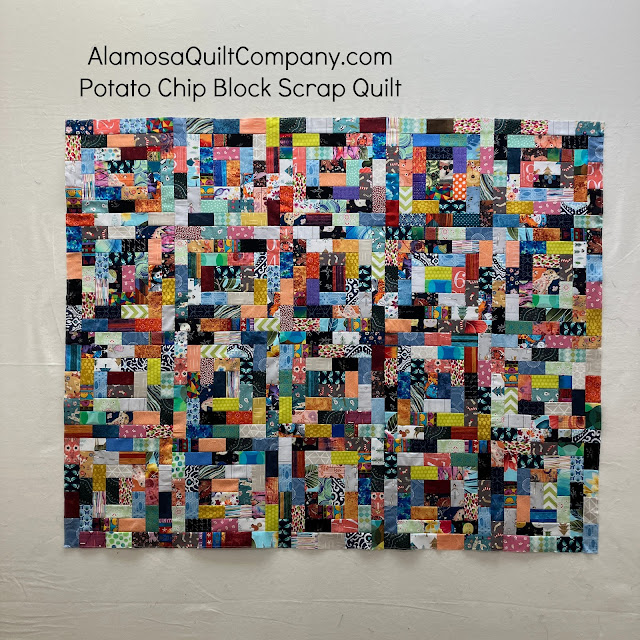
 I finally got all 20 blocks made and sewn together!

My Potato Chip Block quilt top

I have some pieces left over. I am thinking about putting a small inner border around this, probably 2" cut, then sew all my remaining pieces together to make an outer border. Not sure if that will happen or if I will just quilt it as it currently is. I have other projects in process right now so this one will have to wait for a bit longer to get finished.

As a reminder, if you want the free instructions for the Potato Chip block, click here. It's a great scrap buster project! And Accuquilt makes a die for both sizes of piece you can use for these blocks if you don't want to cut your fabrics with a ruler and rotary cutter. 


Thursday, February 16, 2023

A Day of Learning

 As a shop owner you have to always be learning! You need to stay current on social media, marketing, new products, changes to taxes, insurance, e-commerce, ... the list seems endless at times. On Monday of this week I spent the entire day on Zoom learning through the Virtual Schoolhouse sponsored by FabShop Network. This is basically a virtual version of the Schoolhouse sessions held the day before Quilt Market opens. One of the great things about going to Schoolhouse at Market is all the swag you get. The Virtual Schoolhouse also has swag.

Virtual Schoolhouse Swag

I learned a lot. Already placed some orders for new stuff. 

It was a fun but long day. However, I still prefer this to running around a large convention center all day. There was no line for the bathroom. Snacks were free and readily available. I was able to eat my lunch and watch. I even fixed dinner while watching.


Thursday, February 9, 2023

Mystery Boxes

 My idea with these boxes is to make them a gift that you purchase for yourself. I think that most of you are like me - you are the gift purchaser for your family, including yourself. It isn't often that you receive a gift and not know ahead of time what it is. Well, this can be one of those rare times when you don't know what you are getting!

I am sold out of all the January Boxes and only have a limited number of February boxes left. If you'd like to purchase a February Mystery Box you can do so by clicking on the following link:

February Mystery Box from Alamosa Quilt Company

The February Box is $49.99 plus applicable tax and shipping. Every month the boxes will be different but all of them will contain a pattern and the fabric to make it (a kit) plus some other goodies.

Now that everyone has their January Box I can share with you what it had in it. My customer/friend, Rose, kindly allowed me to photograph her opening up her January box. I meant to do this BEFORE packing up the last one but forgot!

When you open the box:

first opening the January mystery box

What's inside:

inside of the January mystery box

Everyone got a cute tin. Inside the tin was a pink Frixion marker, a pair of my favorite little embroidery scissors, a small spool of Aurifil thread, and some candy.

goodies included in the January mystery box

Then there was the pattern and fabric. All of the fabric was included for the January project - the fabrics for the front, the fabric for the back and the binding fabric.

January mystery box pattern and fabrics

Rose didn't waste any time starting her new project. She got it completely finished too!

Rose's completed January mystery box project

The February Box will be similar in that it will also contain a pattern and all the fabric required to make it (front, back and binding fabrics) plus some fun goodies. I am going to try very hard to keep the price of these boxes at $49.99 for the entire year. If the pattern makes a larger project then I probably won't be able to include backing fabric too but you are always going to get the fabric for the front and binding. 

In January I made up the boxes as they were ordered because I had plenty of the items available that I was putting in the box. February is a different story. I only have a limited number of these boxes because I purchased items specifically for them and was only able to get a limited number of some things. So if you are interested in getting a fun surprise in the mail from me you need to order soon. You can order through February 14, 2023. I will remove the item from the online shop at 5pm (USA Mountain Time) on February 14, 2023. The boxes will be mailed out on February 15, 2023 or available for pick-up at the shop starting at 10am on February 15, 2023.

You can order these boxes yourself every month or pick and choose which months you participate. Or you can let me know that you want the box every month and I'll just charge your card on file on the 14th of each month before shipping it out to you.


Tuesday, February 7, 2023

Customer Show and Tell

 I haven't shared any customer projects recently. These were all made by the same person, Nancy C.

First one of several Twister quilts Nancy made recently.

Nancy C's twister quilt

Nancy took a class at my shop on the Twister ruler and loved the technique. She had me order all of the various sizes of these rulers for her and she has made several quilts with them.

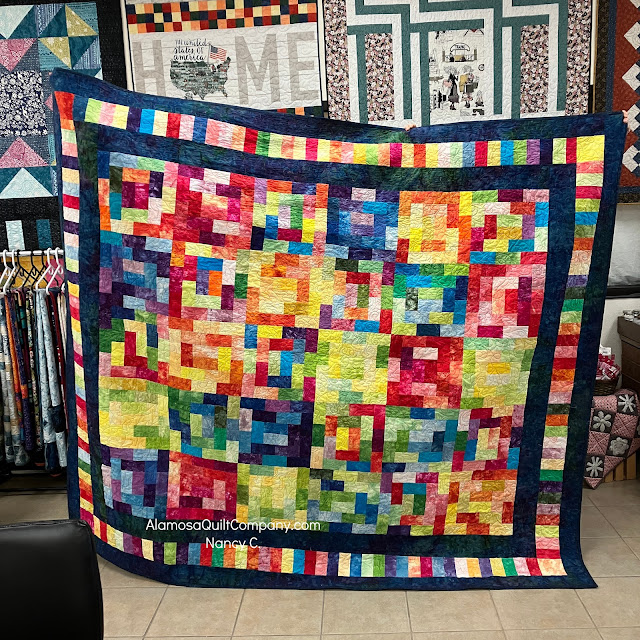
This is Nancy's second Potato Chip quilt. (The link will take you to the free tutorial I wrote for this block). For this one she used a stack of hand-dyed fabrics she dyed years ago. She wasn't happy with them when she dyed them because they didn't work for whatever project she had in mind for them. However, they look fabulous in this quilt!

Nancy C's hand dyed potato chip quilt

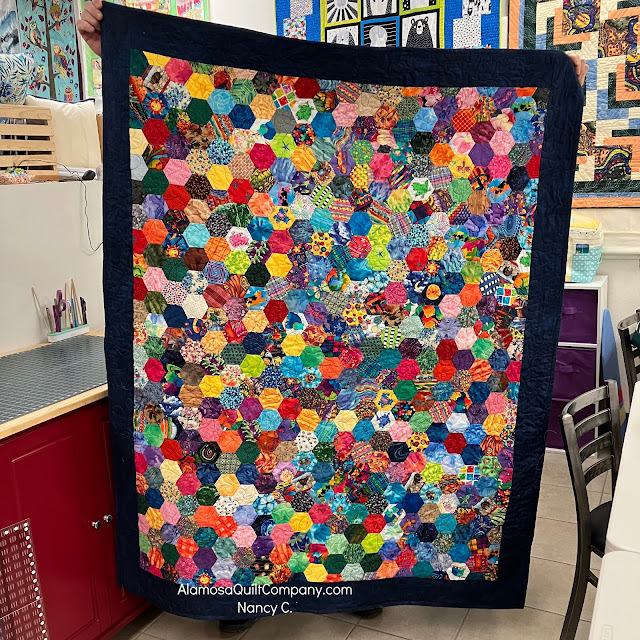
Finally, Nancy has been bitten by the English paper piecing bug. She started this project years ago and just recently finished it.

Nancy C. hexagon quilt

Many of the fabrics in this one were scraps left over from dresses Nancy made for her daughter, who is now in her 30s. So this was a nice trip down memory lane for them both!


Thursday, February 2, 2023

How to make a Quilted, Divided Cup {Photo Heavy}

 First, let me just say that this is not my original idea. I got this idea from a woman in the Birmingham (AL) Quilt Guild. Her Bee made these to sell in their boutique at a recent quilt guild show. My mom bought one of them and gave it to me as a gift. Here it is:

Quilted Divided Cup top view

Quilted Divided Cup Side view

Quilted Divided Cup bottom view

I was able to get the basic instructions so I thought I would share them with you in case you want to make one (or a bunch) too.

What you will need: two 12" squares of fabric and one 12" square of a thin, flat batting. I used fusible fleece and fused the fleece to the square that will be the outside fabric of my little divided cup.

materials required

Layer your fabrics right sides together and place the batting on the top or bottom of the fabrics. Since I used fusible fleece, I fused the fleece to the back side of the exterior fabric - the large purple/pink floral in the photo above. 

fabric layers before sewing

Starting toward the middle of one edge, start sewing all the way around the outside of the square with a 1/4" seam allowance, leaving an opening for turning. Be sure to back stitch when you start and stop stitching on either side of the opening left for turning. In the photo below, the opening has been left in between the two pins at the bottom of the square.

sew around leaving an opening for turning

I like to clip the corners at an angle before turning to reduce the bulk in the corners.

corners clipped before turning

Turn this right side out (the fabrics should be right side out with the batting in between the two fabrics). Take the time to gently poke out the corners and press everything nice and flat.

turned and pressed square

Topstitch all the way around the outside edge about 1/8" from the outside edge. This will also close the opening left for turning.

Topstitching 1/8" around the square

Quilt your square however you would like, but I'm going to give you a simple suggestion. You can pin baste first if you want but I just pressed it nice and flat then used my walking foot to quilt it to minimize any shifting that will occur.

Quilting suggestion: using your walking foot, start quilting about 1/2" down from one corner. I lined up the outside edge of my walking foot with the line of topstitching along the outside edge. Spiral all the way around the square in this way. When you get back to where you started, stop stitching about 1/2" or so before you reach the previous line of stitching, pivot your square with the needle down and keep spiraling into the center.

spiral stitching diagram


starting the quilting

In the photo below you can see how I am using my walking foot to know where to stop stitching and pivot. The previous line of quilting is right at the front corner (where the scissors are pointing). I stop here an pivot then keep stitching. Do this until you have spiraled all the way into the middle of the square.

showing where to stop the first line of quilting and pivot

image of the quilting in progress

Below you can see the quilted square. I quilted it from the lining because I fused the batting (fusible fleece) to the outside fabric. I wasn't worried about anything shifting on that side so I quilted from the unfused, lining side. I think you can see the quilting better on this side rather than the lining side.


Exterior side of my square all quilted


Lay your quilted square on your table with the exterior fabric facing up. Fold the quilted square in half. The lining fabric should be facing you now.

square folded in half with lining fabric facing you


At the two folded corners, draw a 4" long line from the fold to the outside edge that is 45 degrees from both the folded edge and the outside edge.

marking the corners


Sew on each drawn 4" long line, back stitching at the beginning and ending. It will look like the photo below at this stage.

two corners sewn

Now you need to do the same thing with the other two corners. These are a little more difficult to mark and sew because you've already got two corners done, but just squish things flat so that you can get it done. Clips are helpful with this part!

clipped and marked second set of corners to sew

It will look like the photos below at this point.

all corners sewn, top view

all corners sewn, side view

You've got a few choices at this point. You can just turn it right side out and call it done!

Or, you can turn it right side out and hand stitch all four corner points together to form the divided cups.

Or, you can do this in stages by machine. Before turning it right side out, first stitch the two adjacent corners together. 

Fold two adjacent corners together.

Pinch together two adjacent sides

Get this under your needle the best way you can. I dropped my stitch length down to around 1mm.


Stitch the corner under your needle

I sewed forward, then backward, then forward again.


take a few stitches to hold the corner together

Repeat this process for the other set of adjacent corners. It will look like the image below before you turn it right side out.


Both sets of adjacent corners sewn

Then turn it right side out. You can leave it like this, with one large area and two smaller ones.

turned cup with only adjacent corners tacked together

Or you can fold down the top peaks as best you can and stitch the corner sets together.

Fold down the top of the piece to expose the center

This might be a challenge to get under your needle but it can be done. You only need to do a few tacking stitches to hold the corners all together in the middle of the cup.


stitch the two sets of corners together

Now you can enjoy your Quilted Divided Cup!

completed quilted cup, top view


completed quilted divided cup

As an added detail, you could fold down the peaks and put a button or something else to hold them down. In the photo below I just pinned one peak down to give you a visual of the idea.

folding down the peak

I want to make a video of me sewing one of these for those who prefer to watch videos rather than read. Unfortunately, I'm not there yet. I am still trying to get the correct set-up for filming and it has been a real challenge for me to this point. I'm not giving up and if I get a video done I will edit this post to include a link to the video. Until then, you just have to read and look at the pictures.