Monday, March 7, 2016

Splendid Sampler Block 5

Have you heard about the Splendid Sampler? If not, click the link and go check it out!

I've decided to participate. I'm using the fabric from my Frivols for the blocks since I really only bought the Frivols for the tins they come in. I'm a little late in starting so I decided to start with the current block and work my way back as time allows.

When I started, block 5 was the most recently released block.


I also have block 6 mostly completed but no photo yet. Block 7 was released yesterday.

These little blocks seem doable with just two blocks being released per week. That's my speed at the moment!

In shop news I purchased the cute mugs.


They are good advertising and unique gifts! We had a daughter come in last week looking for a gift for her mom. She said that her mom is hard to buy for because she already has everything. I told her that I have the perfect thing . I can guarantee that she doesn't have this mug yet because they just arrived that morning. She bought the mug and some fat quarters to go inside. Makes a very nice gift for the quilter who has everything!


Friday, March 4, 2016

Busy Week

I've had a busy week. This week has been the Grand Opening Sale week in my shop. We've had a good turn out. 

I've been trying to carve out some sewing time each day after I've gotten my book work done and in between customers. Some days it is only a few minutes while others I can get in about an hour during the course of the afternoon. 

My latest project is a shop sample - big surprise.


I've been collecting Frivols. This is the pattern from the second one. The completed top measures about 26" by 26". Even though the fabric is not really my style, the pattern was fun to make and I love the project.


Friday, February 26, 2016

Embroidered Pin Cushion

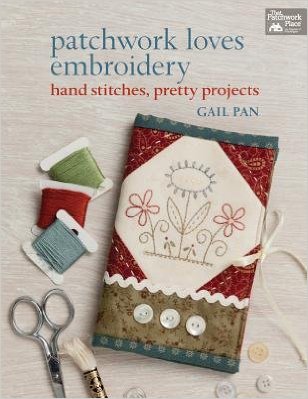
I recently purchased a couple of colors of Aurifloss for my shop, just to try it out. I needed a test project and chose one of the pin cushions from the book Patchwork Loves Embroidery.


Here is my pin cushion.


It is about 4" by 6" when finished. How did I like the Aurifloss? I loved it and ordered several more colors for the shop. Eventually I will get all of the colors but, like most people, I can't afford to get everything I want immediately.


Wednesday, February 24, 2016

Moda Love

I came across the Moda Love pattern a few months ago. My Moda sales rep. gave me a charm pack of the new Flow line which will be arriving in the next few weeks. I decided it was a good opportunity to make a Moda Love quilt.


I used a couple of Crossweave Wovens, also from Moda, for the background and the turquoise second border. I will also use the turquoise as binding.

The pattern is only for the center. It only uses 30 charms and makes a 32" by 32" finished size block. I wanted my quilt to be a bit larger so I added a 2.5" cut size border of the background fabric. Then a 2.5" cut size border of the turquoise. And finished it off with the rest of the squares from the charm pack and more of the background fabric. The finished size of my quilt will be about 48.5" by 48.5".

The pattern includes directions for three sizes. The largest uses a layer cake. The smallest uses a mini charm pack. I made the middle size which uses a charm pack.


Monday, February 22, 2016

Raggy Squares and AQC Update

I made up a cute sample for some kits we will carry for Raggy Baby Quilts. I'm calling it Raggy Squares.

Here it is before washing.


And here it is after washing and drying.


Super simple since I cut the squares using the Accuquilt die that cut the fringes. Took about 3 hours to cut and sew. The washed quilt measures 34" by 41" which is a good baby quilt size.

Alamosa Quilt Company Update:

My shop opened last Monday! We had a good first week and reached the milestone of emptying the first bolt.


Friday, February 19, 2016

Art Group :: Circles

Back in August of last year my art group did some paintings. I posted photos of the ones I did. The idea we had at the time was that we would each choose one of our paintings, enlarge a section of it and then make a quilt from the enlargement.

What we ended up doing was choosing one of our paintings, making copies of it and then each of us picked a different section of the same painting to enlarge.

The painting we chose was one of mine. It is the one in the upper left in the photo below, the one with all the circles.


And here is my progress on the section that I chose to enlarge from the original.


We each enlarged a 2" square section of the original to an 18" square. We were permitted to omit portions of our chosen section in order to create a pleasing composition. We were suppose to stick with the original color palate, but were given license to recolor pieces in order to balance the colors.

Mine is only fused at this point. It still needs to be quilted. At this point I have no idea when that will happen. My store, Alamosa Quilt Company, opened on Monday. I will be pretty busy with getting things going for the next few weeks. The little sewing time I have at the moment is taken up with store and class samples. I look forward to getting back to this one though!


Wednesday, February 17, 2016

Goose on the Loose Quilt Along

Before we start I want you to know that I will provide directions for what I do and give a couple of border options, but you are free to ignore my directions and put your blocks together any way you choose. Whatever you make is yours! You need to be happy with it. You are free to substitute different blocks for block patterns you don’t like. On that note, you don’t have to make a quilt with these blocks. You could make pillows or bags or placemats or something else out of the blocks.

I am going to make a twelve block quilt. Each block will finish at 12” square. The plan is for the finished quilt to measure 52” by 66” with sashing and borders. It will be a straight setting of 3 blocks by 4 blocks. If you would like a larger quilt then I suggest you make two of each block plus a third of your favorite one for a total of twenty-five blocks. With sashing and borders a twenty-five block version of this quilt should measure about 80” by 80”. It will be a straight setting of 5 blocks by 5 blocks.

Below is a photo of my block ideas pages for this project in my design notebook. I'm showing it to you so that you can know that I really do have a plan! 


I have drawn 14 blocks thus far. I know, I know ... I said I was going to make a 12 block quilt. I drew the first twelve blocks a few months ago. When I went to start this project a few weeks ago I realized that a couple of the blocks are very similar to each other. This bothered me so I drew a few more blocks. 

I am using all scraps for my blocks. I am sorting them into lights, mediums and darks and not worrying about color for this sorting process. If you would like to use a consistent background fabric throughout then I suggest you purchase at least 2 yards (maybe a bit more) for the 52” by 66” version, at least 3 yards (maybe a bit more) for the 80” by 80” version.


If you have a fabric for sashing and borders in your stash already then you may want to set it aside now so you don’t use it for another project. I do not have any sashing or border fabric yet for my quilt. I plan to wait until I have all the blocks made then audition various options. For the border there will be at least two options, one pieced and the other plain. For sashing I am planning to use a single fabric with cornerstones, but I may change my mind once I get the blocks made.

Block 1 – Wild and Goosey

This block is paper pieced and uses Bonnie Hunter’s free pattern that appeared in Quiltmaker Magazine in May/June 2013. You will need to download your own copy of the paper piecing pattern. Click here to get the pattern.

You can paper piece the block using any method. There are at least two I am aware of: (1) sew through the paper and (2) use freezer paper and don’t sew through the paper. I did a tutorial on the second method a few years ago. Click here to go to my tutorial.

I used the first method though for this project. I printed out the patterns onto Carol Doak’s foundation paper, cut out the patterns and sewed directly to the paper with a shortened stitch length. When it comes time to tear off the paper, gently run a pin along the seam lines to score the paper and it pulls off fairly easily.

Note: Knowledge of paper piecing is assumed. If you need assistance with the “sew through the paper” method I suggest Carol Doak’s tutorial. Click here to go to the tutorial.

You will need to print out four copies of the pattern for a total of 16 wild and goosey units. For 8 of these I followed the value suggestions printed on the patterns. For the other 8 I reversed the values, that is, I used med/dark fabric where it says to use light and I used light fabric where it says to use med/dark.

Pieces 1, 4, 7, 10, and 11 are made from cutting 2.5” squares in half along the diagonal. This will give you a generous overhang that can be cut down to 1/4” seam allowance after sewing each piece. Pieces 2, 3, 5, 6, 8, and 9 are made from cutting 2” squares in half along the diagonal. Pieces 12 and 13 are made from cutting 3” squares in half along the diagonal.

Thus you need:
(24) 2" squares of light scraps
(24) 2" squares of dark scraps
(40) 2.5" squares of medium scraps
(8) 3" squares of light/medium scraps
(8) 3" squares of medium/dark scraps

When you get your 16 units made, sew them together as shown in the photo below.


If you are quilting along I'd love to hear from you. Just leave a comment. As time allows, I will respond. If you are "no-reply" then I can't respond to you personally. I understand that some folks prefer to remain "no-reply" and that is totally fine. 

If you have any questions at any point, please leave those in the comments. Again, I will respond personally if I can; otherwise I will answer your question with another comment and you'll just need to check back for my response.

If you want to share photos of your blocks with me as you play along I'd love to share them. 

Finally, I have put a "Quilt Along" tab at the top of this blog. All the various posts will be organized there for future reference.