Monday, October 14, 2024

Crimson Tweed is Done, Done, DONE!

 As most Sue Spargo projects are, this one took quite a while. I've been working on this for about four years. The hand quilting alone took a little over two years, but I really only got to work on it on Thursdays during the hand sewing group at my shop.

I included lots of close up shots of the finished quilt below. 

Crimson Tweed Finished

Crimson Tweed Detail 1

Crimson Tweed Detail 2

Crimson Tweed Detail 3

Crimson Tweed Detail 4

Crimson Tweed Detail 5

Crimson Tweed Detail 6

Crimson Tweed Detail 7

Crimson Tweed Detail 8

The pattern is called Crimson Tweed by Sue Spargo. The pattern book is discontinued and I have already sold my personal copy of the pattern to a customer who wanted it. An internet search might turn up a couple copies of the book from an individual who is selling their personal copy or from a shop who might have a copy or two still in their inventory, but I don't have any copies of the pattern book any more.

If you get your hands on a copy be forewarned that this pattern is from 2010. At that time Sue Spargo was not doing as much embroidery on her designs as she uses now. Most of the embroidery I did on this is my own design. There were about 10 of us at my shop who did this project together. We all took ideas from each other and shared lace, buttons, beads and other embellishments within the group.


Monday, September 23, 2024

Crimson Tweed Update

 On Thursday of last week I put the final seed stitch, which is how I hand quilted this, in my version of Crimson Tweed.

Crimson Tweed, quilting completed

I've been working on this for quite some time! I started quilting it in October of 2022. I worked on it most Thursday afternoons at my shop during our Hand Sewing Group. Sometimes store sewing took precedent and I had to get it done instead of working on my Crimson Tweed, but I tried to not let store sewing get in the way very often.

The last step is binding, a label and a hanging sleeve. I have the binding fabric picked out and cut. The plan is to get this finished soon and ready for hanging up in my house this year during the Christmas season. 

When I do my final post on this project I'll take some close up images of it so you can see the details a bit better.


Monday, September 16, 2024

Dip Dyed Rope Bowls

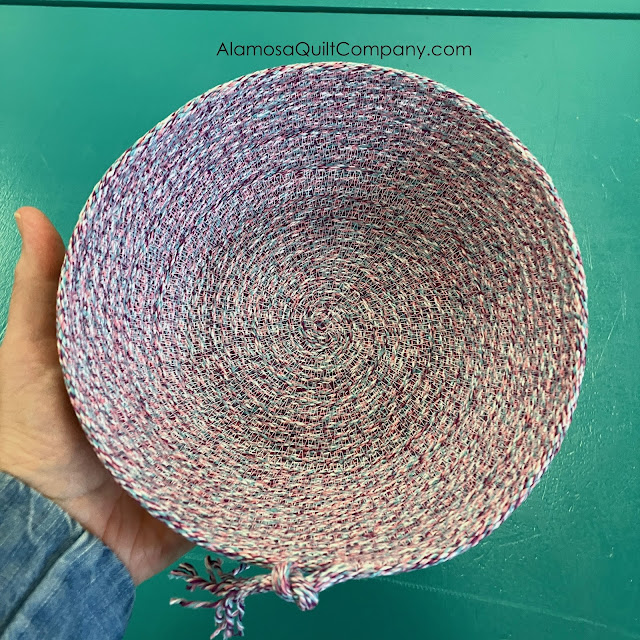
 I did a little experiment last week. I bought some liquid Rit dye from the grocery store along with a bottle of the Rit dye Color Fix. I followed the directions on the bottles and dip dyed a sewn bowl and some loose rope.

Here is the bowl before dyeing.

bowl before dyeing

I used an old bucket to set the bowl and loose rope in with the dye. Then I set them in the sun in my backyard to dry.

dyed bowl and rope drying in the sun

dyed bowl and rope drying in the sun

Here is what the bowl looks like after it dried. 

finished dip dyed bowl

Then I made another bowl with the dip dyed loose rope.

bowl made with loose dip dyed rope top view

bowl made with loose dip dyed rope side view

bowl made with loose dip dyed rope cork finish

On this bowl I tried out a different finish than I've used before. I just finished the bowl then cut a 1.5" by 3" piece of cork and folded it over the end of the rope. I made sure it was evenly folded over the edge and topstitched it down.

I'm not a big fan of dyeing fabric myself. I love the finished product but don't really enjoy the dyeing process personally. Dyeing rope is about the same, but much easier than the methods I have tried for dyeing fabric. It took about 2 hours of dyeing time, most of which was spent waiting. I would guess there was an actual 30 minutes of true work during the 2 hours. Then it took a few more hours of drying time, again, no actual work, just waiting patiently to handle my dyed stuff.

But wow, I love how both of them turned out!

If you would like to try this out and you can't get the supplies locally, I do have all of the rope, rope kits, and a rope sewing book listed for sale on my website.

Rope Sewing Supplies from Alamosa Quilt Company


Monday, September 9, 2024

More Rope Sewing

 I'm having so much fun sewing with the new rope I received in my shop!

The first thing I made with the new rope from The Mountain Thread Company was this Basket with Handles. I used the kit shown in the photos that the basket is sitting on to make it. I wanted to test out their kits. They are excellent! Each kit includes the amount of rope you need to make the project, a denim needle for your sewing machine and the instructions for the project.

Basket with Handles

Basket with Handles


Next I wanted to try out some of the colored rope from The Mountain Thread Company. This is their Spring Poppies Mix and I just made a small bowl. I didn't use a pattern. My base is about 5" and the sides are about 3" tall. Note that the color of the rope is truer in the second photo. In the second photo you can also see how the rope is made. There is no core - it's braided. It's also made in the USA, in North Carolina!

Small basket with colored rope

Small basket with colored rope


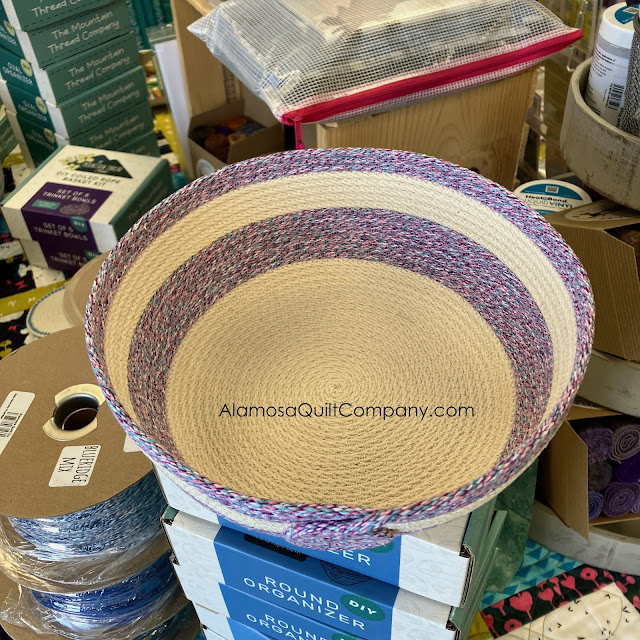
Then I wanted to see how easy it would be to use two different colors of rope in the same project and I wanted to try out the coil finish.

Bowl with two colors of rope

Bowl with two colors of rope

Next I decided to get samples made up of all the kits. Below is the Oval Organizer. To finish it off I did another coil but on the inside of the bowl instead of the outside and I attached the coil to the bowl with a button.

Oval Organizer


Then I made the set of Nesting Bowls. Note that the kit does not include the wooden bead. I had some wooden beads and wanted to try out finishing a bowl with them. So I added on to the largest size bowl.

Nesting Bowls set

Nesting Bowls set


Strictly speaking, I haven't made every set. I haven't made the Set of 5 Trinket Bowls or the Set of 3 Bowls or the Coaster Set with Basket. However, the smallest bowl in the Nesting Set is the same size as the Trinket Bowls. And the medium bowl in the Nesting Set is the same size as the bowls in the Set of 3 Bowls. I've made lots of coasters and the size bowl in the coaster set is in between the medium and large bowls from the Nesting Set.

Then I had some rope leftover from years ago when I was making rope bowls. I had it hand dyed by a friend. I made a few coasters off the roll then just decided to sew it all up into a big bowl. Mission accomplished! It is a very big bowl.

Big orange bowl

Big orange bowl

First, I really don't like this rope after sewing with the new stuff from The Mountain Thread Company. This rope is lumpy, floppy and uneven thickness. It also has a polyester core so you are limited by how you can end it. The bowl bottom is about 11.5", it's 9" tall and the diameter at the top is 18".

You can use lots of different kinds of rope to make these bowls, but the nicer the rope you start out with the nicer the finished product. If you are buying and can feel the rope, pinch it to see how squishy it is. The Mountain Thread Company rope is not squishy at all and sews up beautifully. Squishy rope makes a squishy bowl that won't hold it's shape very well.

I made a short video for how to make a coaster with rope. The video is 11 1/2 minutes long and you see me make the coaster in real time. It actually takes me about 5 minutes to make a coaster, but everything takes longer when you are explaining to folks.


I have embedded the video above but if it doesn't play for you then click this link to view it directly on YouTube: How to make rope coaster

If you are interested in getting some rope and trying this yourself, I do sell the kits and spools of rope in my physical shop and my online shop.


If something is out of stock, I've already ordered more but I'm having trouble keeping this stuff in stock because it's just so fun to work with!


Tuesday, August 20, 2024

Rope Bowls

 This is not new. I've made bowls, baskets and bags using rope in the past, but around 2018 I started having difficulty finding good rope. I ordered several different brands and tried buying from my local Ace Hardware and Walmart, but everything I could find was too "floppy" so I quit.

Well, rope bowl sewing is making a comeback and there are now lots of great rope options on the market again.

Large Rope Bowl 1

Large Rope Bowl 2

The above bowl was made using 100 ft of cotton rope. Then I found a company that makes kits!

Rope Bowl kits

Basket with Handles kit and finished basket

Each one of these kits comes with enough rope to make the project, a 90/14 denim needle for your machine and instructions to make the project. 

Then I ordered several books on the subject to check them out. The only one I ordered for my shop and will recommend is this one:

Best rope bowl project and information book


This book has lots of great projects and great information about sewing with rope. It goes into detail about the different kinds of rope. Not all rope is created equal and not all rope is appropriate for these types of projects! Best to understand the various types and get the right thing for what you want to do rather than just ordering and being disappointed.

I've also ordered some colored rope and more kits, but those items aren't here yet. Hopefully by the end of this week they will be here.

If there is no place to buy stuff for rope sewing in your area, I've got all the stuff you'll need in my shop (in store and online). Click the following link to go to the Rope Sewing section of my website: Rope Projects from Alamosa Quilt Company

The book shown above is listed there for purchase as well as most of the kits from the photos above. If anything is sold out, just check back. I've already reordered several of the kits. When the colored rope and other kits arrive they will also be listed on my website on the same page.


Tuesday, July 23, 2024

Potato Chip Blocks Variation 2 is Closer to Done

 I'm getting closer to finishing up my potato chip quilt.


Quilted Potato Chip variation 2 quilt

I got it quilted this weekend. Next step is binding. I have some scrappy binding and I plan to use it for this scrappy quilt.

Check out the backing fabric I used. I found this in my stash.

Backing fabric
closeup of backing fabric


Monday, July 1, 2024

Potato Chip Block (Variation 2) Sew Along :: Putting the Blocks Together

 I used sashing and corner stones to complete my quilt top using the 12 blocks that I made. If you made 12 blocks and you want to finish your blocks the way I did, the directions are below.

You will need (31) 2" by 12.5" for the sashing and (20) 2" by 2" squares of scraps for the corner stones. If you used the larger 2.5" by 4.5" potato chip pieces, then you need (31) 2.5" by 16.5" rectangles for the sashing and (20) 2.5" by 2.5" squares of scraps for the corner stones.

Using the (20) squares of scraps and (15) of the sashing rectangles, make 5 strips for the horizontal sashing. Each row needs to start and end with a square and have three sashing rectangles in between the squares. See the photo below for what you need to make.

horizontal rows of sashing

Next you are going to add the remaining (16) sashing rectangles in between the blocks. You'll need to make four rows of three blocks with sashing rectangles in between the blocks and on both ends. See the photo below for a sample of what you need to make.

a sample of the block rows

Note that the photo above only shows two rows but you need to make four rows. I alternated the orientation of the blocks but honestly, it really doesn't matter.

And here is my finished top!

my completed potato chip block variation 2 quilt top


If you missed the block instructions click the following link for those: Potato Chip Block (variation 2) instructions

If you missed the contest info click the following link: How to enter the blocks you made in the drawing

Note that the deadline for entry is Friday, July 5, 2024 at midnight.


Friday, June 28, 2024

Potato Chip Block (Variation 2) Sew Along :: Contest Info

 Now is the time to enter. Unless you are local and can bring your blocks into the shop, you need to take ONE photo of your blocks similar to what I did below. I made 12 blocks, but your photo should include all of the blocks you made. And one block is totally fine, it counts!

example of how to photograph your blocks

You can enter the contest in any of the following ways, but please only do ONE:

(1) If you are local, you don't need to take a photo. You can just bring all of your blocks into the shop. We'll count them and make a note of your name and the number blocks on our contest list.

(2) Email your photo to AlamosaQuiltCompany@gmail.com. Use the Subject line: Potato Chip Block Contest. Please include your name and a phone number in your message so we can contact you if your name is drawn. If you would prefer to be texted instead of called, let me know.

(3) Text your photo to (719) 480-8483. This is the shop's texting only number. If you call the number no one will answer. Please include your name in the text message so we can put your name in our drawing the appropriate number of times.

(4) Send your photo via Facebook Messenger to the shop. Click the link to go to our Facebook page and you can message the shop from there: Alamosa Quilt Company Facebook Page. Please include your phone number in your message so we can call you if your name is drawn. If you prefer to be texted instead of called, just let me know.

You don't need to provide a mailing address yet. If your name is drawn I will contact you and we can work out those details at that time.

The deadline for entry in the contest is midnight on Friday, July 5, 2024. On Saturday, July 6, 2024 I will make up the scrap bag, draw a name and contact the winner. If I get a lot of entries then I might draw more than one name. I definitely have enough of scraps to make up several prize bags!


Monday, June 24, 2024

Potato Chip Block (Variation 2) Sew Along :: My Blocks are Done!

 Things have settled down a bit for the moment with the POS switch. As with so many things, there is a lot of "hurry up and wait" with this. Since I didn't have to focus so much on the POS project last week I was able to get my blocks done.

12 Completed Potato Chip Blocks, variation 2

This week I will try to do the sashing I have planned and write up the instructions for that so that you can finish yours just like mine if you want to. If you don't, it won't hurt my feelings at all. It's YOUR quilt and you should feel free to finish it anyway you like.

Get busy making your blocks. The deadline for having them done in time to enter my contest is fast approaching. On Friday of this week, specifically June 28, 2024, I will release the instructions for how to enter the contest and you will have several days to enter. The prize is a big bag of scraps from my shop. We don't save tiny pieces. Most scrap pieces are 3" by 9" or larger. I will be making up this bag specifically for the winner and won't put anything smaller than 3" by 9" in the bag. I will fill a 10" by 13" ziplock bag as full as I can and still zip it shut, which will hold quite a lot (about 4-5 yards).

Again, anyone anywhere is welcome to enter and there is no purchase of anything required. If you live in the US and your name is drawn then I will mail you a bag of scraps for free or if you are local you can just come pick it up. If you live outside the US, I will email you a PDF copy of a pattern. You will get one entry for every block you have made. So you need to take a photo similar to what I did. I need to be able to clearly see how many blocks you have made in the photo. And I only want ONE photo, so all of your blocks need to be neatly laid out in ONE photo.