Tuesday, February 12, 2013

Scrap Solutions

I have a couple of scrap quilting books. I love scraps and scrappy quilts, but my scraps have gotten out of hand. After reading my scrap books I realized that my main problem is that I just throw the scraps in a king size blanket bag instead of dealing with them as I make them. A few months ago I decided to get serious about my "scrap problem."

I started by cutting width of fabric strips from every fabric I could and some squares. I blogged about this here. But this didn't really address my scrap problem. It was just a way to use up older fabrics.

To tackle the scraps I began by cutting a tumbler shape out of every fabric in my scrap bag that was large enough.
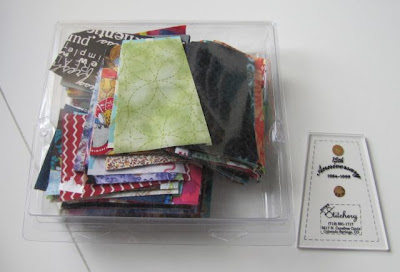

I got that tumbler template from a Colorado Springs quilt store when we lived there. That was in 1998 through mid 2000.

Part way through this process I realized that this didn't use up much fabric! I only need a 3.5" by 4" piece to cut a tumbler shape. So I began sorting the rest. Fabrics I really like or have used recently (within the last year) went into a basket.

I'm keeping the ones in the blue basket on the right
Fabrics that were too small to cut a tumbler shape, older fabrics I don't really like, and fabrics that were donated to me and I'm done with went into bags to be given away.

fabrics bagged up to be given away
The blanket bag in the photo above is the king size bag I used to keep scraps in. Before I started this process it was so full that it wouldn't zip closed. I had started a second scrap bag in the blue basket sitting behind the bag that now contains the scraps I'm keeping. Unfortunately I didn't take a before photo. I thought I had, but if I did I can't find it now.

I also have another container of scraps that I'm cutting into 2" and 4" squares.


Next to it is the bag of scraps left over from my Modern Monday quilt. They will get added to this container.

I have a couple of scrap patterns in mind to make with my 2" and 4" squares. Below is one.


This block is called Scrap Jar Star. Click the link to see where I got the idea and for a tutorial to make the block. The tutorial calls for the star points to be made from HSTs. I used my Winger Clipper ruler to make my star points from flying geese units. It is a little harder to get a really scrappy look with my method, but I think with more blocks I can mix up the geese better if I want.

I'm going to try to cut up the rest of the scraps I'm keeping into usable sized pieces instead of just throwing them in a basket or bag. I now have a manageable amount of scraps to attempt to cut up. The overflowing king size blanket bag of scraps was an overwhelming amount of fabric for me to cut up! Giving scraps to someone else is an acceptable technique for scrap management in my book.


Monday, February 11, 2013

Embroidery Hoop Tool Holder

Last week I saw the photo below

Photo from Marika at Live, Laugh, Love ... Sew
used with permission

on one of the blogs I follow, Live, Laugh, Love ... Sew written by the talented Marika. I looked around online for directions and found some on the Sew Daily website. Click here to get them. You may need to register first.

This is how I made mine. It isn't as fancy as Marika's. She obviously pieced hers, which is super cute! This is just my first one so I opted for a bit simpler.

What you need:
  • an embroidery hoop
  • a square of fusible fleece 2" or 3" larger than your hoop
  • two squares of fabric 2" or 3" larger than your hoop 
  • thread
I used a 12" hoop so my fabric and fleece squares were 14". Fuse your background fabric to the fleece. Fold your pocket fabric in half and press. Place your pocket fabric on the bottom half of the background. Lay your hoop and tools on top to figure out your pocket sewing lines and mark them.


Stitch the pockets. I started at the fold and backstitched to reinforce this stress point.


Put this in the hoop.


Put the tools in to make sure everything fits.


There are several ways to finish these. This time, I simply cut everything off even with the back of the hoop. I'm going to use it this way for a while to see if this is sufficient or if I need to do something more permanent. The instructions I linked to above suggested glue between the fabric and the hoop. If anyone has a good suggestion for how to finish this more permanently, I'd love to hear it. Please leave a comment so everyone can benefit from your expertise.


Hang on the wall and enjoy!


Currently this is hanging on one nail. For this to be a good option I should have distributed the weight of my tools better. The rotary cutters are the heaviest and both on the same side which means the nail can't be at the top or the hoop hangs slanted. Another option is two nails spaced a couple of inches apart. Notice that Marika put a ribbon at the top of her hoop to hang it.

I just thought this was so cute! And it was easy too. The one above took me about 30 minutes to make which included picking out the fabric and finding my embroidery hoops.


Friday, February 8, 2013

Learning Something New

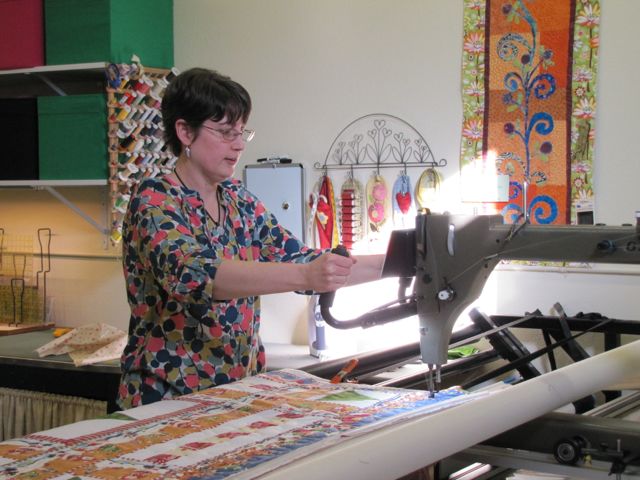
Yesterday afternoon I learned how to use Big Louie at my LQS.


I am in no way unhappy with my HQ Sweet 16! The store owner wants all employees to be trained on Louie so we can help customers who come in to use him if we are working that day.

I've been working an extra day at my LQS as needed. Yesterday was one of those days. In the morning we took down all of the Christmas samples we had hanging around the store. I quilted up one of these as my practice piece.


Since this was my first time using a real long arm on a frame, I just did an all-over fairly large meander. I wanted to get comfortable with how the machine moves before trying anything more intricate.

I will bind this and then I don't know what we will do with it. Maybe sell it or donate it to charity.


Wednesday, February 6, 2013

Wednesday edition of Modern Monday

I finished the last three of my Modern Monday blocks yesterday!

Here are blocks 62, 63 & 64:


So I copped out a bit with #64. It is just a 6.5" square of one of my favorite pink print. Jenifer said to do whatever we wanted for the last block and that it would be our signature block. I laid all of my blocks up on my design wall to see if there was anything I really felt needed to be added. There are several other blocks I can use as my signature block and no great ideas for pieced blocks occurred to me. The only thing I felt was lacking was a very simple square so that is what I did.

Here are all of my blocks. These are right out of the bag, no arranging was done.


Originally I thought I would not sash these blocks and sew them together as Jenifer suggested. But then I saw Caroll's blocks all sashed and they look wonderful! She used three different sashing fabrics instead of the recommended two fabrics. I love it with three! I think that might be what I do too, I don't know. I'm going to leave them up on my design wall for a few days to see if anything else occurs to me. If not, I'm going to use white, ash and medium gray Kona solids as my three colors.

Caroll said that she has finished her quilt. Go to Attic Window Quilt Shop blog to see it.


Tuesday, February 5, 2013

Which Witch's Boot - Finished!

Another finish to share this week! Again, I'm thrilled with how this has turned out!


I must admit that I was a bit afraid to quilt this. I've never quilted an embroidery piece before and wasn't quite sure how to quilt it. It has been basted and ready to go for about three weeks waiting for inspiration to strike.

Despite my quilt tester's assistance, I finished the quilting over the weekend.


I used three different thread colors, orange, parchment and shades of grey, all Signature 40 wt. cotton. This is the first time I've used one of the Signature variegated threads. I really like this one!


I quilted lines in orange on the pumpkin fabric following the vertical lines in the fabric. I quilted a spider web in each of the pieced nine patch blocks. I'm really happy with how well those turned out! I just stippled around the embroidery because I didn't want the quilting to compete with the embroidery. The narrow black border got circles and you can see the shades of grey thread pretty well on it. I did the Back and Forth pattern from Free-Motion Quilting with Angela Waters in the outer border. It doesn't show up well because I used the shades of grey there too, but I wanted the fabric to be the focus not the quilting. The finished size is about 38" tall by 39.5" wide.

Now I'm ready for Halloween 2013!


Monday, February 4, 2013

Sue Spargo Ornaments - Finished!

I'm thrilled by how well these turned out!


And a shot of the backs.


I opted to simply blanket stitch around the two pieces to hold them together and incorporated the hanging loop into the blanket stitch process. By that I mean that I left about a 6" tail at the beginning, stitched all the way around, tied the two ends together with a double knot then knotted the ends to make the loop.

Since I've already put all of my Christmas stuff away, (and I don't want to get it back out just to put these away) I'm going to hang these in my sewing room until I put our tree up in December.


Friday, February 1, 2013

Finished Triple Zip Bag & Another Ornament

Yesterday afternoon I sewed up my Triple Zip Bag. The pattern and all quilt along information can be found in the link. I followed the pattern as Debbie wrote it. I found last page of the pattern a bit challenging for me to execute well. After making this first one I found this tutorial with an alternate method for finishing. I will definitely do it this way next time.


As you can see, I went with my first group of fabrics for this one. I did use an orange print for the lining though.


One fat quarter was more than enough to cut all three lining pieces out of. Mine finished at about 7" wide by 5.5" tall. Despite my difficulties with the last couple of steps, I'm really happy with how this little bag turned out. It is very cute and I think will be quite useful. I'm looking forward to using it!

I also finished the embroidery on the last Sue Spargo ornament.


On the left next to it is what I am doing on the back piece for each ornament. I still have more backs to embroider but I hope to have these done soon. Why, oh why, did I put off making these? I have no idea but I'm glad they are finally getting done.