Wednesday, May 11, 2022

Customer Show and Tell

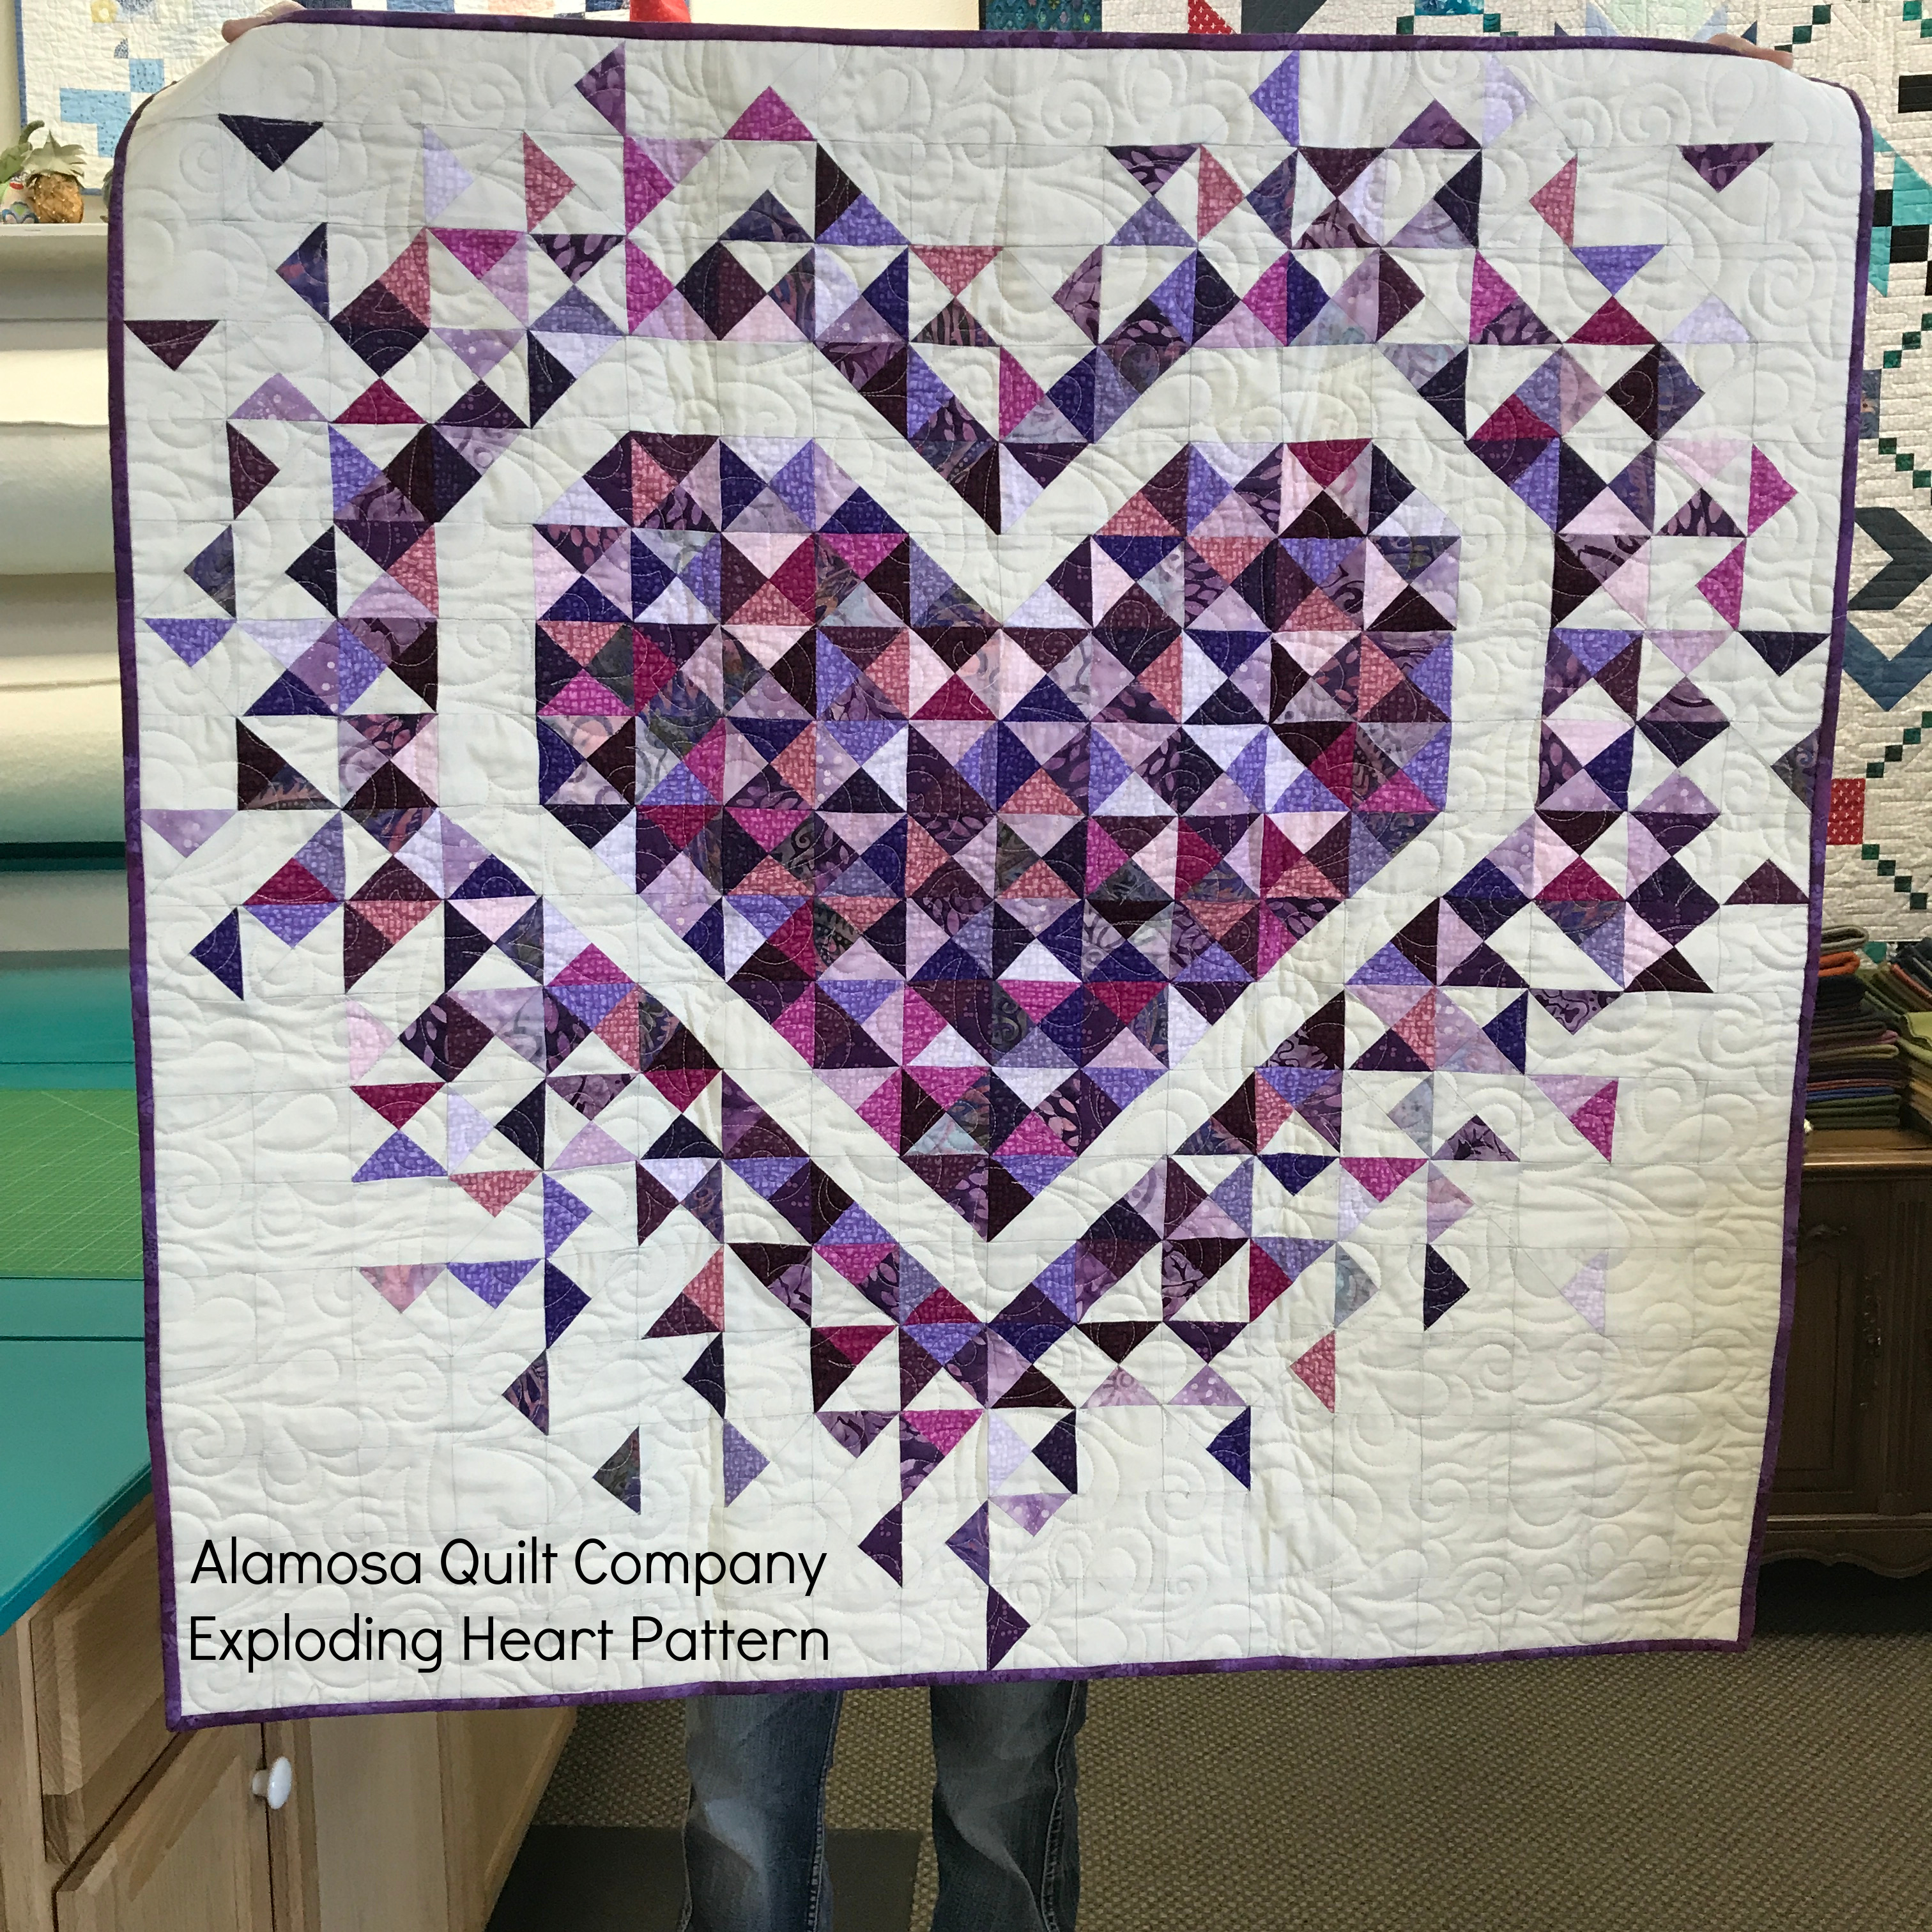
 The Exploding Heart pattern has been a popular pattern and class at my shop. This is Vicki R.'s version. The link will take you to the pattern in my online shop.

Exploding Heart Vicki R

She used purples and pinks for her "colors" with a white background. She took our class on this and I helped her to downsize the pattern to make a small wall hanging that finished at 36" by 36".

*****

Janet D. spent a week last month at the Alegre Retreat in Gateway, Colorado. She took a class from Sheila Frampton Cooper and this is her completed class project.

Art Quilt by Janet D.

Janet is a very talented artist! She has been entering major quilt shows for years and she wins often. You can see why. This is just a class project and her first project following the technique taught in her class.


Monday, May 9, 2022

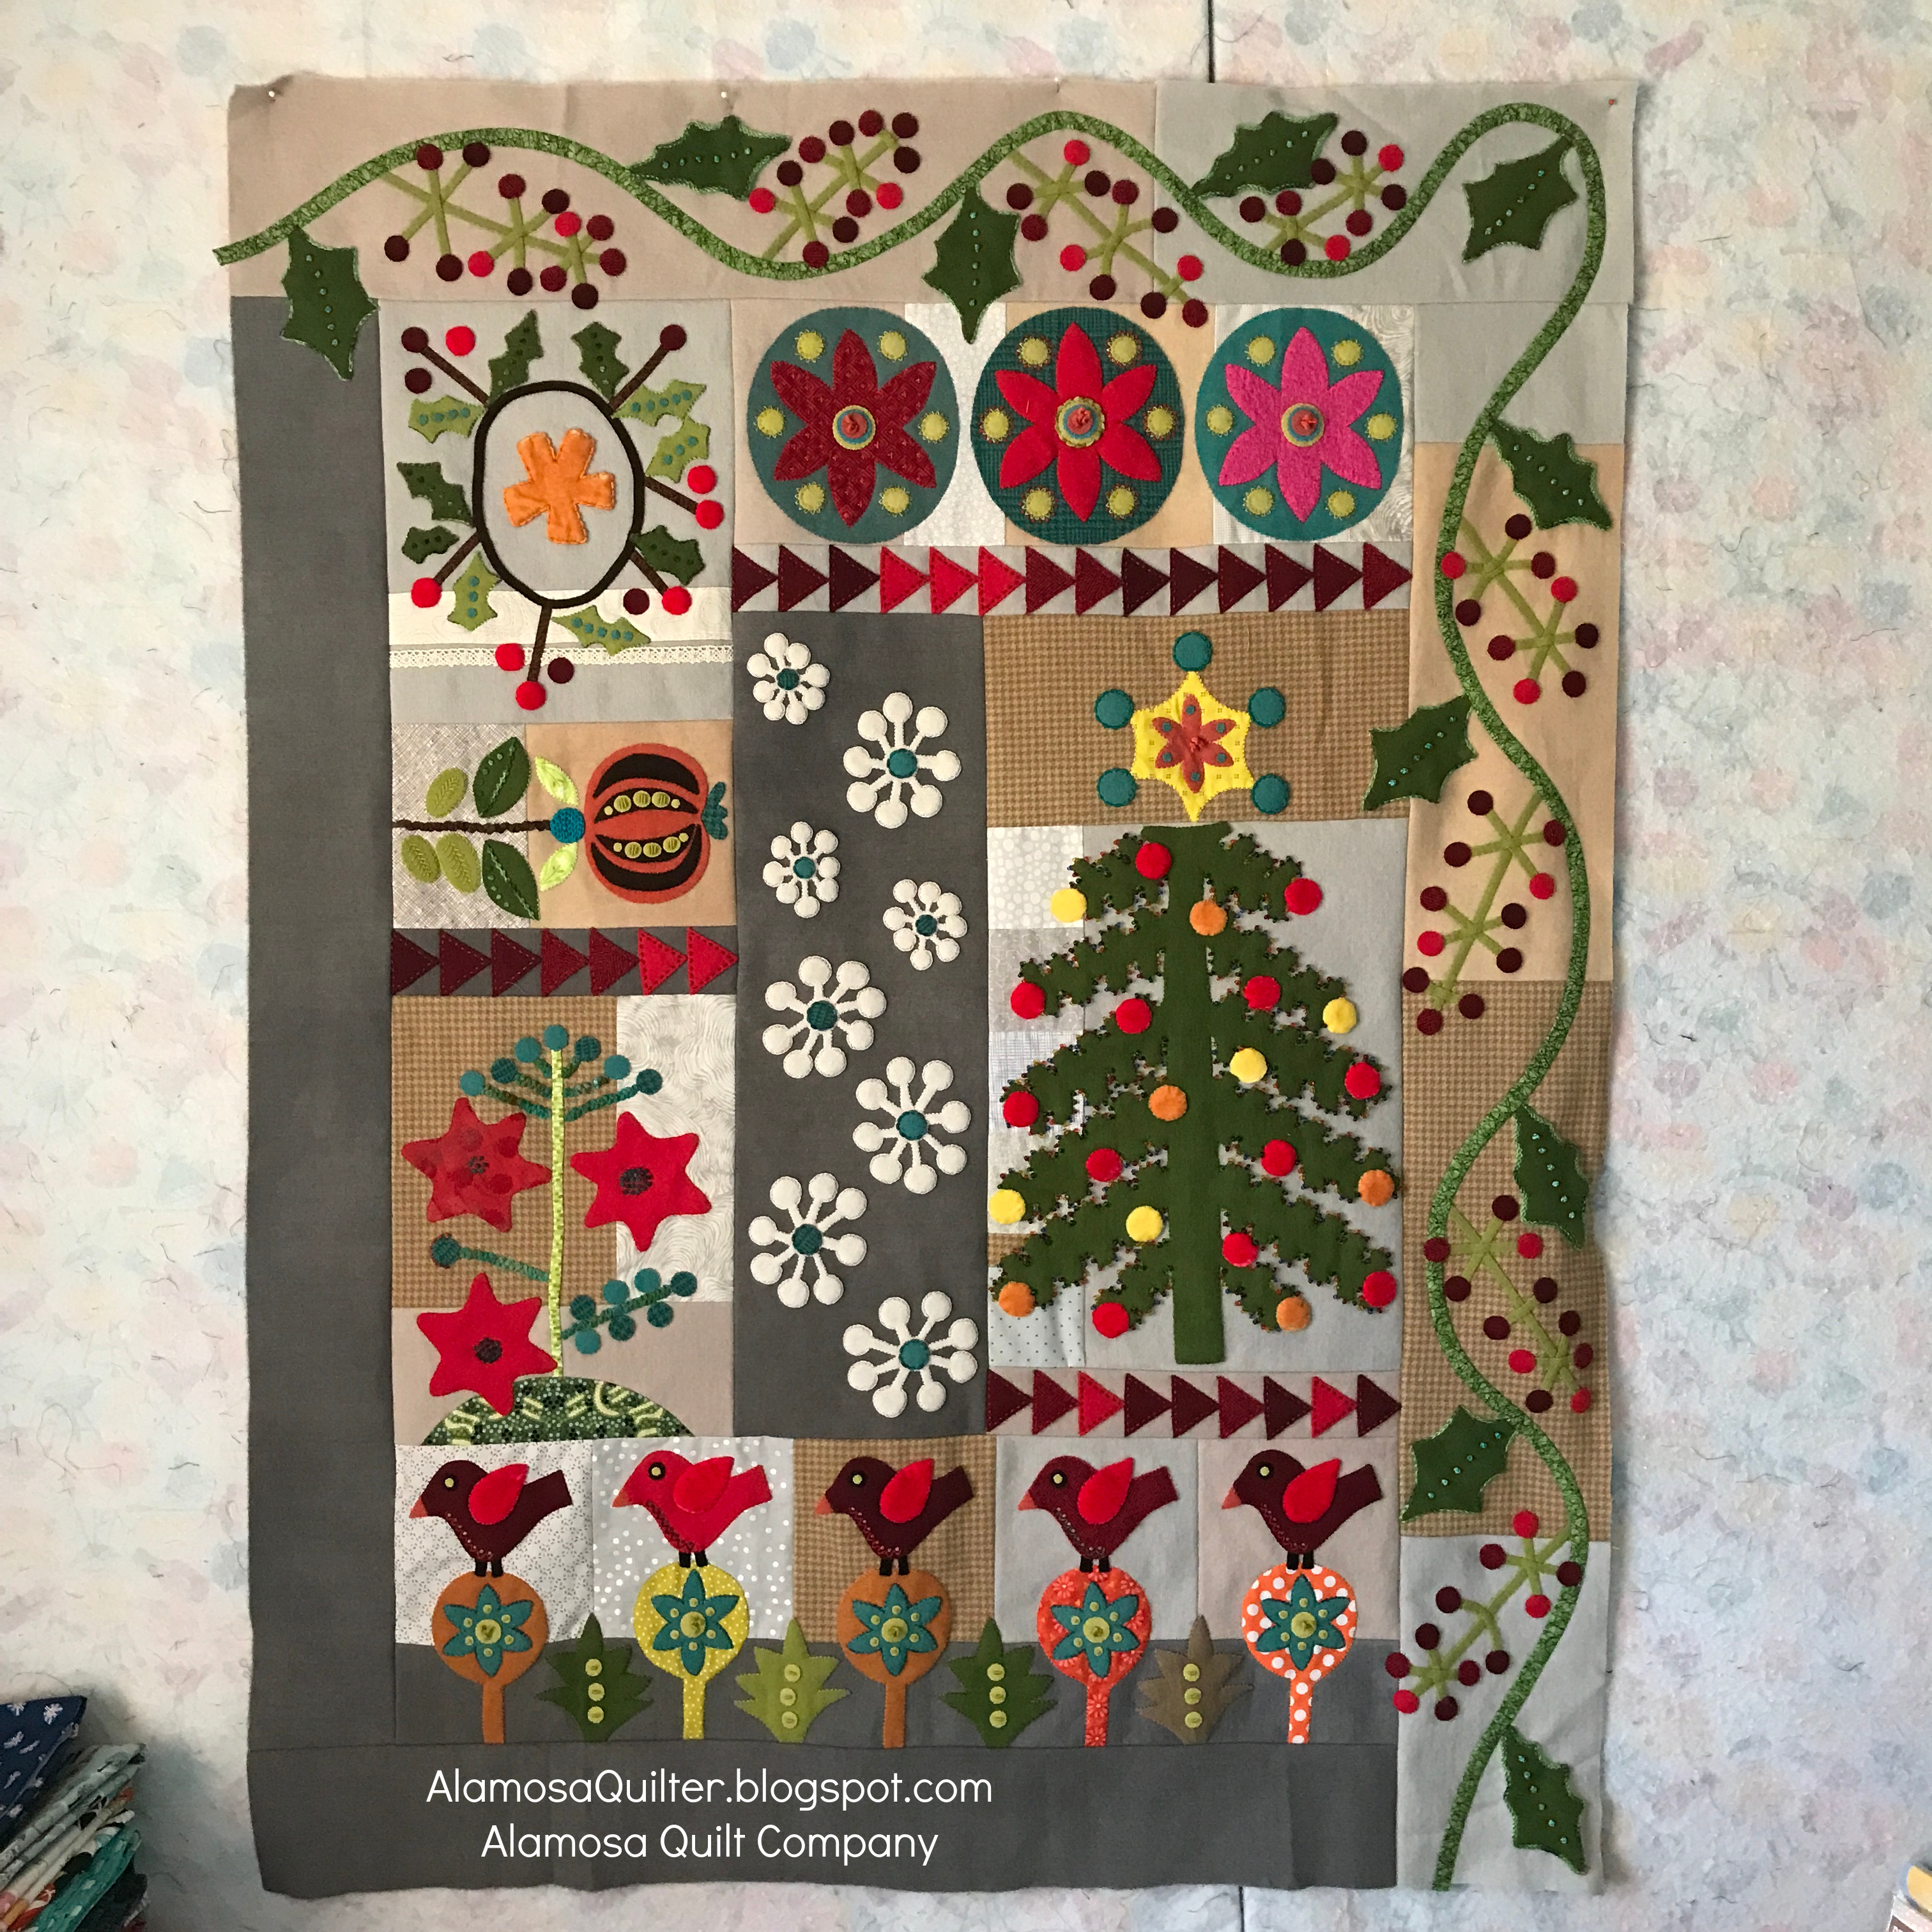
Crimson Tweed Update

 I might be done with the embroidery and ready to baste it together for quilting.

Crimson Tweed

But I'm not sure yet. I just hung this up on my design wall and I will think about it for a few days. If I get a great idea for more embroidery I could do in the border then I will do it. If nothing occurs to me within a week or so I will just baste it together with backing and batting and start quilting.


Friday, May 6, 2022

Finish It Up Friday

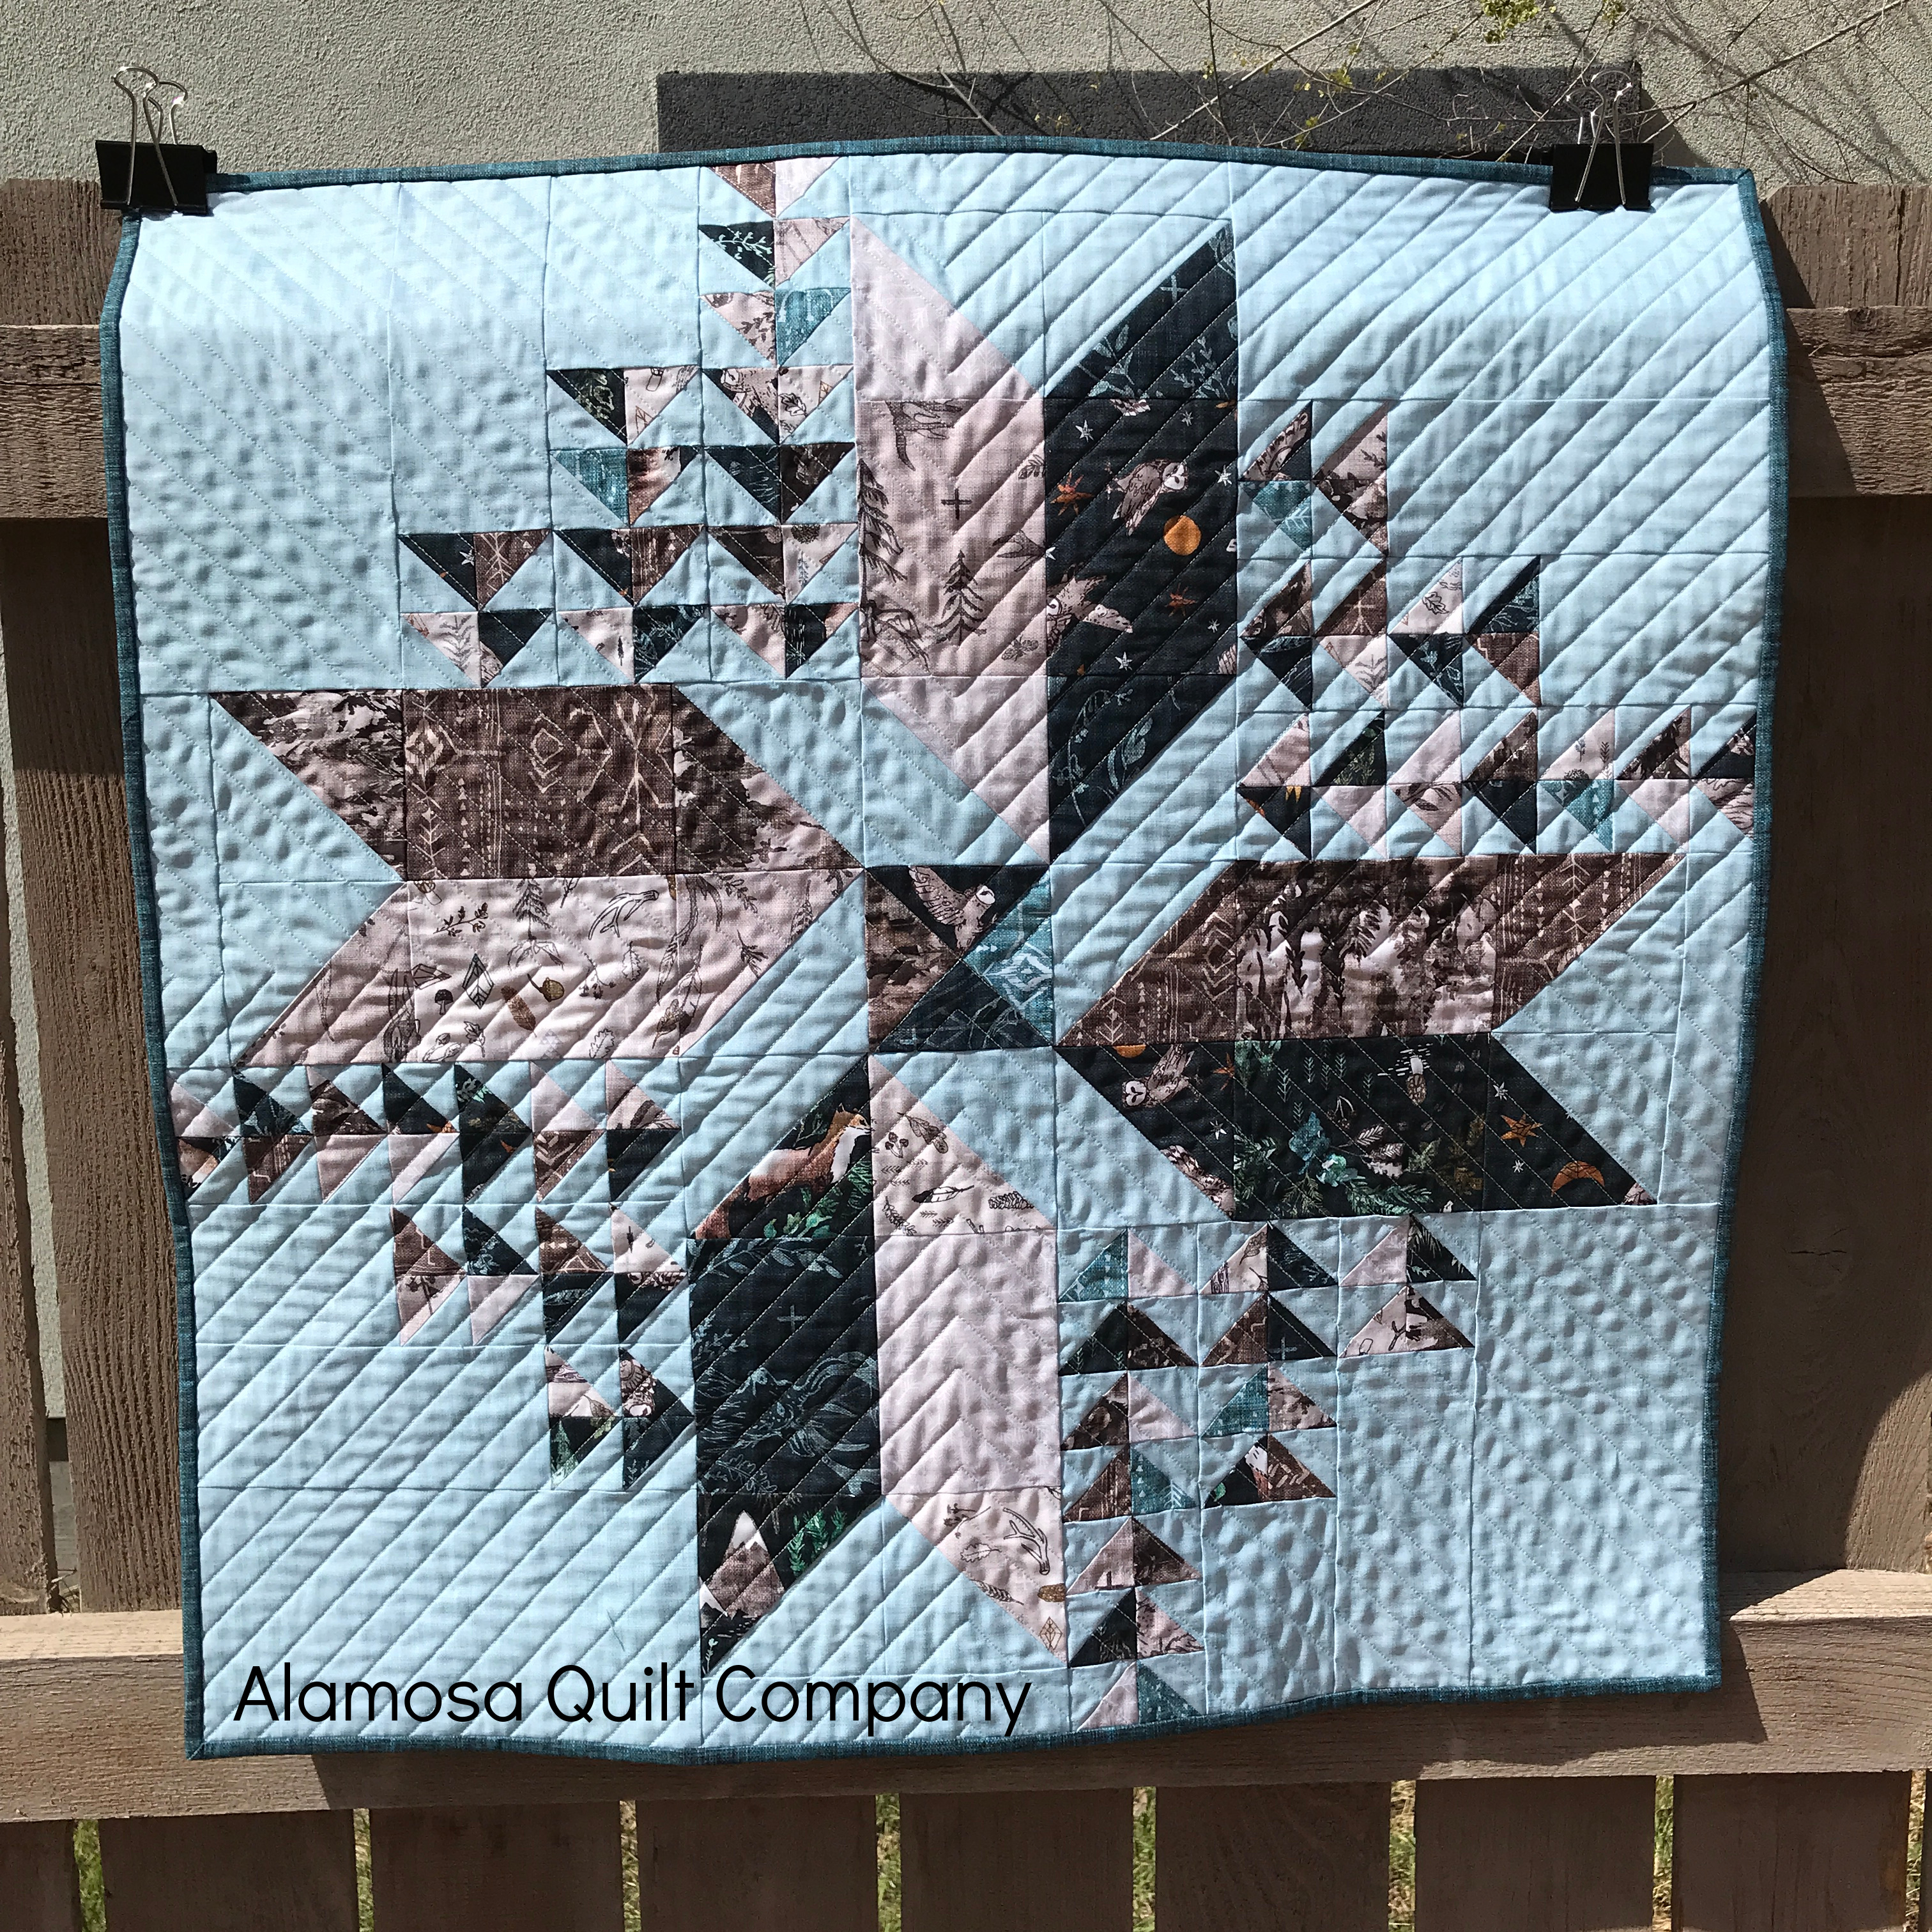
 I got my Wind Drifter shop sample quilted. Patterns are available by clicking the link: Wind Drifter.

Wind Drifter Quilted

I quilted this very simply but I love the effect. I started by quilting a straight line from corner to corner diagonally in both directions. Then I used a ruler and quilted lines in a "V" shape to fill in each section. The lines are 3/4" apart. I used my Q20 longarm and a straight ruler but you could easily do the exact same thing with a walking foot on a regular sewing machine.

My other finish for this week is a Chunky Wee Zippy Pouch.

Chunky Wee Zippy Pouch

This is a new-to-me pattern and a new pattern that I have in my shop. There are several patterns on the market right now for these little duffle style bags but this is the only one I have found that has all the information you need in the pattern to make one in any size you want. It includes all of the information and measurements for three sizes of bag PLUS the fill-in-the-blank formulas so that you can make one whatever size you want. You do have to do a little arithmetic, but you don't have to start from scratch to figure out what size to cut your pieces so that you end up with a specific size bag. Very handy!

The pattern is very well laid out and well written with plenty of diagrams to help you out. It stands up nicely because you use interfacing and fusible web. I don't recommend using batting or foam batting like Soft and Stable. Those are just too thick for this pattern. I made my own pull tabs instead of using grosgrain ribbon as the pattern suggested - this was a mistake. I made my pull tabs too thick and had trouble sewing over them along with the zipper. I was able to make it work but on my next one I will either use ribbon or make the tabs with less layers of fabric.


Wednesday, May 4, 2022

Customer Show and Tell

One of the best parts of my job is getting to help folks choose fabrics and patterns for their projects and then getting to see the finished item!

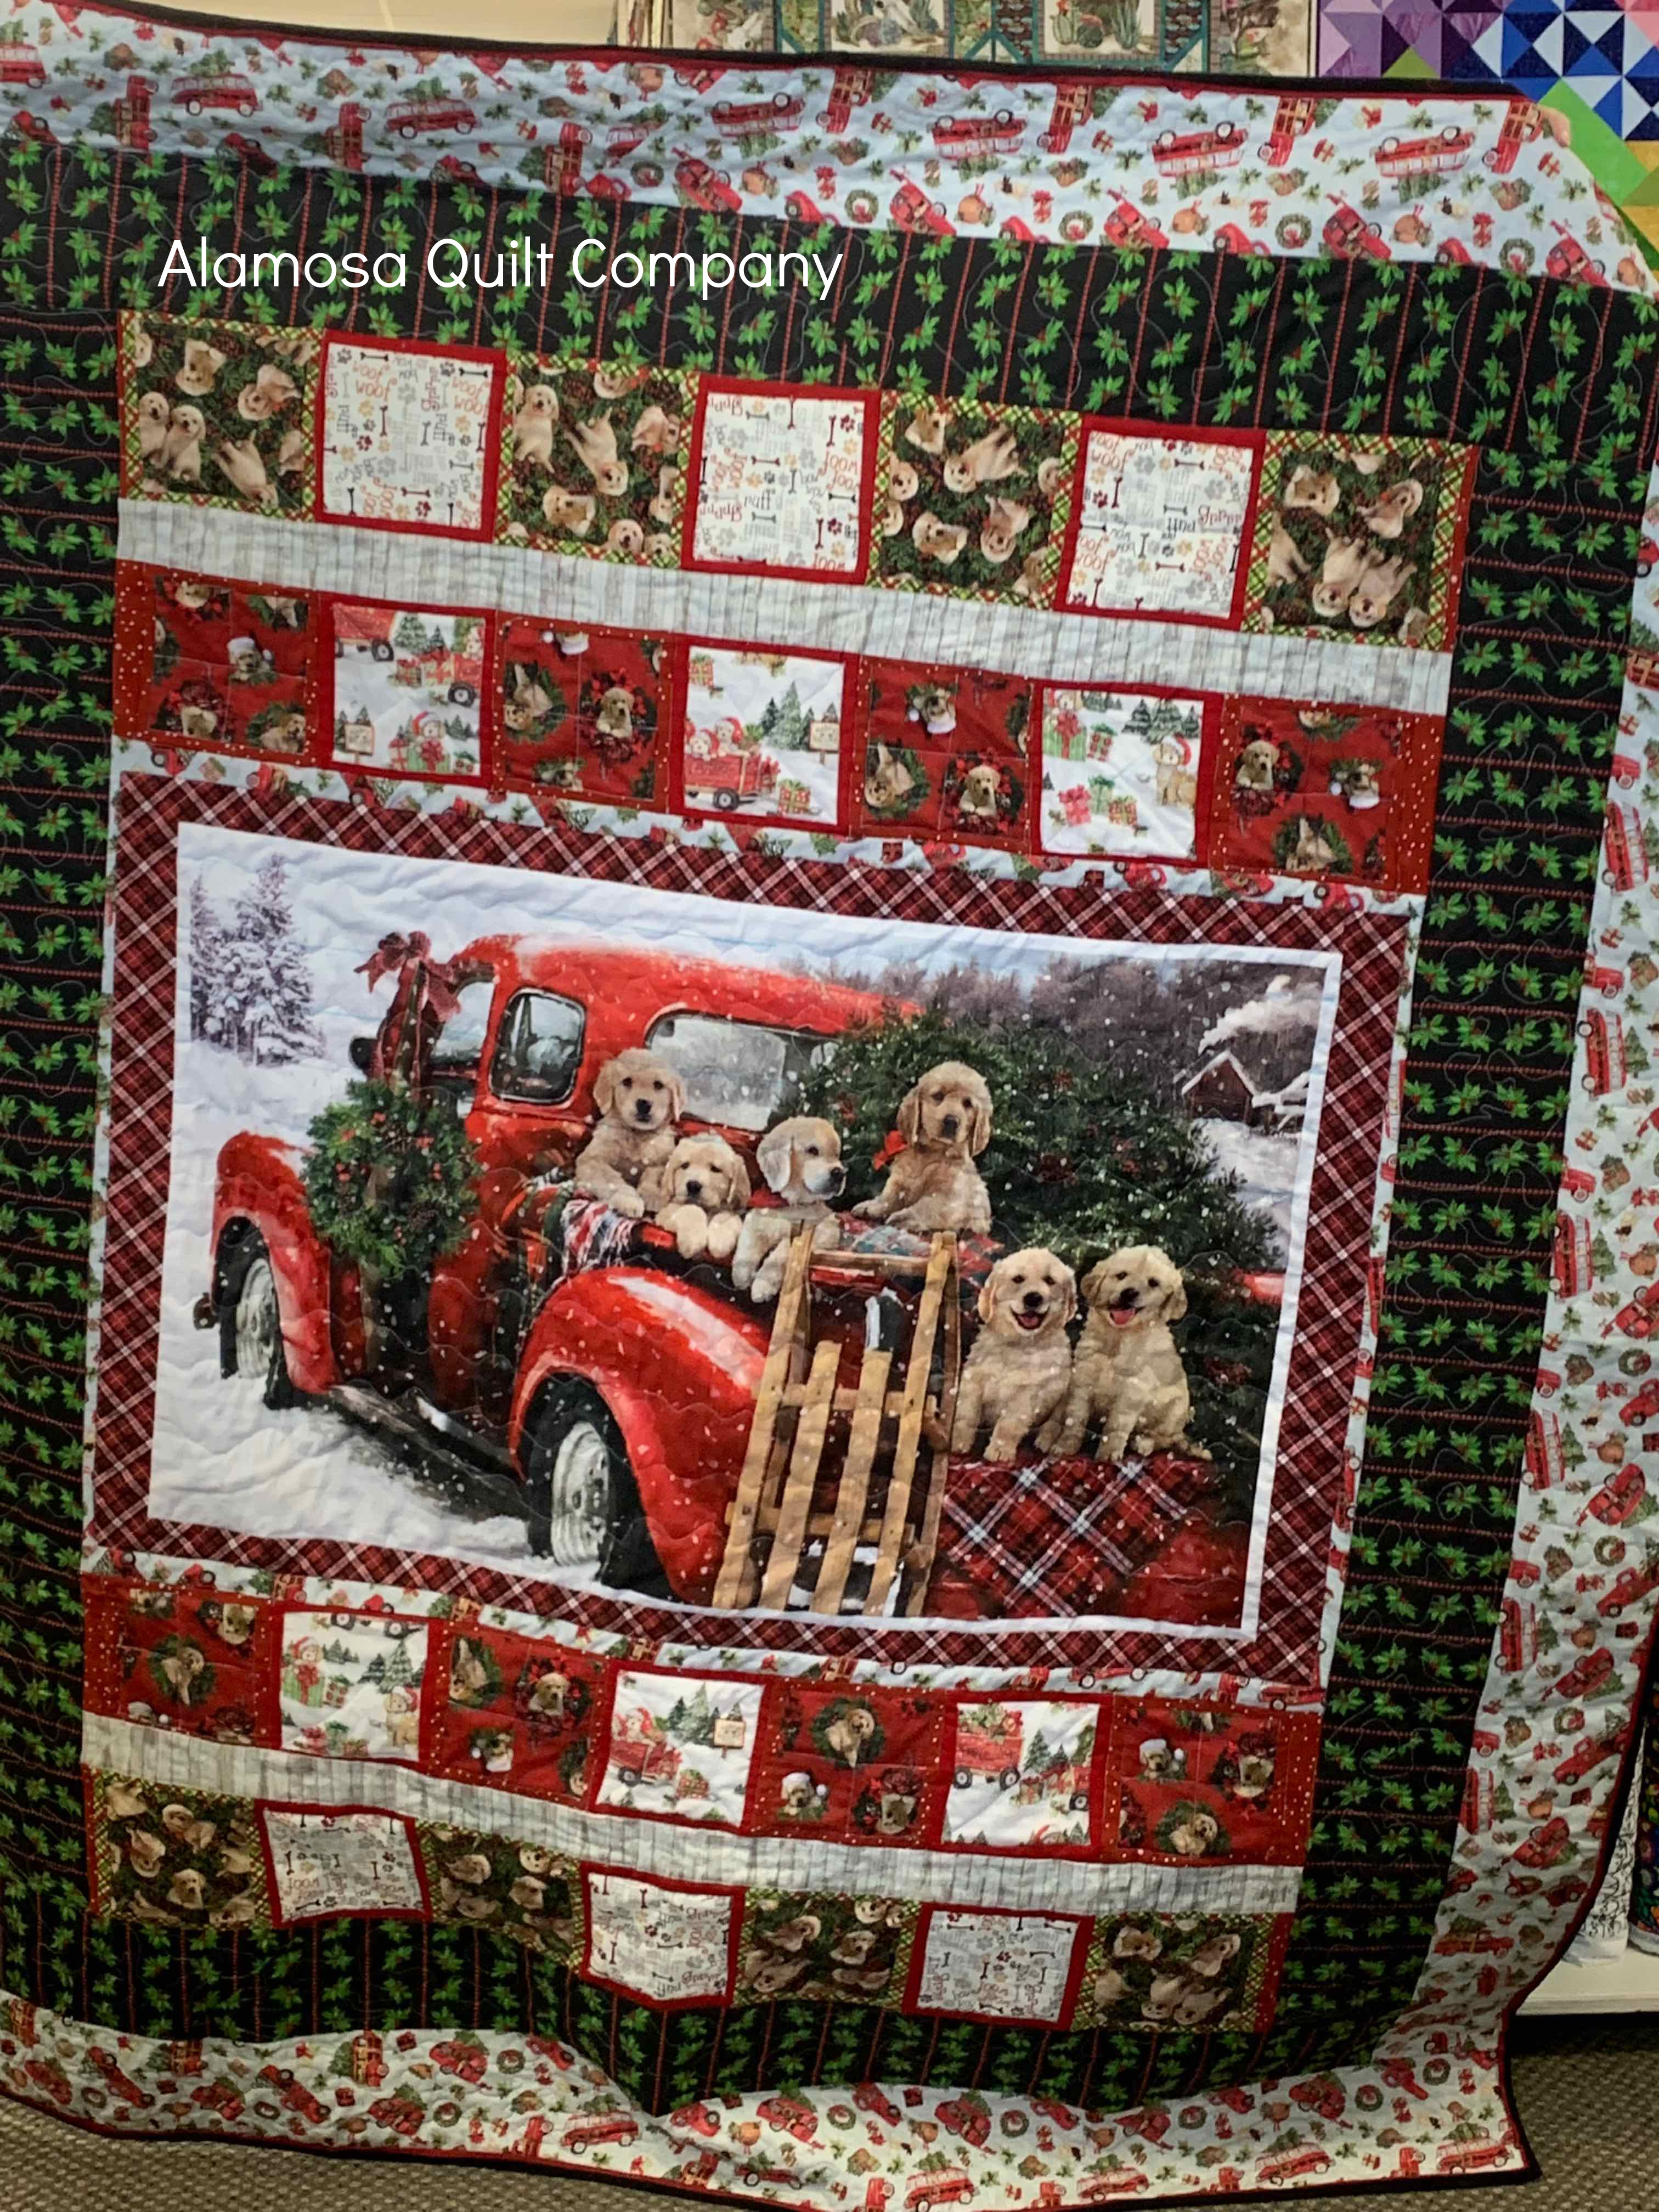
This was made by Sharon M. as a Christmas gift. She is starting early for this Christmas!

Sharon M. Christmas Quilt

 She purchased the panel and a few companion prints from another shop but needed a few more fabrics to round out the pattern she chose and those came from my shop. Great job Sharon!

This one is just a top by Joan D. She purchased a lot of the fabrics from my shop.

Joan D. Squares Quilt

I wish I knew the name of this pattern or if she just made it up. If you know would you please leave me a comment. Joan came into the shop on a Monday and I wasn't there so I couldn't ask her.

Great job ladies! If you are ever in the area I would love for you to stop in to my shop and show off what you have been working on. All of the contact information and address for my shop can be found by clicking here.


Tuesday, May 3, 2022

March Madness Challenge Winners

 My shop sponsored a little challenge recently. I called it March Madness because it's cute, catchy and you had to be a little bit mad to give it a try. You can click the following link to read the challenge rules: March Madness Challenge

We had eleven folks brave enough to give it a try AND bring their item back in for voting.

March Madness Challenge Display

There were some really creative items made using those little 1" finished size units! Visitors to the shop were able to vote for their favorites all month in April and I tallied the votes on Saturday, April 30th. Here are the winners:

March Madness Challenge Winners

That fish was hands down almost everyone's favorite but all of the entries received several votes each. There were only two votes separating 2nd place and 3rd place. It was fun and I'm already thinking about what kind of challenge I can give next.

Scroll back up and look at the first photo. I'm really impressed by my employee, Leah, who came up with such a cute and unique way to display such a wide variety of items. That was a challenge in itself!


Friday, April 29, 2022

Do you like Shop Hops?

 If you do, then do you know about the monthly FabShop Hop? It's a virtual shop hop with prizes and everything! All the details along with how to register yourself for the hop can be found by following this link: FabShop Hop.

There is a lot of information on the page those links take you to. If you just want to register yourself and figure the rest out later, click this link: Register for FabShop Hop.

FabShop Hop logo

My shop is participating in the May hop, as well as June, July and August. And maybe more but I've only committed right now to four months.

Look for the image above on my shop website, Alamosa Quilt Company. This is a great way to find new independently owned local quilt shops, especially if you don't happen to live near one! Search for the "Found It" bunny on my website and all the other websites of participating shops to enter the drawings for prizes.

The hop starts May 1, 2022. Hope to "see" you there!


Monday, April 25, 2022

Canvas Tote Bag :: A Tutorial

 I am making up kits for these adorable canvas tote bags. I needed to refresh my tote bag pattern and thought I'd do a tutorial as well. So here goes:

The finished size is 17" wide by 14" tall by 5" deep. You'll need 1/2 yard of canvas fabric for the exterior and 3/4 yard of regular quilting cotton for the lining and handles. Or you can purchase one of our kits. We have several options: Basic Tote Nya-Nya, Basic Tote Midnight Geometric, Basic Tote Leaf Pods.    

Optional: 1 1/2 yards ShapeFlex interfacing. ShapeFlex is my favorite interfacing for bags. It is a Pellon product - SF101.

Let's get started:

From your canvas exterior fabric you need to cut two 17 1/2" by 17 1/2" squares. From your lining fabric you need to cut two 17 1/2" by 17 1/2" squares and two 4" by width of fabric strips for the handles. From the interfacing, if you are using it, cut two 17 1/2" by 17 1/2" squares and four 4" by width of interfacing strips. The interfacing is only about 20" wide.

Iron the interfacing squares to the wrong side of the lining squares. Iron two 4" by width of interfacing pieces to each 4" by width of fabric handle pieces. Just butt up the edges of the interfacing toward the middle of the handle piece and iron it down. Note: the interfacing will not cover the entire width of fabric strip, but will cover most of it. You can cut off the excess fabric not covered, or not.

canvas tote bag handle

Fold the handle in half lengthwise, wrong sides together, and press to create a 2" by width of fabric piece. Open this back out and fold each raw edge in towards the fold and press again. Then press in half along the original center fold to create a piece that is 1" by width of fabric. 

canvas tote handle

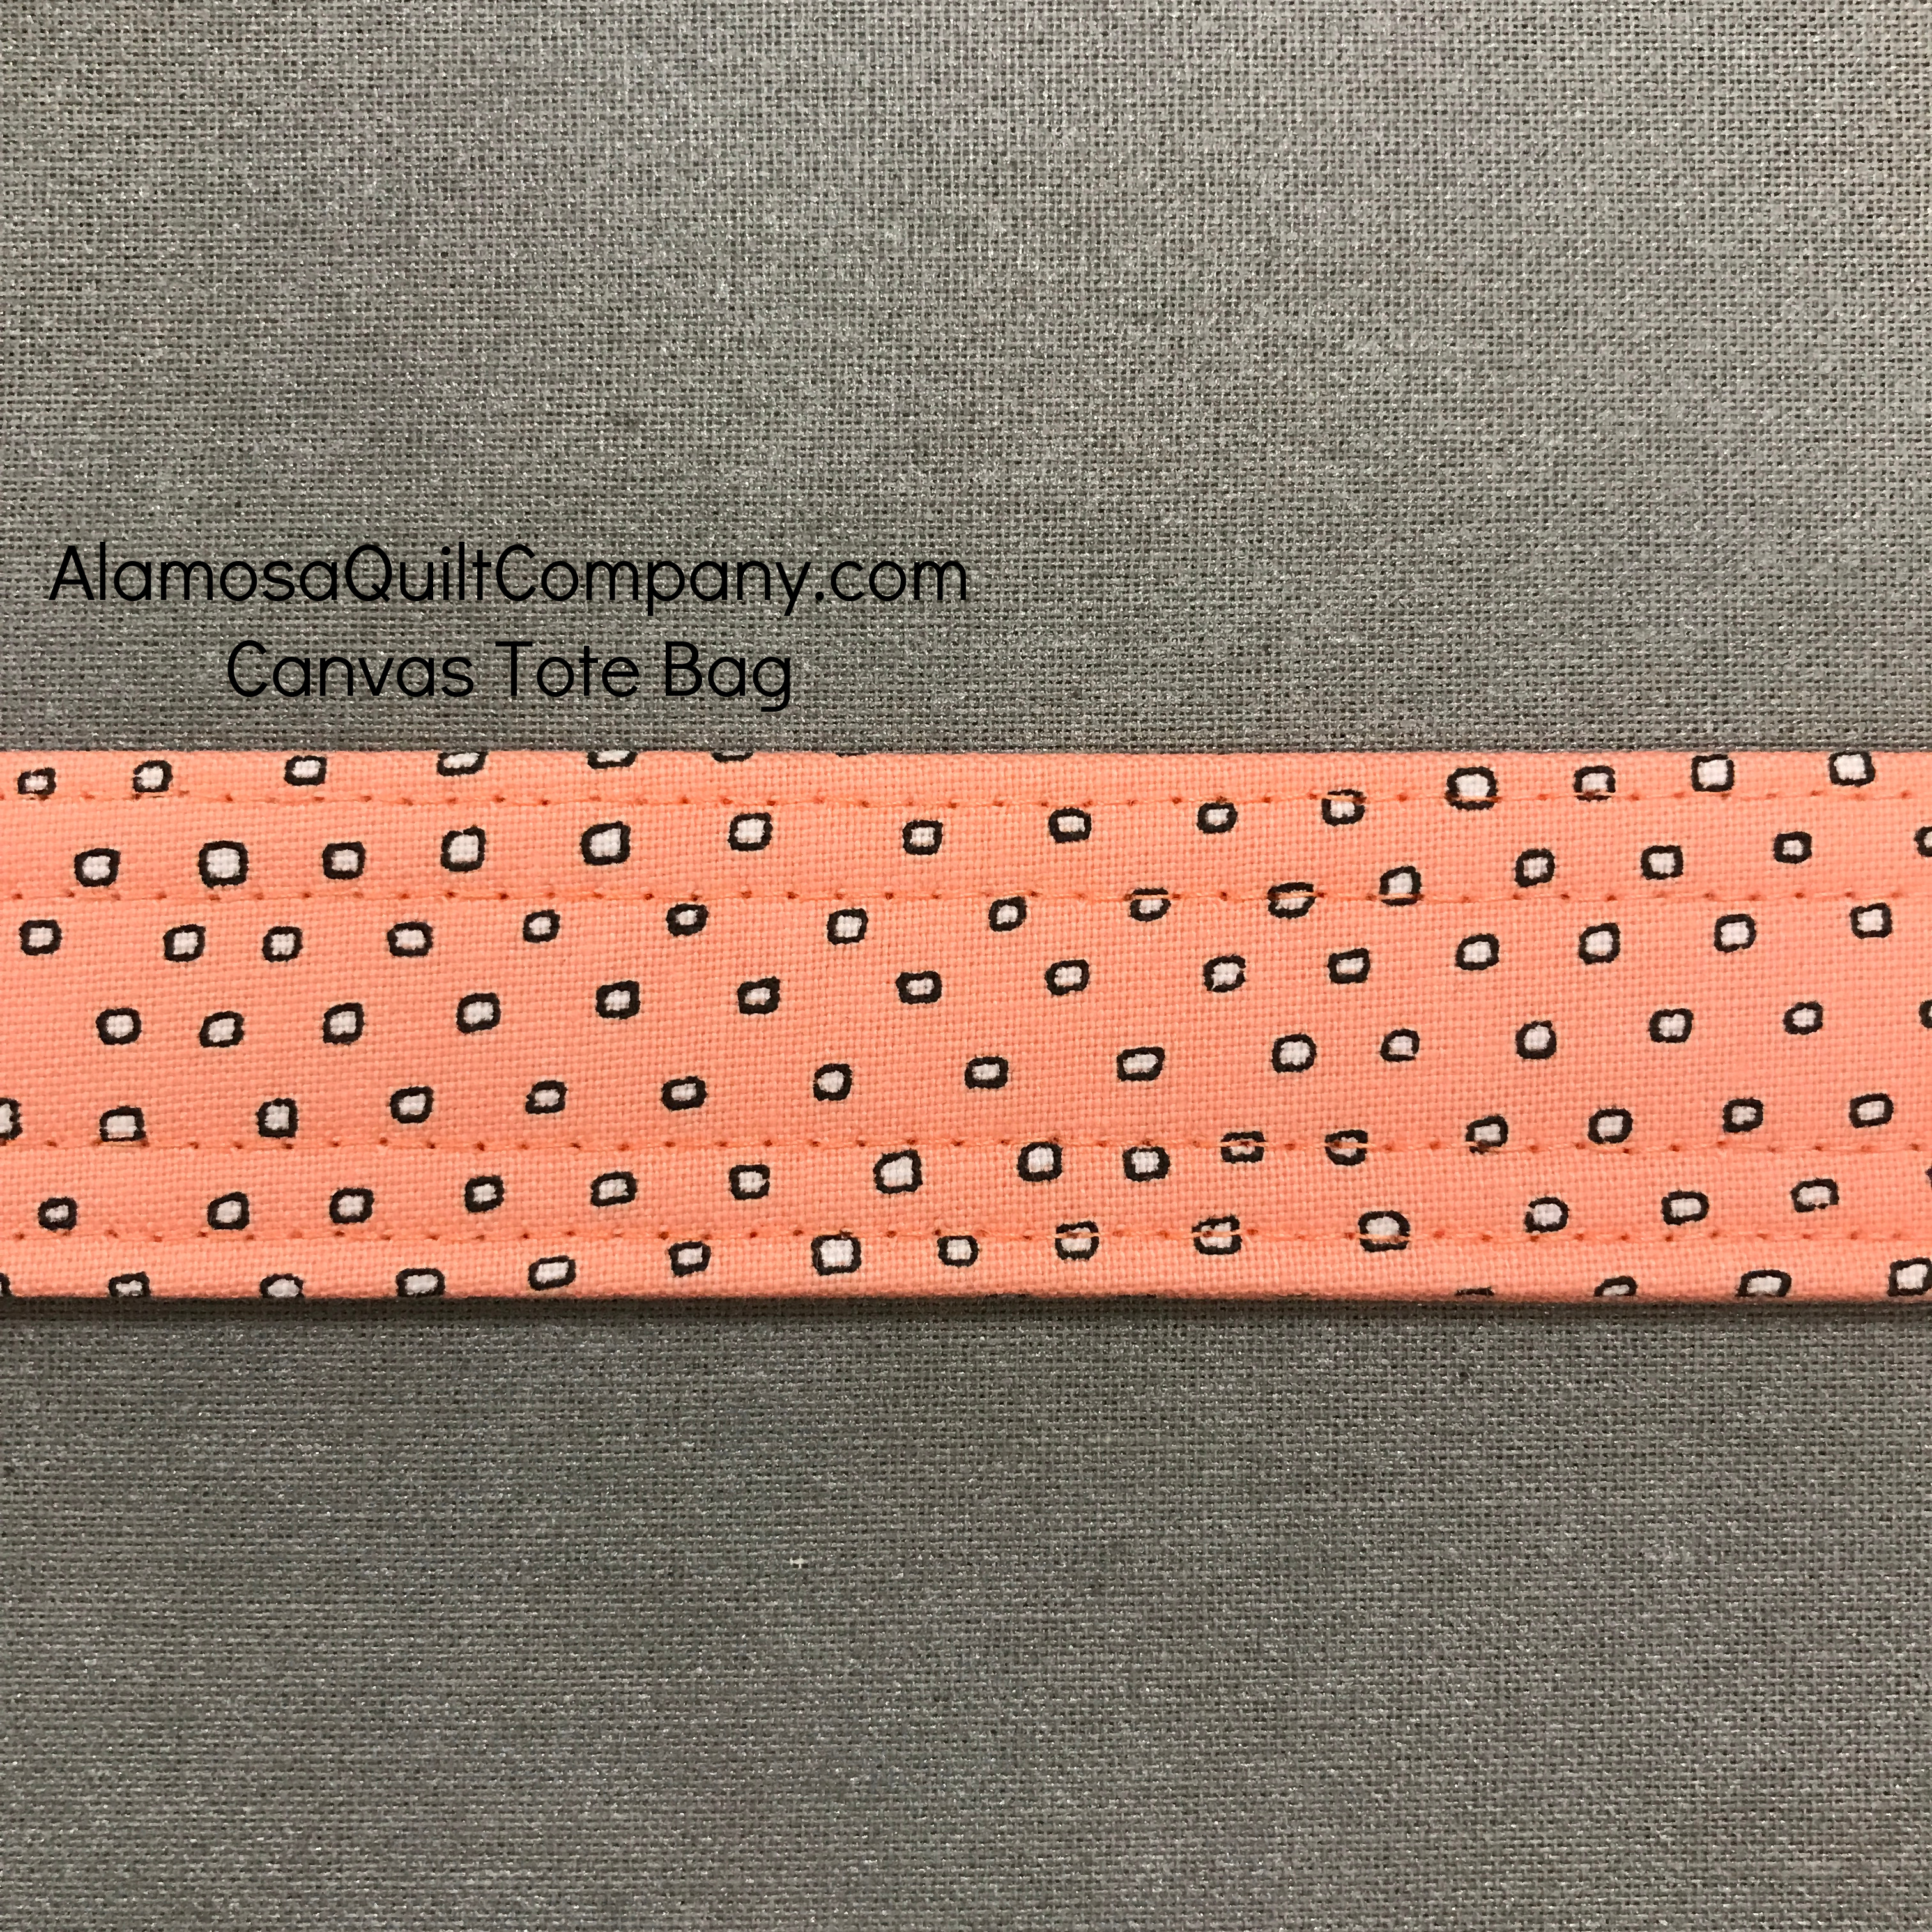
Topstitch on both long sides and repeat for the other handle. Optional: you can add a second row of topstitching about 1/4" away from the first stitching for a professional detail.


canvas tote handle

Now is the time to decide how long you want your handles. Short, over the wrist length handles are about 22" - 26" long. Over the shoulder handles are about 40" - 42" long. You can pin one handle to one exterior square and test the length of the handle. 

On one of the exterior bag pieces, find the center of the top edge and mark it with a pin. If your fabric is directional make sure the design is right side up! Pin each end of one handle 2 1/2" out from the center. I like to leave about 1/2" of the end of the handle sticking up from the top of the bag.

canvas tote attaching the handles

Once the bag is completed this longer bit will make the handles sturdier because it will get sewn over several times. Baste the handles in place by sewing a 1/8" seam allowance. Repeat with the other exterior square and handle.

canvas tote handles basted

Draw a 2 1/2" square on the wrong side on both bottom corners of the fabric on one exterior square and one lining square.

canvas tote corner markings

You are going to cut on this line so use whatever marking utensil you have. It doesn't matter if it is permanent because you will cut it off.

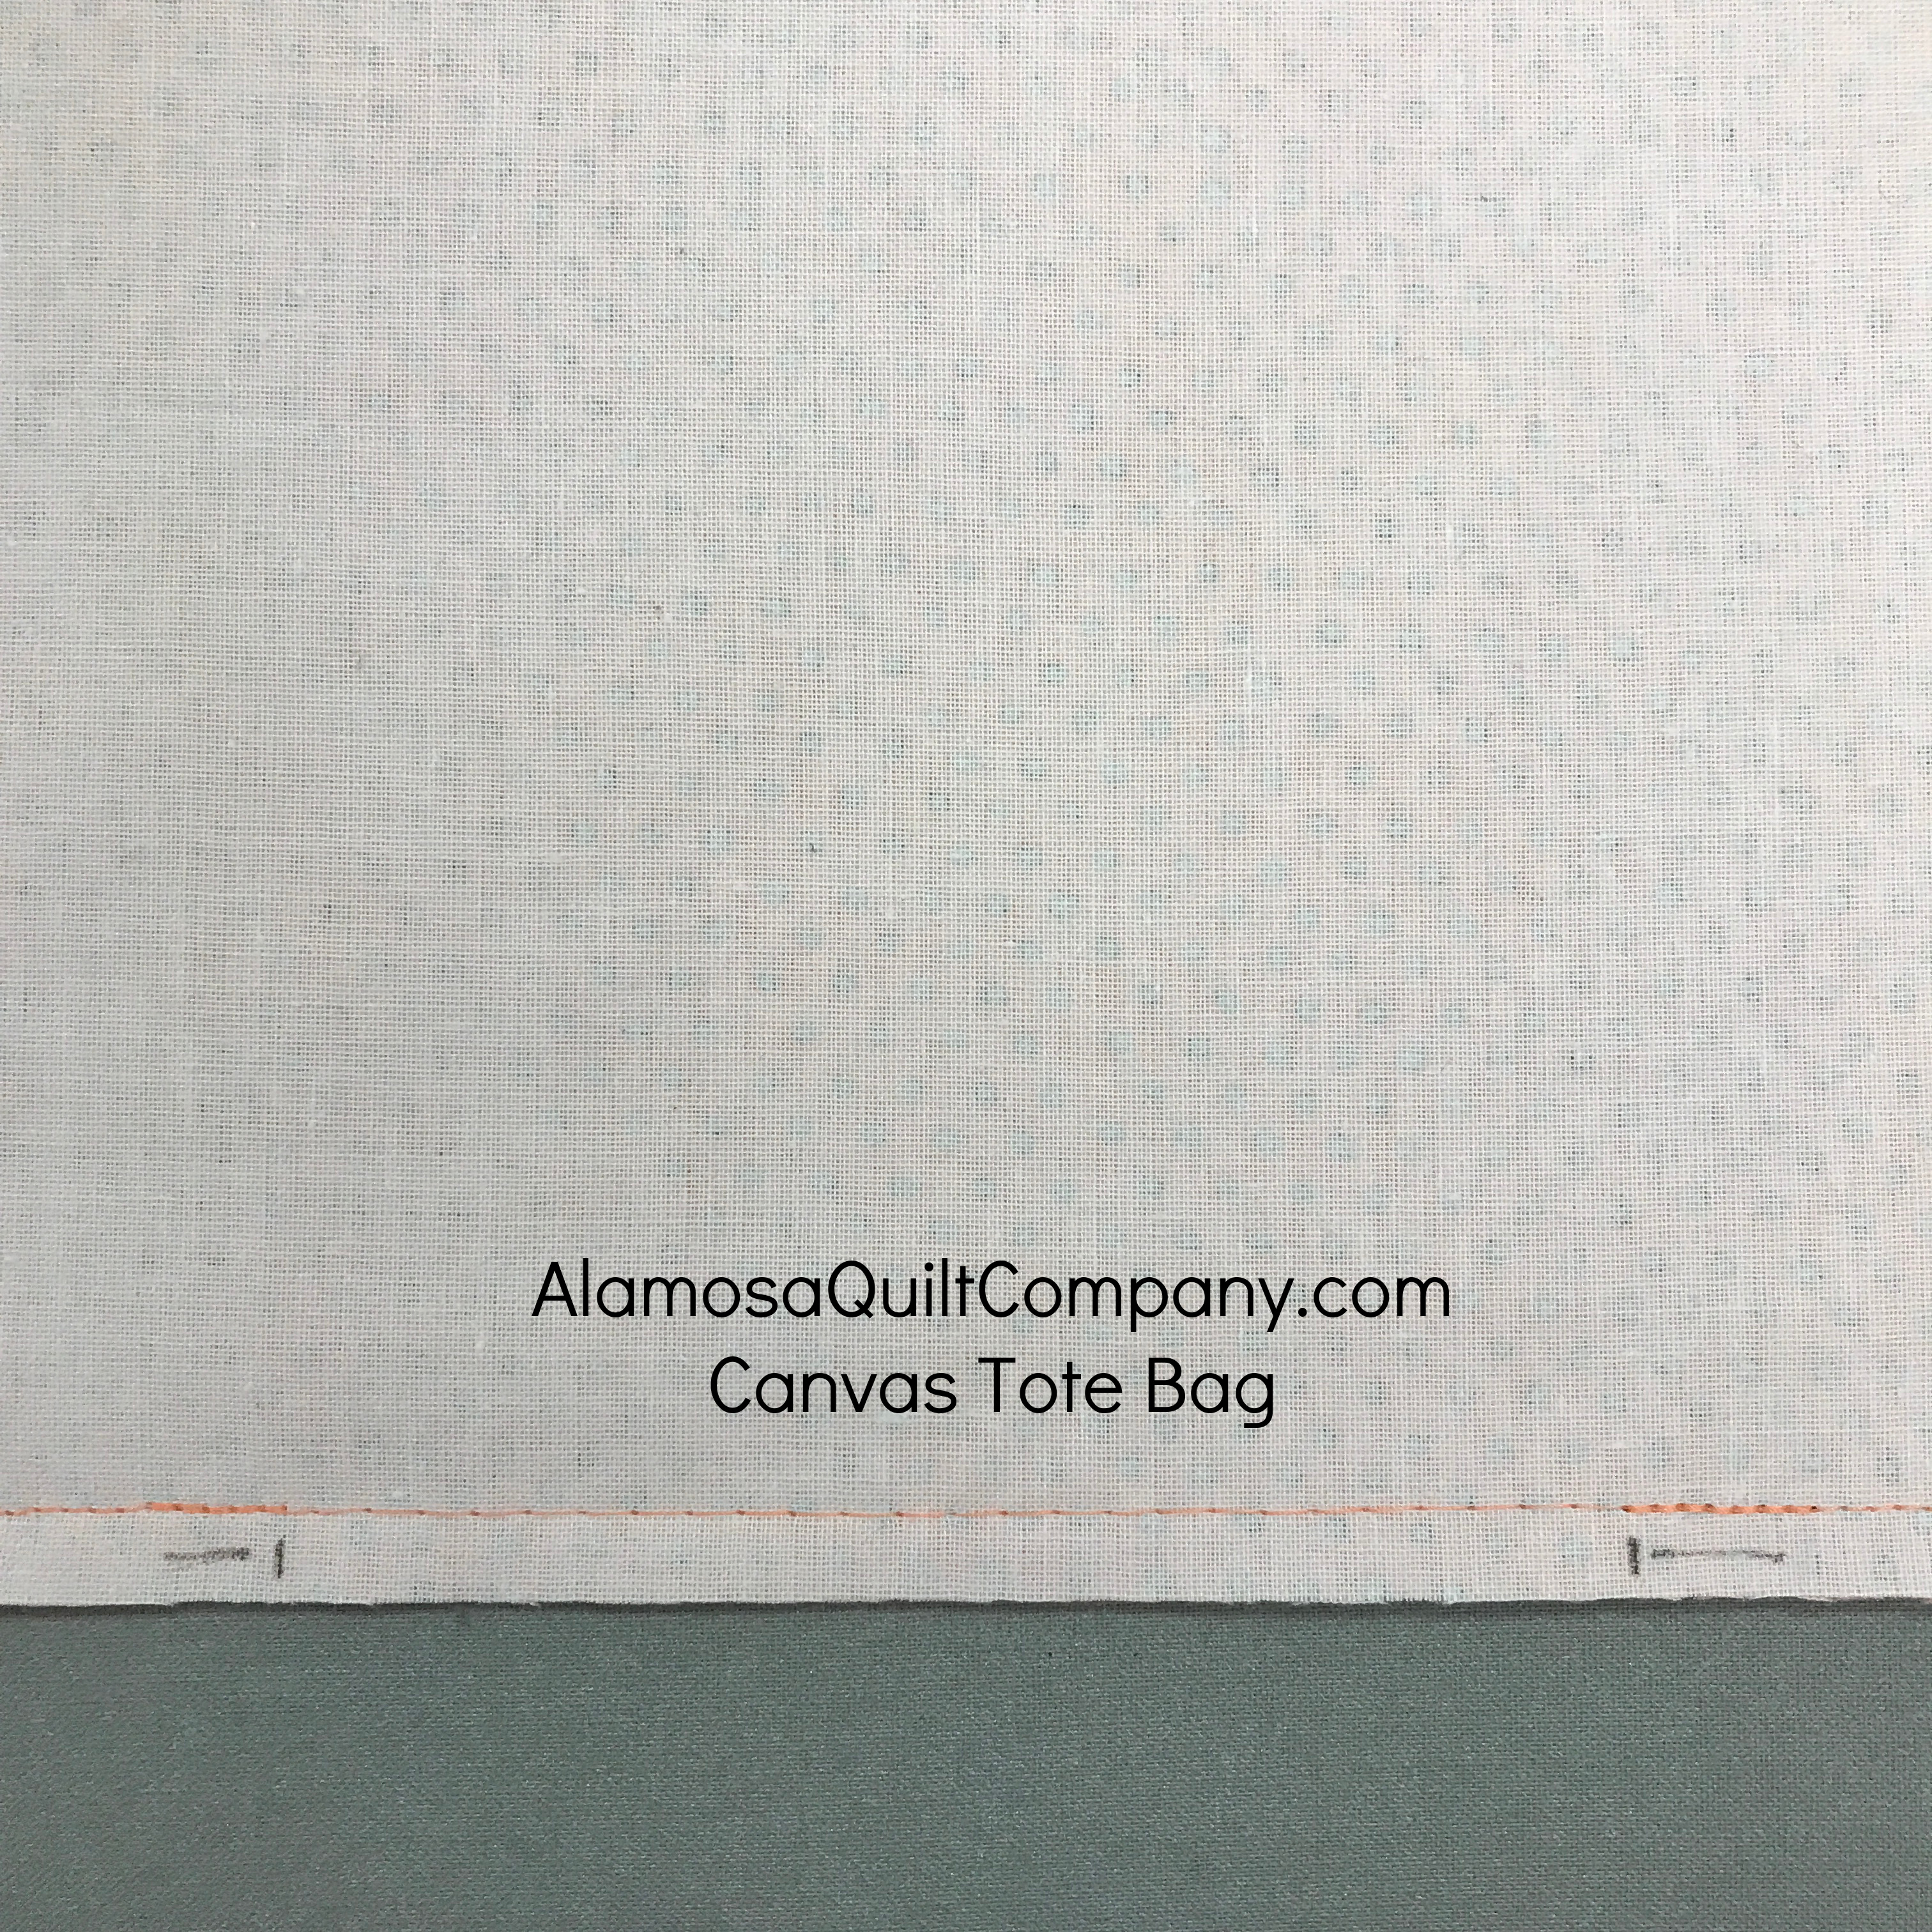
Lay your two exterior bag pieces with handles attached right sides together. Sew the two side seams and the bottom seam. Leave the top open. Back stitch at the start and end (the two top edges) AND back stitch over the lines you drew at the bottom corners. Photo above shows my back stitching over the corner lines. This is important to do so that these seams don't pop open when you cut those corners off.

Repeat with your two lining squares. IMPORTANT: You need to leave a 3" opening in the bottom seam. Back stitch at all the places you did on the exterior pieces PLUS at the two ends of the opening you leave on the bottom seam.

canvas tote bottom opening basted

PRO TIP: lengthen your stitch length when you get the point where you need to leave the opening in the bottom seam. Instead of leaving an opening, sew the seam with the longest stitch length your machine will do. Press the bottom seam open. Then remove the long stitches. This will leave a nice folded edge on the bottom of your bag that you can use later after you have turned the bag right side out and you need to stitch up the hole.

canvas tote bottom seam

canvas tote bottom seam

Cut out the corners through all layers on each piece. Be careful that you do not cut your handles!

canvas tote corners cut

Pinch the corners together lining up the side seam and the bottom seam.

canvas tote boxing the corners

canvas tote boxing the corners

canvas tote boxing the corners

Sew the seam to box the corners, back stitching at the beginning and end of each seam.


canvas tote boxing the corners

Repeat for all the bottom corners on both the lining and the exterior.

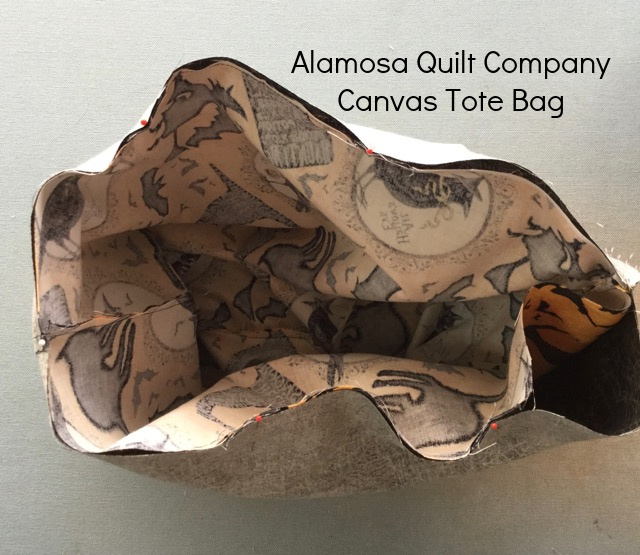
Turn the exterior bag piece right side out. Place the exterior bag INSIDE the lining bag, aligning the side seams and the top edge. Pin or clip the top edges in place. (I forgot to take a picture of this step! Sorry, that's what happens when I make things at the shop and get interrupted in the process.) Here is a photo of this step from a previous bag.

canvas tote pinning top

Sew around the top edge. Turn the bag right side out through the opening left in the bottom seam of the lining. 

canvas tote turning the bag

Topstitch the opening in the bottom seam of the lining closed. Notice in the photo below the nice folded seam allowance. 
This is the result of using my Pro Tip from the step where you sew the lining pieces together.

canvas tote closing hole in bottom

canvas tote closing hole in bottom

Topstitch around the top edge of the bag so that the lining doesn't shift when using the bag. I stitched around the top edge twice to repeat the double topstitch sewing on the handles. Once is sufficient though.

canvas tote finished

Enjoy your new Canvas Tote Bag! If you would like a kit for one of these you can find them on our website, Alamosa Quilt Company in the Kits Section. Or scroll back up to the top where I have links to each of the three kits we currently have for these. We are making more with other canvas fabrics and those will be added to the Kits Section when they are ready.

Shown is the Nya-Nya kit. Note: "Nya-Nya" is what a cat says in Japanese. It's their version of "meow-meow".