Friday, April 29, 2022

Do you like Shop Hops?

 If you do, then do you know about the monthly FabShop Hop? It's a virtual shop hop with prizes and everything! All the details along with how to register yourself for the hop can be found by following this link: FabShop Hop.

There is a lot of information on the page those links take you to. If you just want to register yourself and figure the rest out later, click this link: Register for FabShop Hop.

FabShop Hop logo

My shop is participating in the May hop, as well as June, July and August. And maybe more but I've only committed right now to four months.

Look for the image above on my shop website, Alamosa Quilt Company. This is a great way to find new independently owned local quilt shops, especially if you don't happen to live near one! Search for the "Found It" bunny on my website and all the other websites of participating shops to enter the drawings for prizes.

The hop starts May 1, 2022. Hope to "see" you there!


Monday, April 25, 2022

Canvas Tote Bag :: A Tutorial

 I am making up kits for these adorable canvas tote bags. I needed to refresh my tote bag pattern and thought I'd do a tutorial as well. So here goes:

The finished size is 17" wide by 14" tall by 5" deep. You'll need 1/2 yard of canvas fabric for the exterior and 3/4 yard of regular quilting cotton for the lining and handles. Or you can purchase one of our kits. We have several options: Basic Tote Nya-Nya, Basic Tote Midnight Geometric, Basic Tote Leaf Pods.    

Optional: 1 1/2 yards ShapeFlex interfacing. ShapeFlex is my favorite interfacing for bags. It is a Pellon product - SF101.

Let's get started:

From your canvas exterior fabric you need to cut two 17 1/2" by 17 1/2" squares. From your lining fabric you need to cut two 17 1/2" by 17 1/2" squares and two 4" by width of fabric strips for the handles. From the interfacing, if you are using it, cut two 17 1/2" by 17 1/2" squares and four 4" by width of interfacing strips. The interfacing is only about 20" wide.

Iron the interfacing squares to the wrong side of the lining squares. Iron two 4" by width of interfacing pieces to each 4" by width of fabric handle pieces. Just butt up the edges of the interfacing toward the middle of the handle piece and iron it down. Note: the interfacing will not cover the entire width of fabric strip, but will cover most of it. You can cut off the excess fabric not covered, or not.

canvas tote bag handle

Fold the handle in half lengthwise, wrong sides together, and press to create a 2" by width of fabric piece. Open this back out and fold each raw edge in towards the fold and press again. Then press in half along the original center fold to create a piece that is 1" by width of fabric. 

canvas tote handle

Topstitch on both long sides and repeat for the other handle. Optional: you can add a second row of topstitching about 1/4" away from the first stitching for a professional detail.


canvas tote handle

Now is the time to decide how long you want your handles. Short, over the wrist length handles are about 22" - 26" long. Over the shoulder handles are about 40" - 42" long. You can pin one handle to one exterior square and test the length of the handle. 

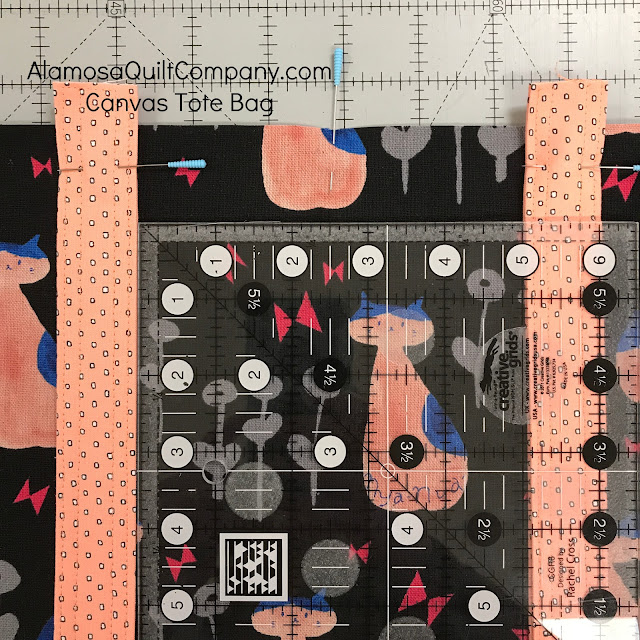
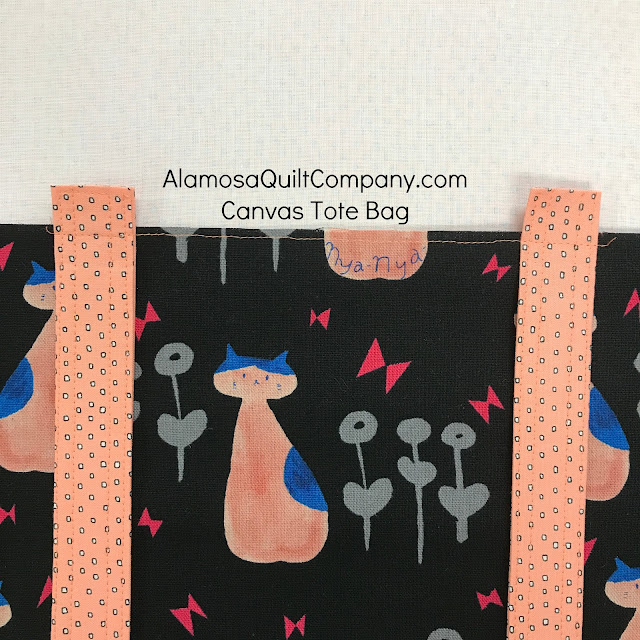
On one of the exterior bag pieces, find the center of the top edge and mark it with a pin. If your fabric is directional make sure the design is right side up! Pin each end of one handle 2 1/2" out from the center. I like to leave about 1/2" of the end of the handle sticking up from the top of the bag.

canvas tote attaching the handles

Once the bag is completed this longer bit will make the handles sturdier because it will get sewn over several times. Baste the handles in place by sewing a 1/8" seam allowance. Repeat with the other exterior square and handle.

canvas tote handles basted

Draw a 2 1/2" square on the wrong side on both bottom corners of the fabric on one exterior square and one lining square.

canvas tote corner markings

You are going to cut on this line so use whatever marking utensil you have. It doesn't matter if it is permanent because you will cut it off.

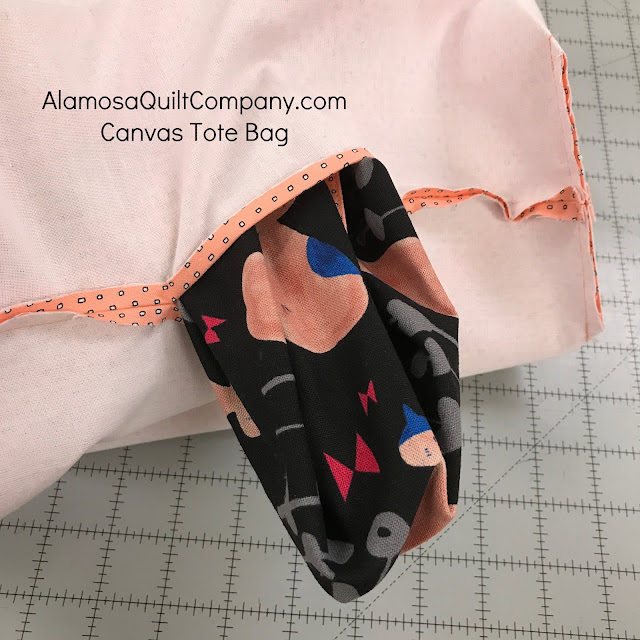
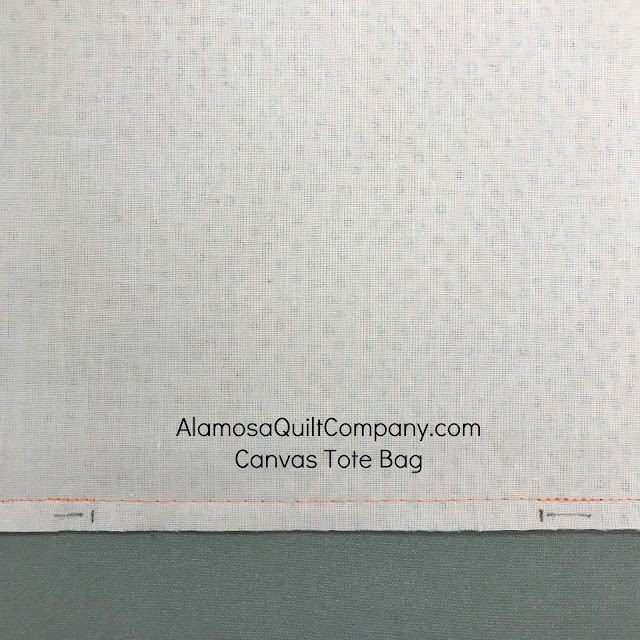
Lay your two exterior bag pieces with handles attached right sides together. Sew the two side seams and the bottom seam. Leave the top open. Back stitch at the start and end (the two top edges) AND back stitch over the lines you drew at the bottom corners. Photo above shows my back stitching over the corner lines. This is important to do so that these seams don't pop open when you cut those corners off.

Repeat with your two lining squares. IMPORTANT: You need to leave a 3" opening in the bottom seam. Back stitch at all the places you did on the exterior pieces PLUS at the two ends of the opening you leave on the bottom seam.

canvas tote bottom opening basted

PRO TIP: lengthen your stitch length when you get the point where you need to leave the opening in the bottom seam. Instead of leaving an opening, sew the seam with the longest stitch length your machine will do. Press the bottom seam open. Then remove the long stitches. This will leave a nice folded edge on the bottom of your bag that you can use later after you have turned the bag right side out and you need to stitch up the hole.

canvas tote bottom seam

canvas tote bottom seam

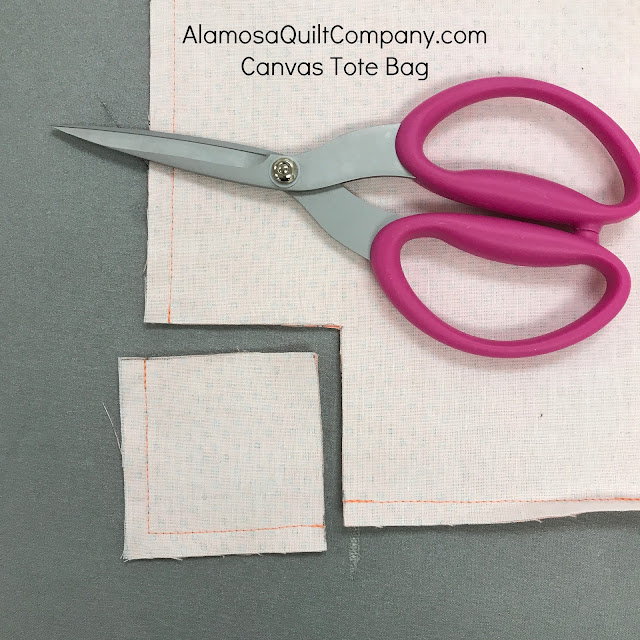
Cut out the corners through all layers on each piece. Be careful that you do not cut your handles!

canvas tote corners cut

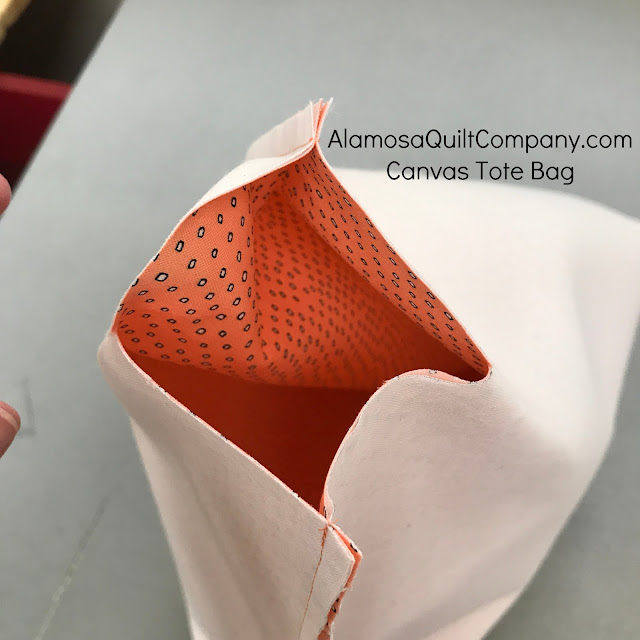
Pinch the corners together lining up the side seam and the bottom seam.

canvas tote boxing the corners

canvas tote boxing the corners

canvas tote boxing the corners

Sew the seam to box the corners, back stitching at the beginning and end of each seam.


canvas tote boxing the corners

Repeat for all the bottom corners on both the lining and the exterior.

Turn the exterior bag piece right side out. Place the exterior bag INSIDE the lining bag, aligning the side seams and the top edge. Pin or clip the top edges in place. (I forgot to take a picture of this step! Sorry, that's what happens when I make things at the shop and get interrupted in the process.) Here is a photo of this step from a previous bag.

canvas tote pinning top

Sew around the top edge. Turn the bag right side out through the opening left in the bottom seam of the lining. 

canvas tote turning the bag

Topstitch the opening in the bottom seam of the lining closed. Notice in the photo below the nice folded seam allowance. 
This is the result of using my Pro Tip from the step where you sew the lining pieces together.

canvas tote closing hole in bottom

canvas tote closing hole in bottom

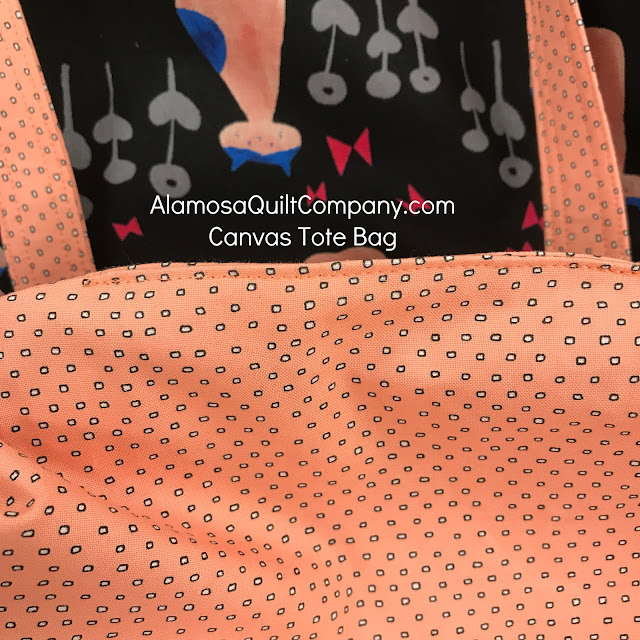
Topstitch around the top edge of the bag so that the lining doesn't shift when using the bag. I stitched around the top edge twice to repeat the double topstitch sewing on the handles. Once is sufficient though.

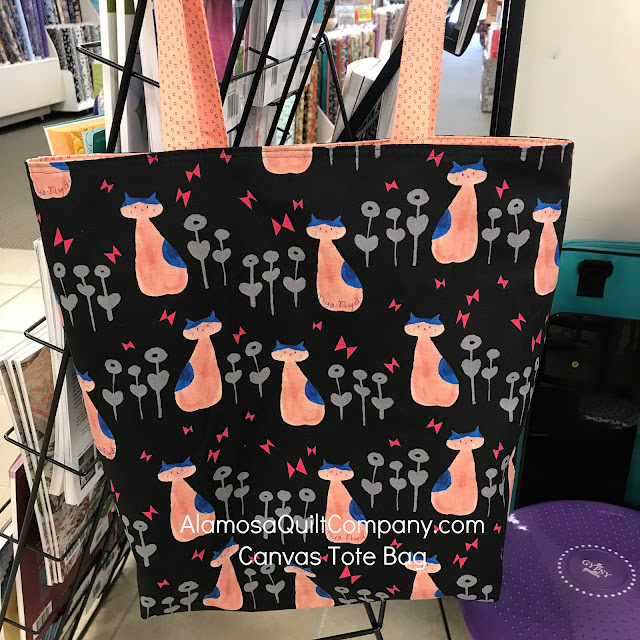
canvas tote finished

Enjoy your new Canvas Tote Bag! If you would like a kit for one of these you can find them on our website, Alamosa Quilt Company in the Kits Section. Or scroll back up to the top where I have links to each of the three kits we currently have for these. We are making more with other canvas fabrics and those will be added to the Kits Section when they are ready.

Shown is the Nya-Nya kit. Note: "Nya-Nya" is what a cat says in Japanese. It's their version of "meow-meow".





Friday, April 22, 2022

Vintage Camper Sewing Machine Cover

 I had these in 2020 in turquoise and they sold out quickly. The fabric company decided to offer it again, but changed the turquoise to red for the re-release. Below is a photo of the original one that I made up to cover one of the Bernina 930 machines I have in the classroom at my shop.

Sewing Machine Cover Turquoise

Unfortunately, the turquoise color way is no longer available, but the red color way shown below just arrived.

Sewing Machine Cover Red

As you can see, it's a pre-printed panel with the instructions printed right on the fabric. All you have to do is cut it out and sew it together. It will make two sizes of cover. The large cover measures 17.5" by 12.5" by 8" and the small cover measures 15.5" by 11" by 7". Both sizes are printed on each panel and cut lines are clearly marked for each size. You simply decide which size your machine needs and cut on the appropriate lines. The sewing instructions are the same for both sizes. My Bernina 930 needed the smaller size.

Sewing Machine Cover Red

As you can see by comparing the photos, the only difference between the two is that the camper is red with white polka dots instead of turquoise. If you want one of these you better act fast, Vintage Camper Sewing Machine Cover. The turquoise ones sold out in just a couple weeks. I already looked to see if I can reorder these, but nope. What I have is what I have and that will be that.

Full Disclosure: On the turquoise one I did use an iron-on interfacing just to give it a little more umph. I used ShapeFlex interfacing. This really isn't necessary, but it has held up nicely to lots of handling. 


Tuesday, April 19, 2022

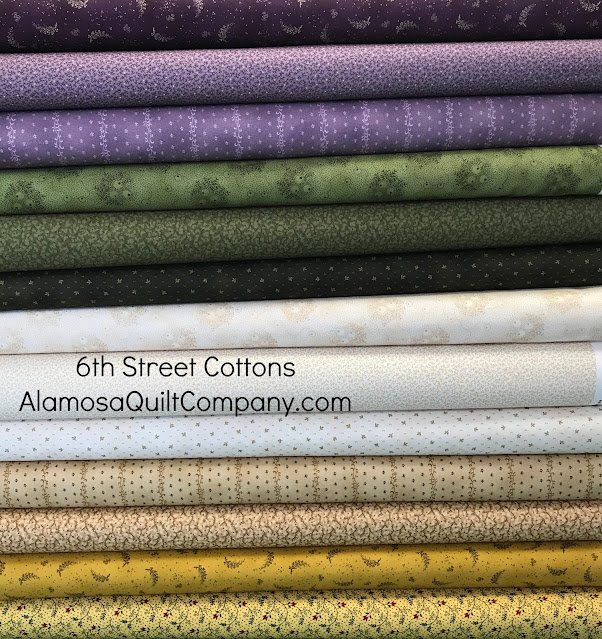
6th Street Cottons

 I am not normally drawn to this style of fabric - traditional - but these are just absolutely gorgeous! This is the second collection by Julie Letvin for Robert Kaufman Fabrics. It's called 6th Street Cottons.

6th Street Cottons Wide Backs

There are three wide backs (108" wide) fabrics in the collection.

6th Street Cottons fabrics

6th Street Cottons fabrics

There are 24 beautiful prints in blue, black, brown, gold, ivory/white/cream, pink, purple and green.

6th Street Cottons pre-cuts

And pre-cuts too - 2 1/2" Rolls-ups and 10" square sets. I also ordered Julie's first collection which came out a year ago. I still have some fabrics left from that collection, Homestead Harvest, and all of the prints from both collections mix very well together.


Friday, April 15, 2022

Canoe Lake Quilt :: A Finish

 This quilt features our Canoe Lake fabrics. These fabrics are batik.

Canoe Lake Quilt 1

The "plain" squares are fussy cut from the main print. It's a little hard to see in the photo but it shows a canoe on a lake at sunset (or sunrise) with a tall pine tree on the left. You can see it better in the photo below.

Canoe Lake main print

And I used the main print for the backing.

Canoe Lake quilt back

I need to write up the pattern as it is one we came up with in-house. Once I do we will kit this quilt. The kit will be available in store and in the online shop.


Tuesday, April 12, 2022

Laser Cut Kits

 Before Christmas I ordered a few laser cut kits for my shop, but held them back until recently when we had time to make samples. I started with just two styles: Gone Quilting and Happy Camper.

Gone Quilting

Above is Gone Quilting. This one finishes at 48" by 30". The kit includes all of the applique pieces that have been laser cut with fusible already on the back, instructions, and a full size pattern for placement or if you want to make another one you can trace the pieces onto fusible yourself and cut them out the old fashioned way.

Below is Happy Camper in the Coral Canyon color way. I am currently out of the Coral Canyon color way but do have the other two in stock. Click the link to view the other two color ways. 

Happy Camper

This one finishes at about 18" by 30". For the Gone Quilting we just fused the pieces in place on the background and quilted it. The applique was sewn down with the quilting. For the Happy Camper we used a straight stitch or a zig zag stitch to sew all the pieces down before quilting. The quilting is just simple diagonal lines about 1" apart.

These are great as a stand alone project or use it as the center of a larger project and add pieced blocks and borders around it until it is whatever size you want it to finish.

I placed another order from this company over the weekend. I got a resupply of the Happy Camper Coral Canyon color way. And I got a few copies of each that are not kits, just the patterns. When those arrive I will put them in my online shop.


Friday, April 8, 2022

Wind Drifter

 I recently tested another new pattern. This one is for a quilt.

Wind Drifter quilt top

The pattern is called Wind Drifter and the cover is shown in the photo above. The pattern includes instructions for two sizes of finished quilt: 32.75" by 32.75" and 65" by 65". I made the smaller one for a shop sample and to test the pattern.

The pattern uses fat 1/8s and yardage for background. I made the smaller size because it is so much easier to display in my shop. There is really nothing very difficult about this pattern. It is mostly rectangles and half square triangles. The center is a quarter square triangle and the quilt goes together using partial seams. If you have never tried partial seams it isn't very hard and is a good skill to have. Basically, the first seam you sew only part way (hence the name "partial" seams). Then you sew the remaining seams as normal. Once they are all sewn you go back to the first one and finish the seam.

I like the way the pattern shows you a diagram of the fabric with all of the pieces you need to cut from the fabric shown on the diagram. This makes it so much easier to know that you are cutting your fabric correctly. I wish the pattern had better pressing instructions but not many patterns have good pressing instructions so I won't hold that against this one.

Just like the bag I shared with you last time, I've ordered copies of this pattern for my shop, but they won't be here for another week or so. That seems to be the way it goes for me: I find a pattern that looks interesting and order one copy. Sometimes it takes me a little while to find time to try the pattern. Once I do and like it I order copies for the shop but often they are backordered by the time I get around to ordering them! Oh well! At least I know that when they do arrive I have a sample already made. More importantly, I know that the pattern is a good one.


Tuesday, April 5, 2022

Stella Bag and Wallet

 I'm always on the lookout for a good, new bag pattern. This one caught my eye and I finally had a chance to test the pattern.

Stella Bag and Wallet

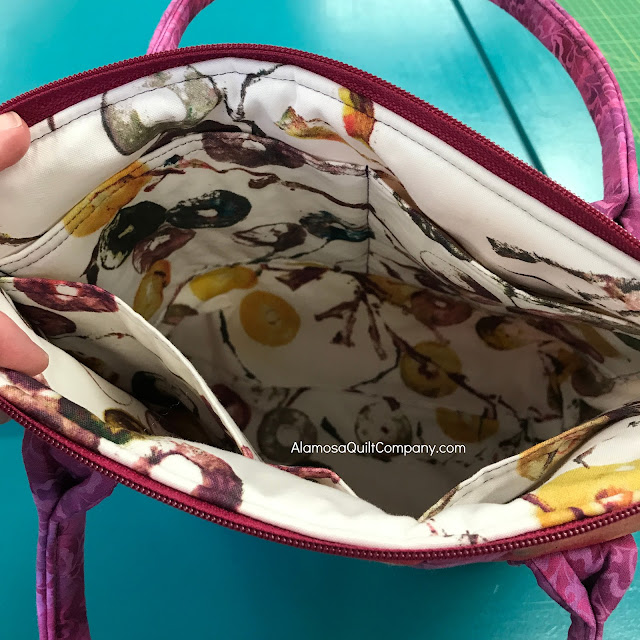
The bag has a top zipper closure and customizable interior pockets. 

Stella Bag inside

The handles can be made short like I did or longer to go over your shoulder. This is a shop sample and short handles are easier for me on a display bag so I went with the shorter handle length. If I was making this to use myself I would make them a little longer.

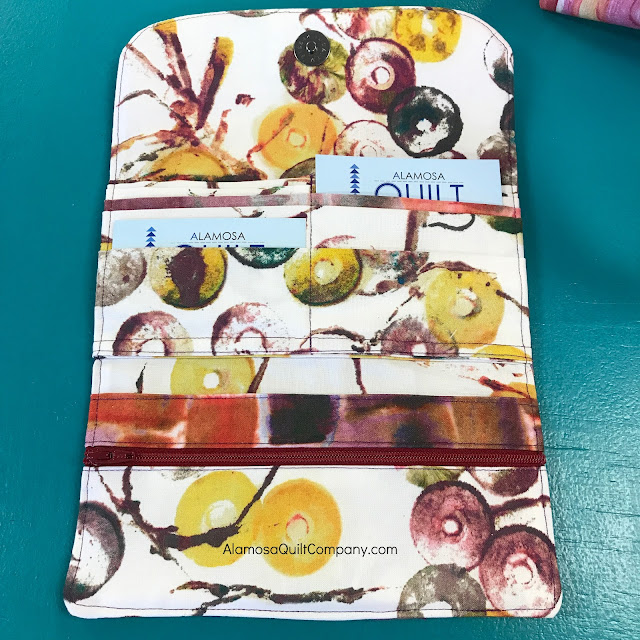
Stella wallet inside

The wallet has plenty of pockets for your cards, a pocket for bills and a zippered pocket for change. It has a magnetic snap closure.

Stella Bag and wallet

I have ordered patterns but they won't be here until next week sometime. When they arrive the patterns will be available in store but also in my online shop. I also went ahead and added this to my shop class calendar too. If you are an experienced bag maker then this pattern is very easy to follow. If you aren't an experienced bag maker you might need a little help but don't let that discourage you from trying this pattern.


Friday, April 1, 2022

Pin Cushions :: Done and Done!

 Both of my Sue Spargo pin cushions are now actual, useable pin cushions!

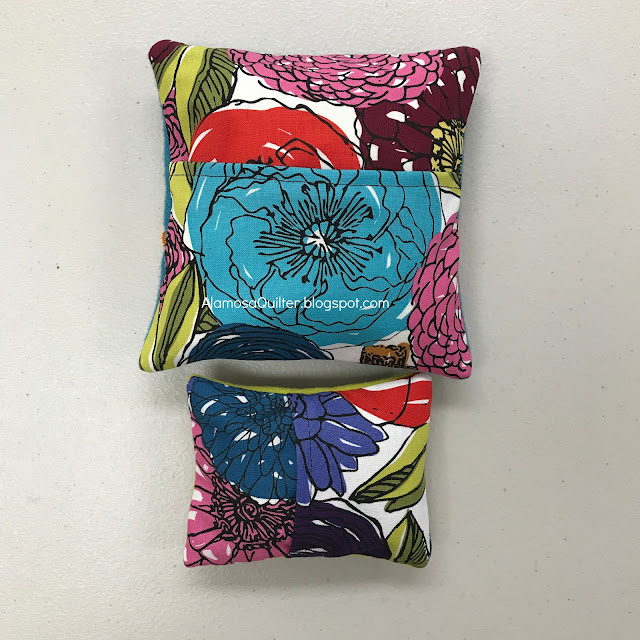
Pin cushions front

Top: Canna Blossom Pin Cushion Kit or Canna Blossom Pattern

Bottom: Circle Play Pin Cushion Kit or Circle Play Pattern

Both of these were kits. They came with all of the required fabrics, even the fabric for the crushed walnut shell inner "pillows" and a piece of wool for the back. I opted to put the wool pieces for the backs into my stash and use a cotton fabric instead for the backs.

Pin cushion backs

Of course, I have these kits and patterns in my shop, Alamosa Quilt Company. I don't have a lot of them, but I do have some. I am ordering more though since I just finished the shop samples!